To select the appropriate sandpaper grit for your project, consider the material you’re working with and your desired finish. Start with coarse grit (40-60) for shaping rough surfaces, then move to medium (80-120) for smoothing, and finish with fine grits (220+) for polishing. Using the proper grit progression guarantees a smooth, professional result without deep scratches. Continue to explore how proper abrasive selection and grit progression can improve your project outcomes.
Key Takeaways
- Match abrasive type (aluminum oxide or silicon carbide) to your material for optimal results.
- Start with a coarse grit (40-60) for shaping, then progress to finer grits (80-120 and 220+) for finishing.
- Use medium grits to smooth imperfections before moving to fine grits for a polished surface.
- Follow a logical grit progression without skipping to avoid scratches and uneven surfaces.
- Choose grit size based on project goal: coarser for material removal, finer for finishing touches.

Selecting the right sandpaper grit is vital for achieving a smooth, professional finish on your project. When you’re choosing abrasive types, it’s important to understand that different materials and grits serve specific purposes. Coarse grits, such as 40 or 60, are best suited for rapid material removal or shaping rough surfaces. Medium grits, like 80 or 120, help smooth out imperfections and prepare your surface for finer sanding. Fine grits, such as 220 or higher, are used for finishing touches to create a polished, smooth surface. Knowing which abrasive types to use at each stage guarantees your project progresses efficiently and results look professional.
Choosing the correct sandpaper grit ensures a smooth, professional finish at every stage of your project.
Grit progression is a key concept to keep in mind when selecting sandpaper. It refers to moving gradually from coarser to finer grits to achieve a seamless, smooth finish. Starting with a coarse grit allows you to remove scratches, rough patches, or excess material quickly. As you advance through finer grits, you’ll notice a reduction in surface scratches, and your surface will become more refined. Skipping grits or jumping directly to a very fine grit can leave behind deep scratches or uneven spots, making it harder to get a flawless result. Instead, you should follow a logical progression—perhaps moving from 80 to 120, then 220—so your surface gets progressively smoother without unnecessary effort or risk of damaging the material.
It’s also important to choose the right abrasive types for your project. For example, aluminum oxide sandpaper works well on wood and metal, offering durability and effective material removal. Silicon carbide abrasives are sharper and more suitable for harder surfaces like plastics or ceramics. Each abrasive type has its own characteristics that influence how quickly and smoothly it sands, so matching the abrasive type with your material and project goals is vital.
As you work through your project, keep in mind that the grit progression isn’t just about speed—it’s about achieving a high-quality finish. Using the appropriate abrasive types at each stage and moving through a logical grit progression results in fewer scratches, less sanding time, and a more polished final surface. You’ll find that patience and attention to grit progression make all the difference in the outcome of your project. With a clear understanding of abrasive types and grit progression, you’ll be able to select the ideal sandpaper for each step, ensuring your project looks professional and feels smooth to the touch.

Sand Paper, 48 PCS Sandpaper, 120 to 5000 Assorted Grit Sandpaper Sheets, 9 x 3.6 Inch Premium Wet Dry Sandpaper for Wood Furniture Finishing, Metal Sanding, Automotive Polishing
Meets All Your Needs: 48 pcs sand paper kit, 16 grits sandpaper assortment, including 3 sheets of each…
As an affiliate, we earn on qualifying purchases.
As an affiliate, we earn on qualifying purchases.
Frequently Asked Questions
How Do I Determine the Best Grit for Detailed or Flat Surfaces?
For detailed surfaces, go with a finer grit like 220 or higher to achieve smooth, precise finishes, while for flat surfaces, start with a coarser grit like 80 or 120 to remove material quickly. Using abrasive textures effectively depends on grit selection techniques; choose a grit that matches your surface’s needs, ensuring you don’t damage intricate details or leave scratches on flat areas. Always test grit on a small section first.
Can I Reuse or Clean Used Sandpaper for Multiple Projects?
You can often reuse or clean used sandpaper for multiple projects, but it depends on its sanding lifespan. If the grit is still intact and not clogged with debris, gently cleaning it with a brush or compressed air can extend its life. However, recycling versus replacing depends on performance; if it’s worn or clogged, it’s best to replace to achieve smooth results. Always assess the sandpaper’s condition before reuse.
How Does Sandpaper Grit Affect the Finish Quality?
Sandpaper grit directly impacts the finish quality by controlling abrasion effectiveness and surface smoothness. A lower grit (coarser) removes material quickly but leaves a rough surface, while a higher grit (finer) provides a smoother, polished finish. Using the right grit guarantees you achieve the desired surface quality efficiently, preventing scratches or unevenness. Select the proper grit based on your project’s needs to get the best surface smoothness and a professional-looking result.
Are There Specific Grits Recommended for Different Materials?
Imagine your project as a canvas needing just the right touch. For abrasive materials like metal, use a coarse grit like 60-80 to remove rust. Soft woods benefit from medium grit around 120-150, while delicate surfaces like varnished furniture need fine grits of 220 or higher. Grit versatility helps you adapt, but selecting specific grits for different materials guarantees a smooth, professional finish every time.
What Safety Precautions Should I Take When Using Different Grits?
When using different grits, always wear personal protective equipment like safety goggles and a dust mask to protect your eyes and lungs. Make certain proper dust management by working in a well-ventilated area or using a vacuum attachment on your sander. Keep your workspace clean, and handle the sandpaper carefully to avoid injuries. Taking these precautions keeps you safe while achieving the best results with your project.
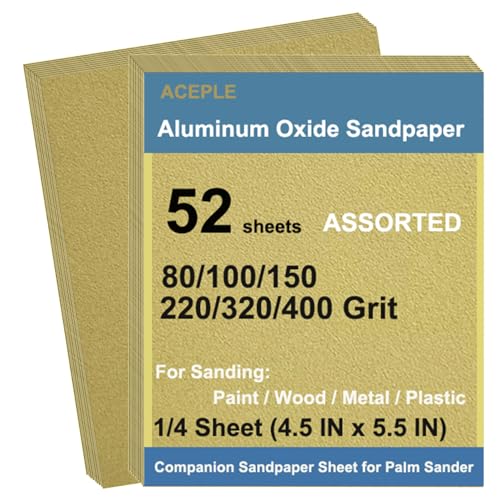
52Pcs Aluminum Oxide Sandpaper Variety Pack, 1/4 Sheet Sand Paper Assorted for Block Sander Wood Metal Wet Dry Sanding 80/100/150/220/320/400 Grits (4.5 x 5.5 Inch)
[❤️Convenient Pack] Perfect selection of grits from coarse to fine, including 8 sheets of each grit: 80/100/150/220 and…
As an affiliate, we earn on qualifying purchases.
As an affiliate, we earn on qualifying purchases.
Conclusion
Picking the perfect grit paves the path to polished perfection. By understanding your project’s needs, you’ll prevent pitfalls and produce pristine results. Remember, coarser grits carve faster but require finer finishes, while finer grits bring out the beauty beneath. So, select smart, sand smooth, and see your project shine. With the right grit guiding your grip, you’ll glide through your work with confidence and create an engaging, professional finish every time.

BMOTL Sandpaper Sheets 9×11 Assortment:12Pcs Wet Dry Silicon Carbide 80 120 180 220 320 400 Assorted Grit Sand Paper for Wood Furniture/Automotive/Metal Sanding
Premium Sandpaper Sheets Assortment:80/120/180/220/320/400 Grit (2 sheets of each) silicon carbide sand paper,easily cuts into 1/4,1/3,or 1/2 sheets…
As an affiliate, we earn on qualifying purchases.
As an affiliate, we earn on qualifying purchases.

DEWALT Random Orbit Sander, Variable Speed, 5-Inch (DWE6423), Power Source Corded Electric
3-Amp motor spins the pad at 8,000 – 12,000 OPM
As an affiliate, we earn on qualifying purchases.
As an affiliate, we earn on qualifying purchases.