To jump-start your spring garden indoors, you’ll need sterilized soil, seed trays with drainage, and quality grow lights like full-spectrum LEDs or fluorescents. Set the lights 2-4 inches above seedlings and keep them on a 12-16 hour schedule. Use tools like spray bottles for consistent watering and monitor seedling growth closely. Proper setup and care help guarantee strong, healthy plants—keep going to discover more tips for a successful start.
Key Takeaways
- Use sterilized seed trays or containers with drainage for healthy seed germination.
- Invest in full-spectrum LED or fluorescent grow lights placed 2-4 inches above seedlings.
- Prepare soil by sterilizing it to eliminate pests, diseases, and weeds.
- Maintain a consistent watering schedule with gentle moisture to prevent stress.
- Monitor light distance and adjust as seedlings grow to prevent legginess and promote healthy development.
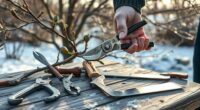
Starting seeds indoors is a great way to get a jump on the growing season and guarantee healthy plants for your garden. To do this successfully, you’ll need the right tools and a bit of preparation. One of the most important steps is soil sterilization. When you start seeds indoors, the soil is your plant’s first environment, and it must be free of pests, diseases, and weeds that could hinder growth. You can sterilize soil by baking it in the oven at 180°F for about 30 minutes or by using a microwave, ensuring it’s free of pathogens. This creates a clean, healthy medium that promotes strong seedlings and reduces the risk of damping-off disease, which can quickly wipe out young plants. Using sterilized soil also means you won’t introduce unwanted pests or weed seeds into your indoor garden.
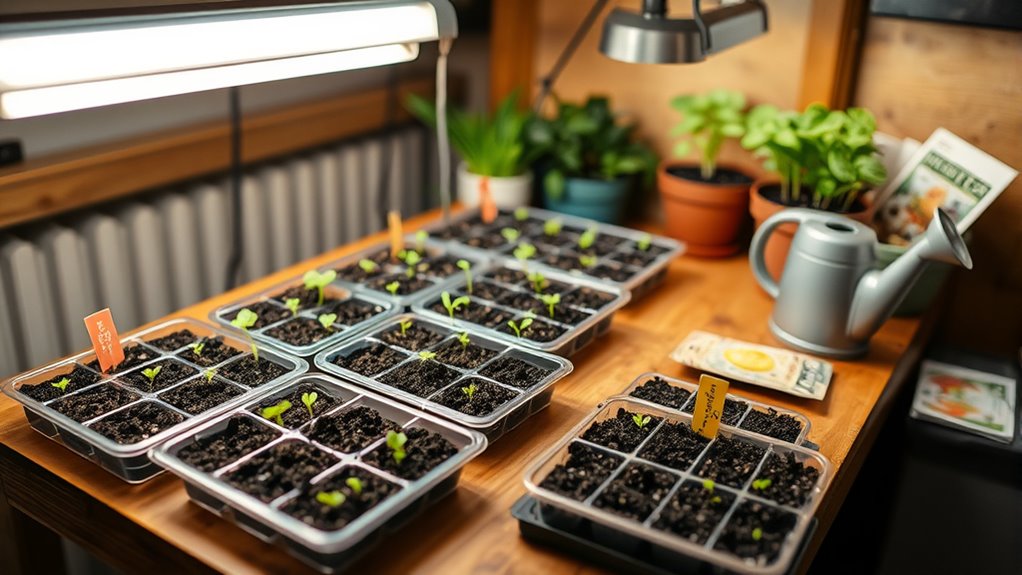
Once your soil is ready, setting up a grow light setup is essential for healthy seedling development. Natural sunlight might be limited indoors, especially during early spring, so investing in quality grow lights will help your seedlings thrive. Choose full-spectrum LED or fluorescent grow lights because they mimic natural sunlight and support photosynthesis. Position the lights about two to four inches above the seedlings and adjust the height as they grow taller. A consistent light schedule, typically 12 to 16 hours daily, ensures your plants develop strong stems and healthy leaves. Proper grow light setup prevents leggy, weak seedlings that stretch toward a distant light source and ensures they get the energy needed to produce robust roots and foliage.
In addition to soil sterilization and a grow light setup, you’ll want to prepare your seed trays or containers with drainage holes to prevent waterlogging. Fill them with your sterilized soil, plant your seeds according to the depth instructions on the packet, and keep the soil moist but not waterlogged. Using a spray bottle or gentle watering can help you maintain consistent moisture. Once your seedlings sprout, monitor the light distance and watering schedule closely to prevent any stress. As they grow, you might need to transplant them into larger containers or acclimate them gradually to outdoor conditions.

VIPARSPECTRA P700 Grow Light, 70 Watt Dimmable Full Spectrum Plant Light, LED Grow Lights for Indoor Plants Seed Starting Seedlings Vegetable,11000 Lumens Small Hanging Growing Lamp for 2×2 Grow Tent
OPTIMIZED FOR SEEDLINGS & VEG PLANTS: The indoor plant light features a scientifically designed diode layout and a…
As an affiliate, we earn on qualifying purchases.
As an affiliate, we earn on qualifying purchases.
Frequently Asked Questions
What Is the Optimal Temperature for Seed Germination Indoors?
The ideal temperature for seed germination indoors is usually between 65-75°F. You should focus on maintaining proper seedling heat and temperature control to guarantee healthy sprouting. Use a thermometer to monitor the environment and consider a heat mat if your space is cooler. Keeping consistent warmth helps seeds break dormancy faster, leading to stronger seedlings. Adjust your heating methods as needed to stay within this suitable range for the best results.
How Do I Prevent Mold Growth on Seedlings?
To prevent mold growth on seedlings, ensure good air circulation around your plants, which helps keep humidity levels low. Avoid overwatering, as excess moisture encourages fungus prevention. Use a gentle fan if needed and remove any dead or moldy leaves promptly. Keep your seed trays in a well-ventilated area and monitor humidity. These steps considerably reduce the risk of mold and promote healthy seedling development.
When Should I Transplant Seedlings Outdoors?
Think of your seedlings as young dreamers ready to face the world. You should transplant them outdoors after they’ve undergone seedling hardening, usually when they’re 6-8 weeks old and the weather warms consistently. Keep an eye on the forecast, ensuring no frost threatens their growth. Transplant timing is vital — wait until the seedlings show strong stems and healthy leaves, signaling they’re ready to flourish outside.
What Are the Best Lighting Options for Indoor Seed Starting?
You should choose grow light types like LED, fluorescent, or incandescent bulbs for indoor seed starting. LEDs are energy-efficient and produce minimal heat, while fluorescents are affordable and effective. Keep lights on for about 12-16 hours daily, using light duration schedules to mimic natural sunlight. Position lights 2-4 inches above seedlings to promote healthy growth and prevent leggy plants. Adjust as seedlings grow for ideal results.
How Often Should I Water Indoor Seedlings?
Think of your seedlings’ hydration as a gentle conversation—they thrive with consistent, moderate watering. You should water when the soil feels just barely dry to the touch, typically every 2-3 days, but adapt based on your environment. Avoid overwatering, as it can drown roots, or underwatering, which stresses plants. Monitoring soil moisture guarantees your seedlings stay healthy and strong, setting a solid foundation for a lush spring garden.

10 Plant Growing Trays (with Drain Holes) – 20" x 10" – Perfect Garden Seed Starter Grow Trays: for Seedlings, Indoor Gardening, Growing Microgreens, Wheatgrass & More – Soil or Hydroponic
Quantity 10 – Durable Plastic – WITH Drain Holes
As an affiliate, we earn on qualifying purchases.
As an affiliate, we earn on qualifying purchases.
Conclusion
Starting your seeds indoors is like planting the first seeds of hope for a vibrant spring garden. With the right tools and a little patience, you’ll nurture tiny seedlings into a lush, thriving landscape. Remember, each seed is a promise waiting to blossom, so tend to them with care and confidence. Before you know it, your indoor efforts will burst forth like a symphony of colors, transforming your space into a garden of dreams come true.

MySoil Soil Test Kit, Unlock Your Lawn & Garden Potential, Complete & Accurate Nutrient and pH Analysis with Recommendations Tailored to Your Soil and Plant Needs
KNOW BEFORE YOU GROW | Grow the healthiest, sustainable lawn and garden with the most accurate and easy…
As an affiliate, we earn on qualifying purchases.
As an affiliate, we earn on qualifying purchases.

Spray Bottle for Plants 2 Pack, 16oz – Ultra Fine Mist, Plant Mister Empty Spray Bottles Indoor, Leak Proof Misting Water Sprayer Bottle for Gardening, Plant Care, Hair Care, Cleaning Solutions
SUPER FINE MIST – Experience a true mist, not just a spray. Our spray bottle’s fine mist is…
As an affiliate, we earn on qualifying purchases.
As an affiliate, we earn on qualifying purchases.