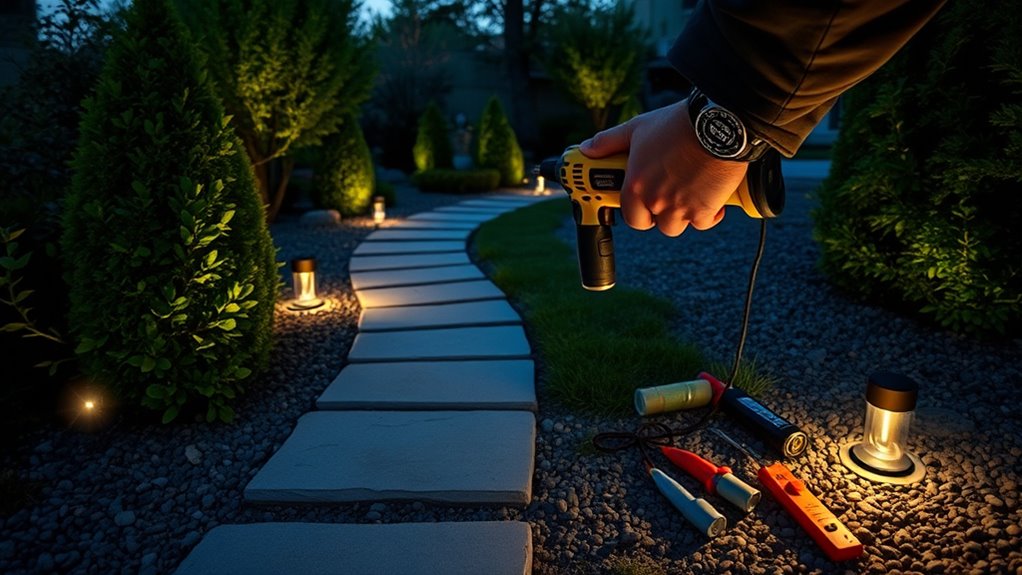
To install solar-powered garden and path lights, start by choosing spots where sunlight hits directly, facing solar panels south (or north if needed). Use a shovel or screwdriver to stake or secure the lights into the ground, ensuring the panels are angled for maximum sun exposure. Test the motion sensors and adjust for sensitivity, then periodically clean the panels for peak brightness. Keep exploring for more tips to make your outdoor setup both functional and beautiful.
Key Takeaways
- Choose solar garden and path lights with adjustable heads and motion sensors for enhanced functionality.
- Position lights in areas with unobstructed sunlight facing south for optimal solar panel exposure.
- Use a shovel or screwdriver to stake lights securely into the ground at strategic locations.
- Ensure solar panels are angled correctly and periodically clean them for maximum efficiency.
- Test and adjust motion sensors and light angles to prevent false triggers and achieve desired illumination.

Are you ready to transform your outdoor space with simple, cost-effective lighting solutions? If so, installing garden and path lights is a fantastic way to enhance both the beauty and safety of your yard. One of the most straightforward options involves using solar-powered lights, which harness the power of the sun through solar panels. These panels are easy to install—simply place the lights in a sunny spot, and they’ll charge during the day, automatically illuminating your garden or walkway at night. Solar lights are energy-efficient and require minimal maintenance, making them perfect for DIY projects. Plus, they eliminate the need for wiring or electricity, saving you time and effort.
When selecting solar garden and path lights, consider models equipped with motion sensors. These sensors detect movement within a certain radius and trigger the lights to turn on, offering added security and convenience. Motion sensor lights are especially useful along walkways, driveways, or near entrances, as they provide illumination only when needed, conserving battery life and reducing energy costs. To install these lights, start by choosing locations where you want to maximize their effectiveness—near doorways, along the edges of your garden, or at the end of a driveway. Make sure the solar panels face south (or north in the Southern Hemisphere) and are free from obstructions like trees or buildings that could block sunlight.
Installation is straightforward: stake the lights into the ground, ensuring the solar panels are angled to receive maximum sunlight during the day. If your lights have adjustable heads, aim them to highlight specific features of your landscape or to illuminate pathways effectively. For motion sensor models, test the sensor’s range and sensitivity before securing the lights permanently. If you notice false triggers from passing cars or animals, you can often adjust the sensor’s sensitivity or angle. Keep in mind that, for peak operation, solar panels should be cleaned periodically to remove dirt or debris that could block sunlight. This simple upkeep ensures your lights stay bright and functional.
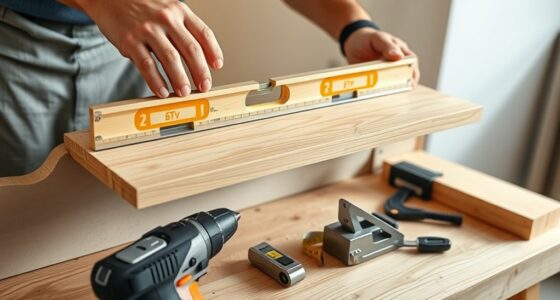
Incorporating solar panels and motion sensors into your DIY outdoor lighting setup not only makes your space more inviting but also adds an element of smart functionality. With a few basic tools—like a shovel for planting stakes, a screwdriver for securing fixtures, and perhaps a level to ensure proper alignment—you can set up a beautiful, energy-efficient lighting system without professional help. This approach allows you to enjoy your outdoor area after dark, whether for relaxing evenings or safe nighttime strolls, all while keeping costs low and installation uncomplicated.

VEVOR 13-Gallon Air Compressor, 2HP, 4.6 SCFM@90PSI, Oil-Free Tank, 66dB Quiet Operation, Ideal for Tire Inflation, Woodworking, Auto Repairs, and Spray Painting (Maximum Pressure 125 PSI)
Built to Last: The 13-gallon large-capacity tank paired with a 2HP motor delivers fast air buildup in under...
As an affiliate, we earn on qualifying purchases.
Frequently Asked Questions
How Do I Choose the Best Outdoor Lighting for My Garden?
To choose the best outdoor lighting for your garden, focus on lighting design that highlights key features and creates ambiance. Opt for energy-efficient options like LED lights to save on power bills and reduce environmental impact. Consider the placement and brightness of fixtures to ensure safety and aesthetic appeal. Think about combining different types of lights—path, accent, and ambient—to achieve a balanced, inviting look that suits your garden’s style.
What Safety Precautions Should I Take During Installation?
You should prioritize electrical safety by turning off power before starting and using insulated tools. Check weather considerations to make sure your lights are suitable for outdoor conditions and avoid installing in wet or stormy weather. Keep cables away from water sources, and secure connections properly to prevent shorts. If unsure, hire a professional. These precautions help protect you from electrical hazards and ensure your outdoor lighting lasts.
Can I Install Outdoor Lights in Wet or Rainy Conditions?
Can you install outdoor lights in wet or rainy conditions? It’s best to avoid doing so unless you use waterproof fixtures and weather-resistant wiring. These features help safeguard your lights from moisture and prevent electrical hazards. If you must install during damp weather, ensure all connections are securely sealed and follow safety guidelines. Remember, working in wet conditions can be risky, so prioritize safety and wait for dry weather whenever possible.
How Do I Maintain and Troubleshoot Outdoor Lighting Systems?
To maintain your outdoor lighting system, regularly inspect the wiring for damage or corrosion. When troubleshooting, check for loose connections and replace faulty bulbs promptly. If a light isn’t working, try replacing the bulb first, then examine the wiring for any issues. Keep the fixtures clean and dry, especially after rain, to prevent moisture buildup. Routine maintenance ensures your outdoor lighting stays bright and functional year-round.
Are Solar-Powered Garden Lights Effective and Reliable?
Solar-powered garden lights are effective and reliable, especially when you choose models with strong solar light durability. They harness sunlight during the day, making them energy efficient and cost-effective. While their performance depends on weather conditions and placement, high-quality options tend to last longer and provide consistent illumination. For ideal results, place them where they receive ample sunlight and regularly clean solar panels to maintain efficiency.

Klutch 29-Gallon Air Compressor, 2.5 HP, 120 Volts, 175 PSI
POWERFUL COMPRESSOR: Unleash the potential of your tools with this portable air compressor, the Klutch 29-Gallon Air Compressor's...
As an affiliate, we earn on qualifying purchases.
Conclusion
Now that you’ve learned the basics of installing garden and path lights, you’re ready to illuminate your outdoor space with confidence. Remember, with patience and the right tools, you can transform your yard into a welcoming haven that shines bright like a starry night. Don’t rush—think of it as planting seeds for beauty and safety. Before you know it, your outdoor area will glow warmly, turning your home into a beacon that invites everyone in.

CRAFTSMAN 33 Gallon Air Compressor, 175 Max PSI, Portable Air Compressor, Vertical Air Compressor for Heavy-Duty Use, Ideal for Home Garage and Workshop, Efficient and Reliable Performance
Oil-Free Pump Technology: Experience maintenance-free operation with our oil-free pump. This 33 gallon air compressor ensures long-lasting performance,...
As an affiliate, we earn on qualifying purchases.

Westinghouse 11000 Peak Watt Tri-Fuel Portable Inverter Generator, Remote Start, Transfer Switch Ready, Gas/Propane/Natural Gas Powered, Low THD, Safe for Electronics, Parallel Capable, CO Sensor
THE BEST OF BOTH WORLDS: The Westinghouse iGen11000TFc is a tri fuel generator with all the benefits of...
As an affiliate, we earn on qualifying purchases.