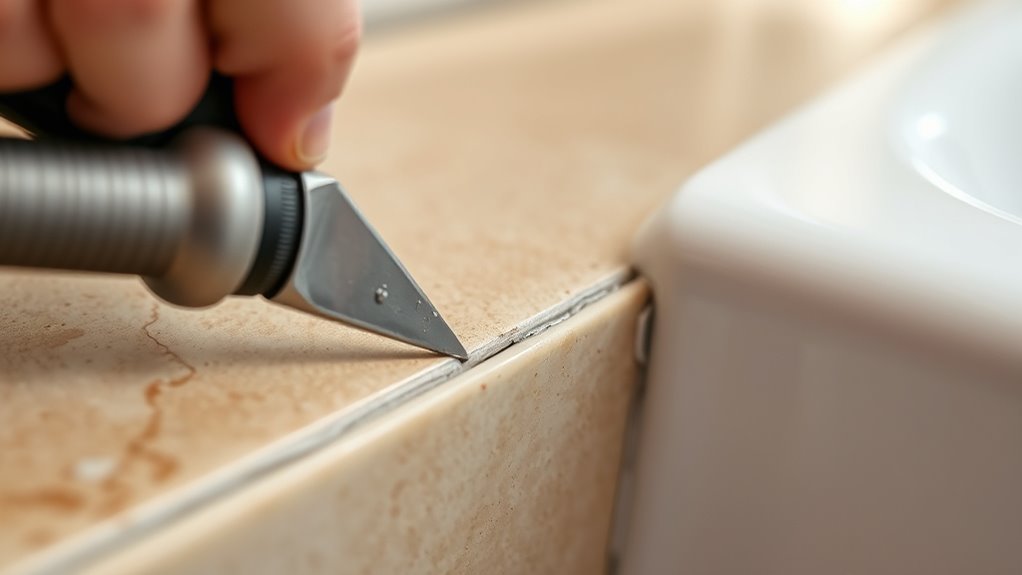

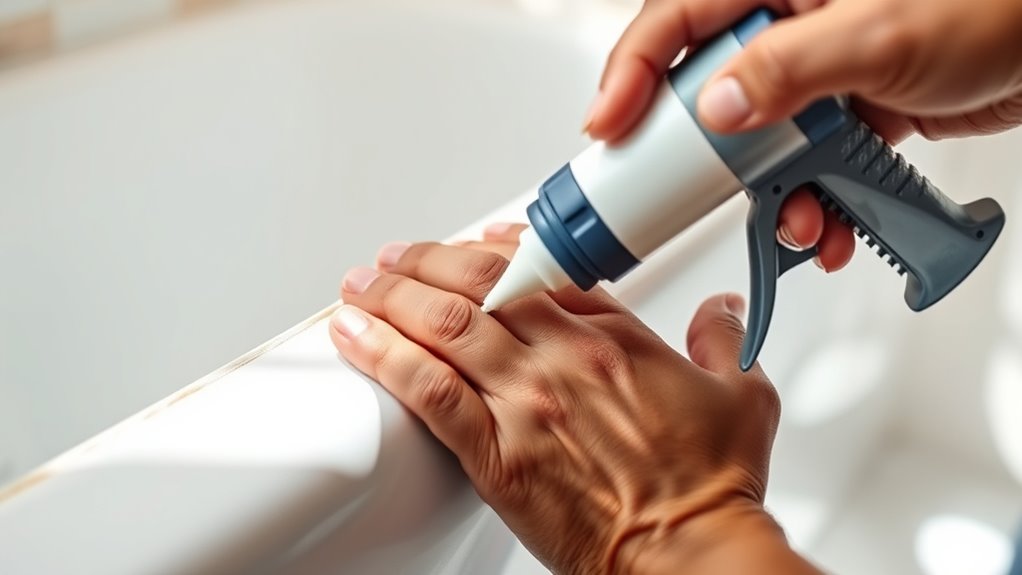
To master caulking, start by carefully removing old, cracked or peeling caulk with a utility knife or scraper, ensuring you clear all debris for a smooth surface. Clean the area thoroughly and let it dry before applying new caulk. Cut the tip at a 45-degree angle and load your caulk gun, then apply a steady bead along the joint. Use a damp finger or tool to smooth it out for a professional finish. Keep practicing, and you’ll see your skills improve with each project.
Key Takeaways
- Remove old caulk carefully using a utility knife or scraper to ensure a clean surface for new application.
- Clean and dry the area thoroughly before applying new caulk to promote adhesion and durability.
- Select a caulk color that matches or blends with the surrounding surface for an invisible or seamless finish.
- Load the caulk gun properly, cut the tip at a 45-degree angle, and apply steady, even beads along the joint.
- Smooth the fresh caulk with a damp finger or smoothing tool to achieve a neat, professional-looking seal.
Ever wondered how to achieve a smooth, professional finish when sealing gaps? It all starts with choosing the right color and maintaining your tools properly. Picking the correct caulk color is more than just aesthetics; it guarantees your repairs blend seamlessly with the surrounding surface. When selecting a color, consider the room’s decor, the material you’re sealing, and whether you want the caulk to be visible or discreet. Clear or neutral shades often work best for versatile applications, while matching the existing paint or wall color creates a nearly invisible finish. Whatever you choose, it’s essential to select a high-quality caulk that adheres well and resists cracking over time. This choice impacts not only the appearance but also the durability of your seal. Additionally, understanding modern sealing techniques can help you achieve more precise and long-lasting results.
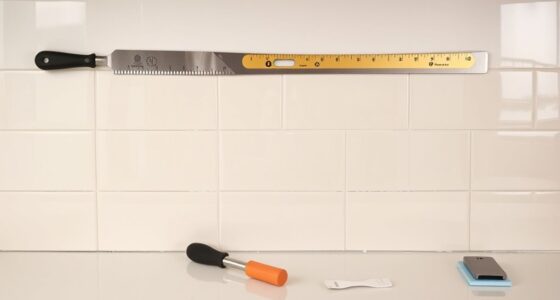
Once you’ve made your color selection, focus on tool maintenance. Your caulking tools—such as the caulk gun, putty knife, or smoothing tools—play a crucial role in achieving a neat, professional look. Before starting, check that your caulk gun operates smoothly, with no jams or uneven trigger action. Clean your tools thoroughly after each use to prevent old caulk and debris from hardening and reducing their effectiveness. Well-maintained tools give you better control, making it easier to apply an even bead of caulk and smooth it out seamlessly. If your tools are rusty or damaged, replace them to avoid imperfections in your work. Proper tool maintenance also extends the lifespan of your equipment, saving you money in the long run.
When applying new caulk, start with a clean surface. Remove all traces of old caulk using a scraper or utility knife, being careful not to damage the surrounding material. Once the surface is clean and dry, load your caulk gun with the selected color and cut the tip at a 45-degree angle, choosing an opening size that matches the width of the gap. As you squeeze the trigger, move steadily along the joint, applying a consistent bead of caulk. Afterward, use a damp finger or a smoothing tool to shape the bead and push it into the joint. Proper technique, combined with the right color choice and well-maintained tools, results in a clean, professional finish that lasts.
Top picks for "caulk remov apply"
Open Amazon search results for this keyword.
As an affiliate, we earn on qualifying purchases.
Frequently Asked Questions
What Types of Caulk Are Best for Outdoor Applications?
For outdoor applications, you should choose waterproof caulk that withstands weather. Silicone caulk is ideal because it’s highly durable, flexible, and weatherproof, making it perfect for sealing windows and siding. Latex caulk, especially when labeled waterproof, is easier to work with and paintable, but it’s less flexible. So, if durability matters most, go with silicone; for ease and paintability, latex waterproof caulk works well.
How Can I Prevent Mold Growth on New Caulk?
To prevent mold growth on new caulk, you should use mold-resistant sealants designed for bathroom or outdoor use, where moisture is common. Keep the caulk area dry and make certain proper ventilation to reduce humidity. Practice good caulk hygiene by cleaning surfaces before application and regularly inspecting for mold. This proactive approach helps maintain a clean, mold-free sealant, extending its lifespan and keeping your space healthier.
Is It Necessary to Wear Protective Gear When Removing Old Caulk?
Think of removing old caulk as traversing a treacherous jungle. You definitely need safety precautions like gloves and goggles to shield yourself from potential hazards, such as mold spores or chemical fumes. Wearing protective equipment acts as your armor, keeping you safe from irritation or injury. Never skip these steps; they’re essential safety precautions that guarantee you can clear the old caulk effectively while protecting your health.
How Long Should I Wait Before Painting Over New Caulk?
You should wait at least 24 hours before painting over new caulk to ensure proper drying time. Rushing this step can affect paint adhesion, leading to peeling or cracking later. Make sure the caulk feels firm and dry to the touch before applying paint. If you’re in a humid environment, consider waiting even longer to guarantee ideal results. Patience here ensures a smooth, lasting finish.
Can I Reuse Old Caulk Tools for Multiple Projects?
You can reuse old caulk tools if you properly sterilize them, but be cautious about tool longevity. Many believe that reusing tools without thorough sterilization risks contaminating your new caulk, potentially affecting adhesion and durability. To guarantee the best results, clean your tools with alcohol or soap and water, which helps maintain their effectiveness and prevents cross-contamination. Regular sterilization boosts tool longevity and keeps your projects clean and professional.
Conclusion
Now that you’ve learned the art of caulking, you’re equipped to tackle any project with confidence. Think of your skills as a sturdy bridge, connecting gaps and sealing out trouble. With patience and practice, your home will stand stronger and look better than ever. Remember, just like a well-placed caulk, your efforts create a seamless shield of comfort and durability—turning a simple task into a lasting masterpiece you can be proud of.