
TL;DR
A cordless drill set usually includes a drill-driver, rechargeable battery, charger, and case, but bit assortments and extra batteries vary. Choose a light 12V kit for common household jobs, an 18V/20V platform for more demanding work or a wider tool lineup, and a hammer drill when you need to make occasional holes in masonry. Compare the complete kit and check battery compatibility before buying.
A drill set can look ready for anything in a tidy case, yet open it and find only a drill, one battery, and a handful of bits. That gap between the picture on the box and the kit you need is why checking the contents matters as much as comparing the tool.

Get business pricing on tools and workshop supplies
- Business-only prices and quantity discounts
- Tax-exempt purchasing
- Multiple users, one account, clear invoices
This guide explains what a cordless drill set includes, how to choose between 12V and 18V/20V tools, and which features earn their place in your budget. You’ll also see when a drill-driver, hammer drill, or impact driver makes sense, so you can buy for the shelves, furniture, and walls you actually plan to tackle.
One simple rule runs through it all: choose the tool and battery platform together. A drill that fits your hand today may also become the first tool in a battery system you use for years.
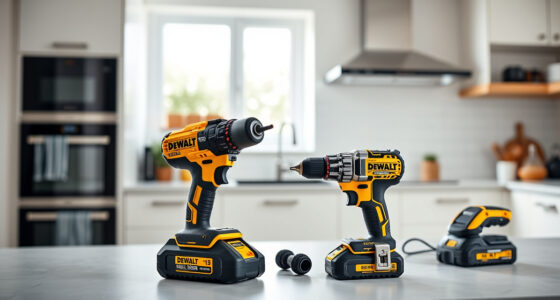
A typical cordless drill set contains a drill-driver, battery, charger, and case, but bit selection and extra batteries vary.
Choose 12V for a lighter tool for many routine home jobs; consider 18V/20V for demanding work or a wider compatible tool lineup.
Amp-hours mainly indicate potential runtime, not guaranteed drill power.
Use a hammer drill for occasional masonry holes and consider a rotary hammer for frequent or larger concrete drilling.
Check the whole battery platform, replacement-battery cost, kit contents, and warranty before comparing prices.
What You’ll Actually Find Inside a Cordless Drill Set
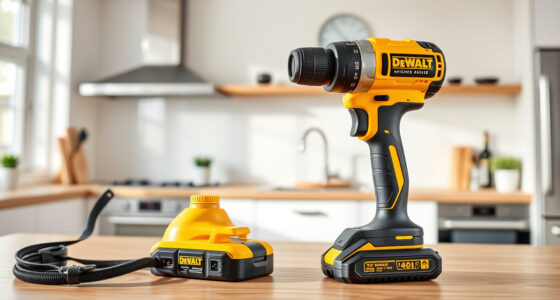
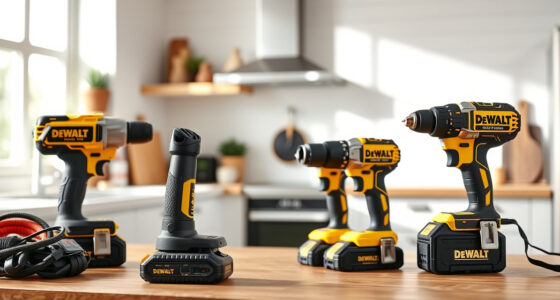
Cordless drill sets usually include a battery-powered drill-driver, at least one rechargeable battery, a charger, and a case or bag. These pieces solve different parts of the job: the drill makes holes and drives screws, the battery powers it, the charger keeps it usable, and the case helps store and carry the kit. Some kits add drill bits, driver bits, a belt clip, or a small work light, but the word “set” doesn’t promise a large accessory assortment. Check the listed contents before you count on a bit being there; otherwise, a low sticker price can turn into extra purchases before you can start.
A drill-driver handles two common jobs: making holes and driving screws. Its adjustable chuck grips a range of bits, while the clutch helps limit turning force as a screw reaches the wood. That clutch matters because the right stopping point changes with screw size and material: too much force can strip a screw head or bury it, while too little leaves it loose. By contrast, a hammer drill adds a pulsing action for occasional holes in brick or concrete, and an impact driver uses rotational impacts to drive fasteners with less effort. An impact driver is useful for long screws, but its bit holder and action don’t replace a regular drill for everyday hole-making.
Imagine you’re assembling a bookcase on a Saturday. A drill-driver can make pilot holes and set the screws; a small driver-bit set may be all you need beyond the kit. If you’re mounting a shelf on a brick wall, you’ll need a masonry bit and a hammer drill, or a suitable alternative for that material. Knowing the difference helps you buy for the actual material and fastener rather than paying for an added feature you won’t use—or finding that the kit lacks a tool or bit the job requires.
Read the box for the number and capacity of batteries, the charger type, the case, and the chuck size. A kit with two batteries lets one charge while you work, which can reduce waiting during a longer project; a single battery costs less and may be enough for quick furniture repairs. Battery capacity also affects weight and runtime, so a larger battery can be useful for extended work but less comfortable for overhead jobs. “Starter kit” can still mean different things across brands, so match the contents to your first few jobs.
Products Worth Considering

Levoit Vital 100S-P Air Purifier with Washable Pre-Filter

Sonos Arc Ultra Dolby Atmos Soundbar, Black

Philips Hue Play HDMI Sync Box
As an affiliate, we earn on qualifying purchases.
Pick 12V or 18V/20V Based on the Work You Do
Choose 12V for a lighter feel and many routine household jobs, or look at an 18V/20V platform for more demanding work and a broader selection of compatible tools. The practical difference is a tradeoff: a compact, lighter drill is easier to control in tight spaces or overhead, while a higher-voltage platform may offer more capability for larger holes, repeated fastening, and future tools. Neither voltage label settles the question on its own: weight, battery design, motor, and the task all affect how a drill feels and performs.
| What you’re comparing | 12V kit | 18V/20V kit |
|---|---|---|
| Good fit for | Furniture assembly, small repairs, light drilling | Frequent projects, larger holes, demanding fastening |
| Typical tradeoff | Often compact and easier to handle | Often more capability, with added weight |
| Think ahead | Check which other tools share the platform | Check battery cost, kit weight, and tool selection |
The “20V max” and “18V” labels can refer to different ways of stating a battery’s voltage. One label alone isn’t a reliable performance ranking. Compare tools within their platforms and look at the actual kit, weight, and job requirements. A higher label doesn’t tell you how long the tool will feel comfortable in your hand or whether it includes the battery capacity your work needs.
For example, if you’re hanging curtain rods and putting together a desk, a compact 12V drill may be comfortable to hold overhead and capable of the work. If you build outdoor planters or regularly drill larger holes in lumber, an 18V/20V option may give you more room to grow. A larger battery can add weight, so try to imagine holding the drill above your head or reaching into a cabinet before choosing based on power alone. If you can, handle the complete tool and battery together: the balance can matter as much as the listed weight.
Platform choice shapes future purchases, too. Batteries generally work within a manufacturer’s tool system and sometimes only within particular voltage families. If you already own a compatible saw or sander, a drill that shares its battery family may make more sense than a small difference in headline specs. If you’re starting fresh, check the cost and availability of replacement batteries and the tools you might realistically add; a platform is most valuable when it supports work you expect to do.
Check These Five Features Before You Buy
Start with the battery platform and kit contents, then compare the features that change comfort and control. A useful shortlist is battery capacity, chuck size, clutch settings, gearing, and motor type. These details matter because they determine how long the drill can work, what bits it can hold, and how well you can match its behavior to the task. None guarantees that a drill is the right fit by itself, but together they give you a clearer picture than a bold power figure on the package.
- Battery capacity: Amp-hours (Ah) give a rough sense of potential runtime. A higher Ah battery can last longer between charges, but it often weighs more and costs more. For short repairs, the extra runtime may not justify carrying the added weight; for a long project, it can mean fewer interruptions. The rating alone does not promise more drill power.
- Chuck size: Many household models use a ⅜-inch or ½-inch chuck. The chuck sets the largest bit shank it accepts; bigger isn’t automatically better if your work uses smaller bits. A larger chuck can give access to a broader range of bits, but it may add bulk, so compare it with the holes and materials you expect to handle.
- Clutch and speed: A clutch helps stop a screw before you strip its head or bury it too deep. Variable speed and two-speed gearing help you adapt to the material and job. Slower speed gives more control for starting screws or drilling larger holes; faster speed suits smaller holes and quicker work. More clutch settings can make adjustment finer, though technique and a well-fitting bit still matter.
- Motor type: Brushless motors are often more efficient and may run cooler or deliver more work per charge than comparable brushed motors. The benefit depends on the tool and job, and brushless kits can cost more. For occasional household use, the added efficiency may not offset the higher price; frequent use can make longer runtime and reduced wear more valuable.
- Battery and charger: Compare how many batteries you get and whether replacement batteries are available and affordable in that platform. A second battery can keep a longer job moving while the first charges, but it adds to the upfront cost. A basic charger may take longer to refill a battery, so check charging time if you expect to work continuously.
Suppose you’re driving screws into soft pine for a small shelf. A lower clutch setting can help keep the screw head intact, while a slower speed gives you more control as it seats. A large battery may be unnecessary for an hour of occasional work; for a full afternoon building planters, a second battery can save waiting time. Those choices show why the best feature depends on the length and demands of the job, not simply on which specification is largest.
For a clear picture of what a cordless drill set includes, check both the product contents and the manufacturer’s current specifications. A larger chuck doesn’t mean the included bits are better, and a brushless label doesn’t tell you how a particular model will feel in your hand. Fit and the work you expect to do still count: if the controls are awkward or the tool feels tiring, impressive specifications may not make it a better choice for your projects.
Match the Drill Type to the Material
Use a drill-driver for ordinary holes and screws, a hammer drill for occasional masonry holes, and an impact driver mainly for demanding fastening. The right tool helps you get cleaner results and reduces the temptation to push a drill beyond the job it was built to handle. Each tool creates a different kind of force: steady rotation for ordinary drilling, rotation plus rapid blows for masonry, and rotational impacts for driving stubborn fasteners. Match the bit to the material, too, because even the right drill can perform poorly with a bit designed for something else.
For wood, use a suitable wood bit and secure the workpiece so it can’t twist or slide. For screws, pick a driver bit that fits the head snugly; a loose-fitting bit can chew up the screw before it sits flush. If you’re drilling a hole in a brick wall to hang a small picture, use a masonry bit with a hammer drill and follow the drill and anchor instructions. The hammering action helps break up masonry as the bit turns, which is why it can be more effective than a standard drill on brick; it isn’t a substitute for choosing the correct bit or anchor.
A regular drill-driver is generally not the right choice for repeated concrete drilling. A hammer drill can handle occasional masonry work, but for frequent or larger holes in concrete, a rotary hammer is usually more appropriate. Its stronger hammering action can make that work faster and less demanding, though it is heavier and more tool than a small home repair requires. It’s like choosing a sturdy hand tool for a small repair and a purpose-built tool for repeated heavy work: the material and workload change the answer.
Before you drill, secure the workpiece, select a suitable speed and clutch setting, and keep your hands clear of the bit. These steps reduce the chance of the material spinning, the bit wandering, or a screw being driven too far. Follow the manufacturer’s instructions for operation, charging, and storage. If your project involves electrical, gas, structural, or roof work, hire a licensed professional; power down circuits when appropriate, use suitable PPE, and follow applicable code and permit requirements.
Compare the Whole Kit to Avoid a Costly Surprise
A good cordless drill set gives you the tool, battery support, and accessories you need at a price that makes sense for your plans. Compare the complete kit: the number of batteries, charger, case, warranty, replacement-battery cost, and other tools that share the battery platform. These pieces change the kit’s real value: a cheap bare-bones offer may need extra purchases, while a more expensive set may save money if you’ll use the second battery or case. Product lines and kit contents change, so verify current specifications with the maker or retailer before buying.
Imagine two offers on a store shelf. The first costs less and includes one compact battery, a charger, and a bag; the second costs more and includes two batteries and a hard case. If you only assemble a flat-pack table now and then, the lower price may fit because long runtime and heavy-duty storage won’t matter much. If you spend a weekend building shelves, having one battery charge while the other runs may be worth the extra cost. Compare the price difference with the cost of buying a second battery later, and consider whether the hard case will protect or organize tools you actually carry.
Look beyond the drill to the platform’s available tools. A battery family that can power a future sander, work light, or saw may offer more value over time than a modest discount on a kit you can’t expand in a useful way. Shared batteries can reduce the number of chargers and battery types you need, but that advantage only pays off if you plan to buy compatible tools. Don’t buy extra tools just because they share batteries; first ask whether you expect to use them.
The fine print matters for service and replacements. Check the warranty terms and whether batteries are sold individually in your area. Some kits include only basic bits, so price a suitable set separately if you’ll be drilling wood, metal, or masonry. Check whether the warranty covers the battery as well as the drill, since replacement costs can affect the long-term value. That turns a tempting box price into a realistic budget for getting the work done.
Make Your First Holes and Screws Cleaner
Choose the right bit, secure the work, and set the drill before pulling the trigger. Those small steps help prevent slipping, damaged screws, and ragged holes. You don’t need a complicated routine; a brief check before each job can make a noticeable difference.
- Pick the bit for the material. Use a wood bit for wood, a metal-rated bit for metal, and a masonry bit for masonry. Check that its shank fits the chuck.
- Grip the bit securely. Follow the drill’s instructions to tighten the chuck, then make sure the bit sits straight rather than wobbling.
- Secure the workpiece. Clamp loose stock or brace it safely. Mark the hole location, and check the other side for anything you could hit.
- Set speed and clutch. Start gently with screws, especially in soft wood. Use a clutch setting that lets the screw stop before the head strips or sinks too deep.
- Keep the tool steady. Hold the drill in line with the bit and let it work without forcing it. Pause if the bit binds or the tool feels unusually hot.
For instance, when fitting a hinge to a pine cabinet door, mark each screw point and use a pilot hole if the project instructions call for one. Set the clutch low, drive one screw, and check whether its head sits level. If it stops too early, adjust the clutch gradually instead of pressing harder and risking a chewed-up screw.
After the job, follow the maker’s guidance for charging and storage. Keep batteries dry and within their specified temperature range, use the recommended charger, and don’t store a damaged battery. Good care protects your kit and makes it more likely to be ready when the next loose cupboard handle appears.
Frequently Asked Questions
What does a typical cordless drill set include?
A typical set includes a drill-driver, one or more rechargeable batteries, a charger, and a case or bag. Some kits add bits, a belt clip, or a work light, but check the listed contents because the word “set” doesn’t promise a full accessory assortment.
Is a 12V or 18V/20V cordless drill better?
A 12V drill is often lighter and suits many household tasks, while an 18V/20V platform generally offers more capability and a broader range of heavier-duty tools. Your project, comfort, and battery platform matter more than the voltage label alone.
Can a cordless drill drill into concrete?
A standard drill-driver is generally not suited to concrete. A hammer drill with a masonry bit can handle occasional masonry holes, while a rotary hammer is usually a better fit for frequent or larger concrete drilling.
Does a higher Ah battery make a cordless drill more powerful?
A higher amp-hour rating usually means more potential runtime, though it can also add weight. It doesn’t by itself guarantee more power; performance also depends on the battery design, motor, and tool electronics.
Are batteries interchangeable between cordless drill brands?
Usually not. Batteries generally work within a manufacturer’s battery platform and sometimes only within a particular voltage family, so check the tool and battery documentation before buying.
Do I need a cordless drill set with two batteries?
A second battery can help on long jobs because one battery can charge while the other is in use. If you only do brief repairs or occasional furniture assembly, a single battery may be enough.
Conclusion
Buy for the jobs you can name: a compact drill-driver may be all you need for shelves and furniture, while masonry or frequent heavy work calls for a different tool. Check the kit contents, battery platform, and weight before you pay.
The best set is the one you’ll reach for without fighting its weight or missing the right battery. Choose well, and the next loose handle or crooked shelf becomes a quick fix instead of a weekend ordeal.