
TL;DR
Placing your rig in a closet can drastically cut noise, but ventilation is key. Acoustic treatment improves sound inside the space, while sealing gaps and decoupling reduce noise transmission. The best setups balance cooling, sound control, and practicality.
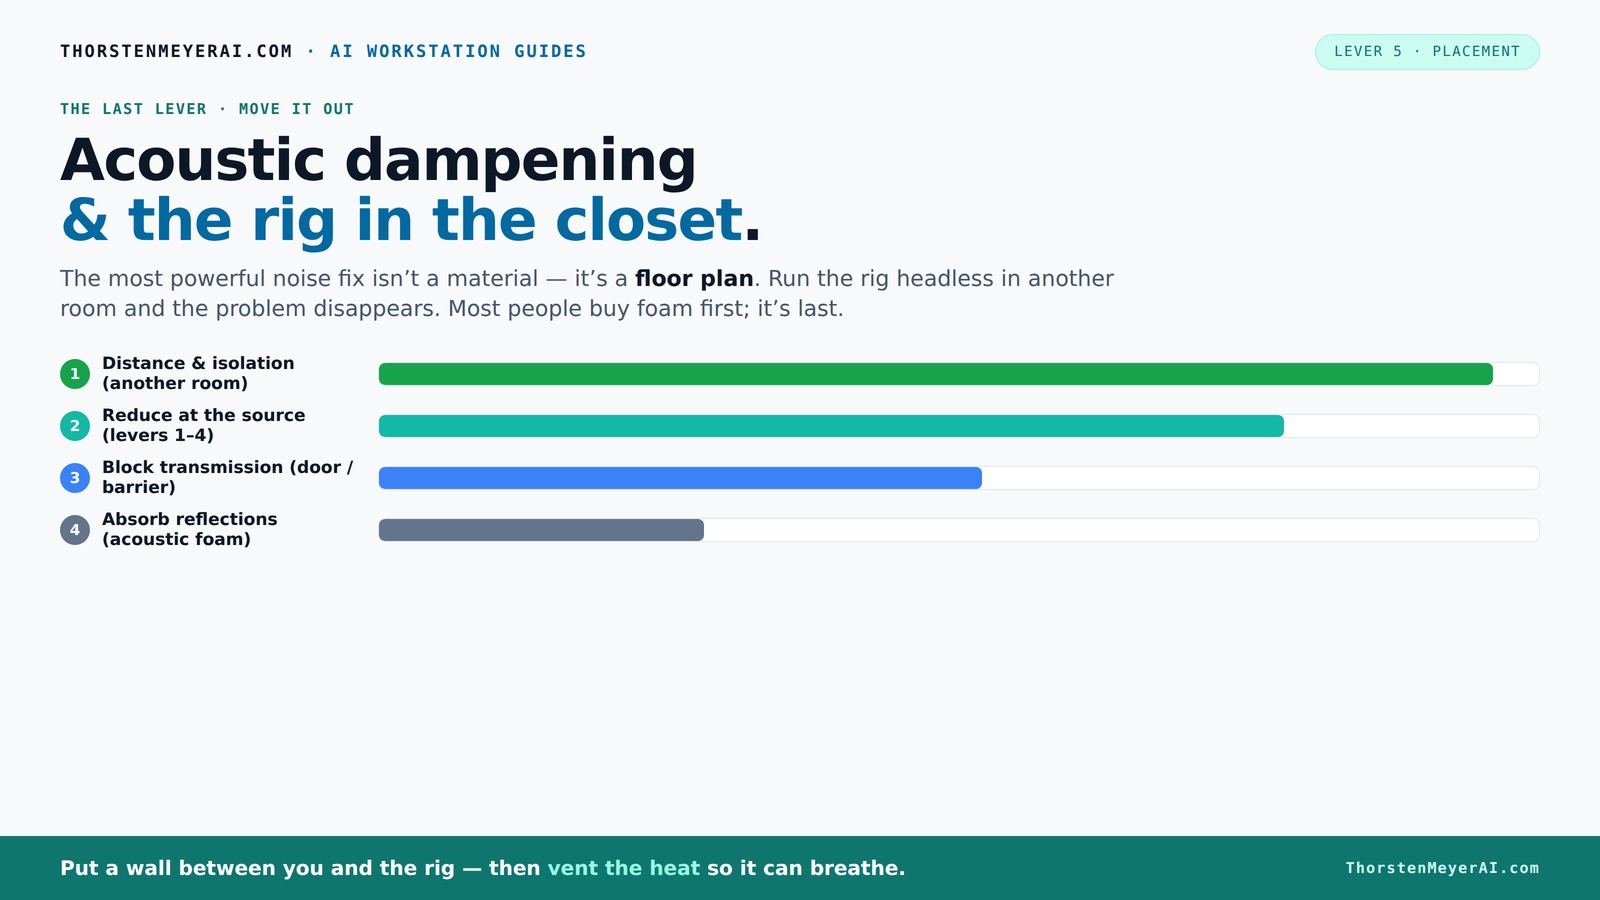
Acoustic dampening
& the rig in the closet.
The most powerful noise fix isn’t a material — it’s a floor plan. A rig you can’t hear because it’s in another room beats any amount of foam. Tap the approaches in Part 1 to see what actually works.
(another room)
(levers 1–4)
(door / barrier)
(acoustic foam)
Contain the noise, not the heat
Key Takeaways
- Moving your rig into another room or closet is the simplest way to eliminate noise, especially with a reliable network connection.
- Ventilation is critical in a closet setup; without airflow, heat builds up fast and risks hardware damage or throttling.
- Place acoustic panels at first reflection points, especially on side walls and ceiling, for maximum sound treatment efficiency.
- Bass traps are often overlooked but vital in small spaces to prevent low-frequency muddiness and improve clarity.
- Sealing gaps, adding mass, and decoupling the machine from surfaces drastically improve soundproofing beyond just foam and soft surfaces.

Focusound 52 Pack Acoustic Foam Panels 1" x 12" x 12" Sound Proof Foam Panles Soundproofing Noise Cancelling Wedge Panels for Home Office Recoding Studio with 300PCS Double-Side Adhesive
Soundproofing - Acoustic foam panels triangular grooves structure for better noise absorption, helps to reduce and absorb unwanted...
As an affiliate, we earn on qualifying purchases.
As an affiliate, we earn on qualifying purchases.
Why Moving Your Rig Is the Easiest Win for Noise Reduction
Moving your noisy rig into another room or closet is the simplest way to cut noise. When the machine isn’t next to you, its sound no longer bugs you. Think of it like putting a loudspeaker in a soundproofed box — the noise is gone from your workspace.
For example, many AI enthusiasts run powerful GPUs in their basement or spare room, then connect remotely over the network. You get the same results without the constant hum in your ear.
All you need is a wired connection and proper ventilation. The noise problem? Solved.
be quiet! Pure Base 501 Black ATX Case | 2 Preinstalled Pure Wings 3 140mm PWM Fans | Optimized Air Pressure | Compact PC Case | Vertical GPU Installation | USB 3.2 Gen. 2 Type C | BG073
Without any distractions, Pure Base 501 is reduced to excel at its core functions and is aimed at...
As an affiliate, we earn on qualifying purchases.
As an affiliate, we earn on qualifying purchases.
The 'Rig in the Closet' Setup — How to Keep It Cool and Quiet
Placing a high-power AI rig in a closet sounds perfect — but only if you handle heat properly. Sealing the closet completely traps hot air, which can raise temperatures by over 20°F in an hour, risking throttling or damage. That’s a costly mistake.
To prevent this, you need active ventilation: exhaust fans, ducted airflow, or even a small HVAC system. A purpose-built soundproof cabinet combines foam with temperature-controlled fans, allowing heat to escape while muffling noise. Think of it as a mini data center with a quiet, cool environment.
According to experts, airflow management and temperature monitoring make or break these setups. Without proper ventilation, your rig will just overheat and throttle, defeating the purpose.

AC Infinity Passive Ventilation Grille 17", White, for PC Computer AV Electronic Equipment Cabinets, Rooms, and Closets
Designed to be installed into doors, cabinets, and walls to help increase ventilation.
As an affiliate, we earn on qualifying purchases.
As an affiliate, we earn on qualifying purchases.
Where to Place Acoustic Treatment for Maximum Effect in a Small Space
Acoustic dampening isn’t just about slapping foam on walls. Placement matters. The most effective spot? The first reflection points — the places where sound bounces directly off surfaces into your ears or mic.
Use the mirror trick: sit in your usual recording or listening position and move a mirror along the wall. When you see the speaker or mic reflected in the mirror, that’s your reflection point. Place acoustic panels there.
In a closet, focus on side walls, ceiling, and behind the mic or speakers. Cover about 20-40% of surfaces, with thicker panels for low frequencies, especially if bass buildup is noticeable.
Deep understanding of reflection points is crucial because untreated reflections can cause muddiness, comb filtering, and a loss of clarity in recordings or mixes. Proper placement ensures that sound waves are absorbed at critical points where they would otherwise bounce back and distort the original sound. This strategic positioning makes your acoustic treatment far more effective, especially in tight spaces where every surface counts.

118” Wedge-Shape Foam Window Weather Stripping Door Seal Strip,Soundproofing Frame Winter Insulation Tape for Exterior Front Door,Noise Cancelling Window Inserts,Door Gap Filler Light Blocker,White
Upgraded Wedge Design: This window draft stopper features an upgraded wedge design, tapering from 5/32" to 11/32" (0.16"–0.35")...
As an affiliate, we earn on qualifying purchases.
As an affiliate, we earn on qualifying purchases.
Bass Traps in a Closet: Are They Worth It?
Bass traps are like the shock absorbers for your room — essential if you notice booming lows or uneven sound. In small closets, bass tends to pile up in corners, creating a muddy, boomy sound.
Adding bass traps in the corners can tame this. You don’t need massive traps—2-foot panels or foam bass traps are enough for most home setups. They absorb low-end energy and prevent it from bouncing around.
For example, if your recordings sound boomy or your monitors seem to “ring,” bass trapping can improve clarity significantly. It’s a small investment for a big difference.
Understanding the importance of bass traps is key because low frequencies are notoriously difficult to control—they tend to resonate and reinforce in small, enclosed spaces. Proper placement in corners where low-end energy accumulates maximizes their effectiveness. Without bass traps, your room’s low-frequency response can be uneven, making mixing and recording less accurate. Investing in bass traps helps achieve a more balanced, natural sound.
Sealing Gaps, Using Soft Surfaces, and Adding Mass to Boost Soundproofing
Soundproofing in a closet isn’t just about foam; it’s about sealing gaps, adding mass, and blocking sound transmission.
Seal cracks around doors with weatherstripping or acoustic sealant. Cover vents with soundproof blankets or gasketed panels. Add dense materials like extra drywall or mass-loaded vinyl to walls for more blocking power.
Soft surfaces like rugs, blankets, or upholstered furniture help reduce reflections inside the space, making it sound better in recordings and less echoey.
For instance, a simple door sweep can cut noise leaks by 50%, and adding a layer of drywall with damping compound can block even loud fan noise.
Understanding the tradeoffs is important: sealing gaps and adding mass enhances soundproofing, but it can also impact airflow and heat dissipation. Balancing these aspects ensures you don’t compromise cooling for noise isolation. Effective soundproofing isn’t just about materials—it’s about strategic design to minimize sound leaks while maintaining necessary ventilation.
Handling Vibration and Structure-Borne Noise in a Closet Setup
Vibration is the sneaky noise that travels through your desk, floor, and walls. It’s the reason your rig can sound loud even if the room is well-treated.
Use anti-vibration pads, rubber feet, or isolation mounts under the case. These decouple the machine from the surface, reducing low-frequency transmission.
For example, placing the rig on a rubber mat can cut down on the bass rumble transmitted through the desk, making your recordings cleaner and the noise less intrusive.
Reducing vibration transmission is crucial because vibrations can carry low-frequency energy directly into structures, causing further noise transmission and even structural stress over time. Proper decoupling prevents this, ensuring your setup remains both quiet and safe. It’s a subtle but vital aspect of effective soundproofing and noise control in confined spaces.
Frequently Asked Questions
What is the difference between acoustic dampening, treatment, and soundproofing?
Acoustic dampening reduces echo and reflections inside a space, making it sound clearer. Treatment involves placing panels at reflection points for better sound quality. Soundproofing blocks sound from entering or leaving a room, typically through sealing, adding mass, and decoupling surfaces.
Where should acoustic panels go in a closet or small booth?
The most effective spots are the first reflection points — side walls, ceiling, and behind your mic or speakers. Use the mirror trick to find these spots, and aim to cover 20-40% of wall and ceiling surfaces for balanced absorption.
Do I need bass traps in a closet?
If you notice boomy lows or uneven sound, bass traps are worth it. Place them in corners to absorb low-frequency energy, which tends to pile up in small spaces, improving clarity and reducing muddiness.
How much treatment is enough?
It depends on your goals. For general voice recording, covering about 20-40% of surfaces with foam or panels at key reflection points is effective. For more critical audio, add bass traps and consider thicker panels or dedicated diffusers.
Can I turn a closet into a recording booth without permanent construction?
Yes. Seal gaps with weatherstripping, add blankets or rugs, and use portable acoustic panels. Ventilation remains the biggest challenge — a small fan or ducted airflow keeps things cool without major renovations.