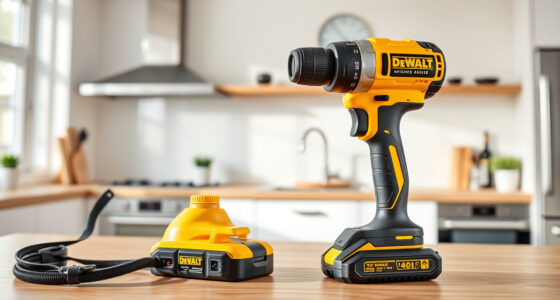
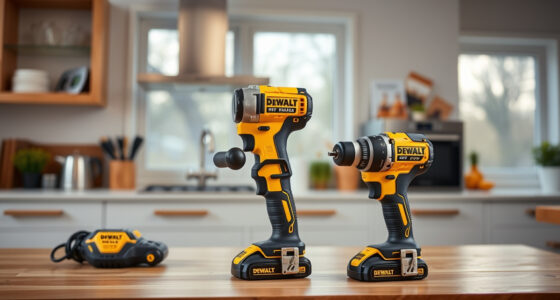
Choose a cordless drill set that matches your projects, check its battery and accessories, then use it to drill a hole or drive a fastener safely. This guide is for beginners buying their first set or learning to use one they already own. Allow 30-60 minutes to compare a few options and complete a first practice task.

Get business pricing on tools and workshop supplies
- Business-only prices and quantity discounts
- Tax-exempt purchasing
- Multiple users, one account, clear invoices

DEWALT 20V Max Cordless Drill Driver Set (DCD771C2)
- ✔ Voltage: 20V Max
- ✔ Motor output: 300 unit watts out
- ✔ No-load speeds: 0–450 rpm and 0–1,500 rpm

BLACK+DECKER 20V MAX Cordless Drill Driver Kit with 100-Piece Bit and Accessory Set
- ✔ Power source: Battery powered
- ✔ Voltage and battery: 20V lithium-ion, 1.5Ah
- ✔ Maximum rotational speed: 650 rpm

DEKOPRO 20V Cordless Drill Set with Battery and Charger
- ✔ Voltage: 20V
- ✔ Battery: 1.5Ah lithium-ion
- ✔ Speed settings: 0–350 / 0–1,350 rpm
Difficulty: Beginner | Time: 30-60 minutes for selection and first use
What You’ll Need
Tools & Materials:
- Cordless drill or drill-driver set with a charged battery
- Compatible drill bits or screwdriver bits for your material and fastener
- Safety glasses
- Tape measure, pencil, and a suitable work surface
- Clamp or vise to hold the workpiece, where appropriate
- Scrap wood or other safe material for practice
Knowledge:
- Basic ability to identify the material you plan to work on
- Ability to read the drill and bit manufacturer’s instructions
Check the drill manual for battery, chuck, speed, and safety instructions. Confirm that the intended job is suitable for a drill-driver. Drilling into walls can hit wiring, plumbing, or gas lines; locate services with an appropriate detector and follow local guidance before making a hole.
DEWALT 20V Max Cordless Drill Driver Set (DCD771C2)
Among these three kits, the DEWALT DCD771C2 is the best starting point when we want one drill for a range of ordinary household jobs. Its two-speed transmission spans 0–450 rpm and 0–1,500 rpm, so we can use the slower setting for controlled fastening and the faster one for drilling. The 1/2-inch ratcheting chuck also accepts larger-shank bits than the 10 mm chuck on the BLACK+DECKER, giving this set an edge when versatility matters.The kit includes two 1.3Ah batteries, a charger and a contractor bag. Having a spare battery is useful when one is charging, although the stated capacity is modest compared with what buyers may want for extended work. BLACK+DECKER counters with a much larger 100-piece accessory set, and DEKOPRO states a lower tool weight, so DEWALT is not the automatic pick for accessory quantity or lightness. Its advantage is the more balanced drill platform. We should skip it for concrete, masonry or heavy industrial use, which the supplied details exclude.
Pros:
- 1/2-inch ratcheting chuck accommodates larger shank sizes than BLACK+DECKER’s 10 mm chuck
- Two speed ranges cover controlled fastening and faster drilling
- Includes two batteries, charger and contractor bag
- Compact, lightweight design is intended to fit tight work areas
Cons:
- The included batteries are 1.3Ah, which may mean more frequent changes during extended work
- The kit contents do not match BLACK+DECKER’s 100-piece accessory assortment
- Not specified for concrete, masonry or heavy-duty industrial use
Best for: Homeowners and DIYers who want a versatile drill driver with a larger chuck, two speed ranges and a spare battery.
Not ideal for: Anyone drilling concrete or masonry, doing sustained industrial work, or prioritizing a large included bit assortment above drill capacity.
Bottom line: We rank the DEWALT first for its useful combination of chuck capacity, speed range and two-battery kit, while keeping it to ordinary drilling and fastening jobs.
“We rank the DEWALT first for its useful combination of chuck capacity, speed range and two-battery kit, while keeping it to ordinary drilling and fastening jobs.”
BLACK+DECKER 20V MAX Cordless Drill Driver Kit with 100-Piece Bit and Accessory Set
The BLACK+DECKER set makes the most sense when we want a drill and a broad assortment of bits in one purchase. Its 100-piece bit and accessory set is the biggest stated bundle here, and its zippered case keeps the kit together for household repairs. A 24-position clutch gives us more adjustment points for screwdriving, which can help reduce the chance of driving a fastener too far into softer material.That all-in-one convenience comes with a capacity tradeoff. The 10 mm chuck is smaller than the DEWALT’s 1/2-inch chuck, and the 1.5Ah battery is a modest size for longer sessions. Its top speed is 650 rpm, below the DEWALT’s 1,500 rpm high setting, so we would choose DEWALT for a wider range of drilling pace and bit sizes. Compared with the DEKOPRO, BLACK+DECKER supplies far more accessories, but its stated weight is 6.1 lb. This kit suits routine home projects better than demanding or prolonged work.
Pros:
- Includes a 100-piece bit and accessory set
- 24-position clutch supports more controlled screwdriving
- 20V lithium-ion battery is compatible with other BLACK+DECKER POWERCONNECT tools
- Soft-grip handle and zippered storage case support everyday home use
Cons:
- 10 mm maximum chuck size is smaller than DEWALT’s 1/2-inch chuck
- 1.5Ah battery capacity is modest for extended work
- Maximum stated speed of 650 rpm is lower than DEWALT’s high-speed setting
- Stated item weight is 6.1 lb, above DEKOPRO’s stated 2.5 lb
Best for: New homeowners and occasional DIYers who want a ready-to-use assortment of common bits and a case in the same kit.
Not ideal for: Buyers who need a larger chuck, faster drilling range, a lighter stated tool or a battery suited to long uninterrupted sessions.
Bottom line: We recommend BLACK+DECKER when accessory variety and screwdriving control matter more than chuck size, speed range or a lighter kit.
“We recommend BLACK+DECKER when accessory variety and screwdriving control matter more than chuck size, speed range or a lighter kit.”
DEKOPRO 20V Cordless Drill Set with Battery and Charger
For quick repairs and lighter projects, the DEKOPRO stands out for a simple reason: its stated weight is 2.5 lb, substantially below the BLACK+DECKER kit’s 6.1 lb. That can make a difference when we are working overhead, carrying the drill between rooms or handling a string of small assembly tasks. Its 18+1 torque settings also give us useful adjustment for fastening, and the two variable speed ranges cover both slower control and faster everyday drilling.The kit includes a 1.5Ah battery, charger, ten drill bits, ten screwdriver bits and a magnetic bit holder. That is a practical starter selection, though it is much smaller than BLACK+DECKER’s 100-piece assortment. DEWALT offers a 1/2-inch chuck and two batteries, making it the stronger choice when bit capacity and reduced charging downtime matter more. The supplied DEKOPRO details do not state its chuck size or torque output, so we have less basis to recommend it for more demanding work. We would choose it for manageable household tasks, not masonry or heavy drilling.
Pros:
- Stated weight of 2.5 lb suits lighter and overhead tasks
- 18+1 torque settings allow adjustment for screwdriving
- Two variable speed ranges cover slower fastening and faster drilling
- Includes battery, charger, drill bits, screwdriver bits and magnetic holder
Cons:
- 1.5Ah battery capacity is modest for extended projects
- Accessory assortment is smaller than BLACK+DECKER’s 100-piece set
- Supplied specifications do not state chuck size or torque output
- Not identified as suitable for masonry or heavy-duty drilling
Best for: DIY beginners and anyone handling quick household repairs, furniture assembly or other light tasks where low tool weight matters.
Not ideal for: Buyers who need a documented larger chuck, two batteries, a broad accessory assortment or a drill for masonry and heavy-duty work.
Bottom line: We favor the DEKOPRO for light home jobs where a lower stated weight and useful fastening settings matter more than a larger chuck or expanded kit.
“We favor the DEKOPRO for light home jobs where a lower stated weight and useful fastening settings matter more than a larger chuck or expanded kit.”
As an Amazon Associate we earn from qualifying purchases.
Before You Start
Choose the set for the work you actually expect to do. Most household tasks call for a drill-driver set with a variable-speed trigger, adjustable clutch, keyless chuck, battery, charger, and a small selection of useful bits. A hammer-drill mode is helpful for masonry, but it does not replace the correct masonry bit or safe checks for hidden services. Impact drivers are designed mainly for driving fasteners and usually need compatible hex-shank accessories; they are not a direct substitute for a drill-driver when making ordinary holes.
Compare battery voltage and capacity within the same product range, since brands may use different battery platforms. Check whether the set includes a battery and charger, the chuck’s supported bit sizes, the warranty, and whether replacement batteries and bits are available. A large accessory case can contain many pieces that do not suit your projects, so inspect the actual contents.
Before operating the drill, remove the battery while fitting or changing a bit, unless the manual gives another safe procedure. Wear safety glasses, tie back long hair, and keep loose clothing away from the rotating chuck. Secure the workpiece; do not hold a small piece in your hand while drilling.
Step-by-Step Instructions
Step 1: Match the set to your projects
List the materials and tasks you expect: assembling furniture, drilling wood or metal, or making occasional masonry holes. Choose a drill-driver set for general drilling and screwdriving. If masonry drilling is part of the plan, select a model with hammer action and check that it accepts suitable masonry bits. Compare weight, grip, battery availability, chuck capacity, speed settings, clutch positions, charger, and included accessories.
Check the set’s product details and manual for the exact chuck range and battery contents. Buy the right bit separately if the included assortment does not specify the material or size you need. A bit must fit the chuck and suit the material and task.
Tip: For repeated heavy work, compare a higher-capacity battery and a comfortable grip; for occasional household work, a lighter set may be easier to control.
Check: You can name the materials and jobs the drill is intended for, and the set includes or supports the required battery, charger, chuck size, mode, and bits.
Step 2: Charge the battery and inspect the drill
Read the charging instructions, then charge the battery with its supplied charger. Fit the charged battery until it locks in place. Inspect the drill, chuck, battery, charger, and bits for cracks, damage, or loose parts. Find the forward and reverse selector, speed control, clutch ring, and any drill or hammer setting before starting.
Check that the battery is compatible with the drill and that the bit shank fits the chuck. Do not force a bit into a chuck that does not support its size or type.
Tip: Some batteries show charge with indicator lights; others use the charger’s status light. Check the manual for the signals specific to your set.
Check: The battery is seated, the drill has no visible damage, and you can identify its direction, speed, clutch, and mode controls.
Step 3: Prepare and secure the workpiece
Put on safety glasses and clear the work area. Mark the hole or fastener position with a pencil. Clamp the workpiece to a stable bench or secure it in a vise so it cannot spin or shift. Check that the drill bit can pass through the material without striking the bench, your hand, or anything behind it.
For walls, inspect the area with an appropriate service detector and follow its instructions. Avoid drilling where you cannot rule out wiring, pipes, or gas lines. If you are unsure about the location or the wall construction, stop and seek qualified help.
Tip: Place scrap material under a board when drilling through it, if suitable, to help limit tear-out and protect the surface below.
Check: The workpiece is steady, the mark is clear, the area behind the drilling point is clear, and you have eye protection on.
Step 4: Fit the correct bit
Remove the battery before changing a bit. Choose a bit made for the material and the job: wood bits for wood, metal bits for metal, and masonry bits for masonry. Match the bit diameter to the hole or fastener instructions. For a screw, choose a driver bit that fits its head closely.
Open the chuck, insert the bit straight and securely, then tighten the chuck according to the drill manual. Remove the chuck key if your drill uses one. Refit the battery only after the bit is secured.
Tip: A driver bit that wobbles in the screw head can slip and damage the screw or work surface. Replace it with the correct size and type.
Check: The bit is straight, firmly held, suitable for the material, and free of visible damage.
Step 5: Set direction, speed, and clutch
Use the forward setting for normal drilling and screwdriving. Select the lower speed for more control when starting a hole or driving a screw; use a higher speed only when the drill, bit, and material instructions allow it. Set the drill to its drilling mode for holes. For screws, start with a low clutch setting so the drill stops applying force when resistance reaches that level.
Keep hammer mode off for wood and metal. Use hammer mode only for suitable masonry work with the correct drill and bit, following the manual. Test the clutch and speed on scrap material before working on the finished piece.
Tip: Clutch numbers and speed ranges differ by model. There is no single setting that suits every screw or material; adjust gradually based on the test.
Check: The direction and mode suit the task, and a short test does not strip the screw head or drive the fastener too deep.
Step 6: Drill the hole or drive the screw
Hold the drill with a firm, balanced grip and line the bit up with the mark. Keep your hands away from the rotating bit. Press the trigger gently to begin, then increase pressure only as needed. Keep the drill aligned with the work surface and let the bit cut; do not force it. Pause if the bit binds, overheats, or stops cutting.
To drive a screw, keep the bit seated in the screw head and apply steady, controlled pressure. Release the trigger when the screw reaches the intended depth or the clutch clicks. For a hole, withdraw the bit while it is still turning slowly if the material and drill instructions permit, then release the trigger. Wait for the chuck to stop before setting the drill down.
Tip: If the drill twists suddenly or the bit catches, release the trigger. Do not try to restrain a spinning bit or workpiece with your hand.
Check: The hole is at the marked location and the intended depth, or the screw is seated without a stripped head, split material, or excessive countersinking.
Step 7: Remove the bit and store the set
Release the trigger and wait until all rotation stops. Remove the battery before taking out the bit. Wipe dust from the drill and accessories with a dry cloth, and let any warm parts cool. Store the drill, battery, charger, and bits in a dry place as described in the manual. Keep bits in their case so cutting edges stay protected.
Tip: Follow the battery maker’s storage and charging guidance. Do not store a damaged or unusually hot battery with the set.
Check: The drill is off, the battery is removed if required for storage, and the tools and bits are clean and safely put away.
Common Mistakes to Avoid
- Choosing a set based only on the number of accessories. — Check that the set includes a compatible battery and charger, and choose bits for the materials and fasteners you will use.
- Using a general-purpose bit on material it is not designed for. — Match the bit type and size to the material and task; replace worn or damaged bits.
- Driving screws at high speed or with the clutch set too high. — Start slowly with a low clutch setting, test on scrap, and increase the setting in small steps if the screw stops too soon.
- Holding an unsecured workpiece or drilling without checking what is behind it. — Clamp the workpiece and check the drilling area, especially walls, for hidden services before starting.
Troubleshooting
Problem: The drill does not start.
Solution: Release the trigger, check that the battery is charged and fully seated, then confirm the forward/reverse selector is not centered in its lock position. Consult the manual if it still does not run.
Problem: The bit slips in the chuck.
Solution: Stop the drill and remove the battery. Check that the shank fits the chuck and tighten it as the manual directs. Replace a damaged bit or chuck rather than continuing.
Problem: The screw stops before it is fully seated.
Solution: Check that the driver bit fits the screw head and that the direction is forward. On scrap, raise the clutch one setting at a time or use a lower speed with steady pressure.
Problem: The bit binds, smokes, or becomes unusually hot.
Solution: Release the trigger and let the bit and workpiece cool. Check the bit type and condition, clear accumulated debris when safe, and reduce pressure. If smoke or unusual heat continues, stop and inspect the drill and material before using it again.
What Success Looks Like
The selected set suits the intended materials and tasks, its battery and charger are compatible, and the correct bit is secured in the chuck. The completed hole or screw is in the marked position and at the intended depth. The workpiece remains stable, the material is not visibly damaged, and the drill and accessories are stored safely after use.
Next Steps
After your first task, note which bit, speed, and clutch setting worked so you can repeat them on similar material. Check bits for wear before each job, recharge and store batteries according to their instructions, and replace damaged accessories. For repeated work in a new material, practice on scrap first. Get qualified help for drilling near unknown services or for a task that exceeds the drill’s stated capacity.
Frequently Asked Questions
Can I use a cordless drill to drive screws?
Yes. A drill-driver is designed to drill holes and drive screws. Fit a driver bit that matches the screw head, select forward direction, start at low speed, and use the clutch to limit driving force.
Do I need a hammer drill for concrete or brick?
For many masonry holes, a drill with hammer action and a masonry bit is suitable. Check the drill and bit instructions and the material requirements. Larger or frequent masonry jobs may need a tool with a higher stated capacity.
How do I choose the right drill bit size?
Use the size specified for the hole or fastener. For pilot holes, follow the screw maker’s size guidance or a reliable chart for that screw and material. Test on scrap when the fit or finish matters.
Why does the clutch click before the screw is fully driven?
The clutch may be set too low for that screw or material. Confirm the driver bit fits, then raise the clutch one setting at a time and test on scrap. Stop if the screw strips or the material begins to split.
Can batteries from one drill brand fit another brand’s drill?
Usually, batteries fit only compatible tools in the same product platform. Check the exact model and battery compatibility information from the manufacturer before buying or connecting a battery.
Fall yard work Picks
leaf blowers
As an affiliate, we earn on qualifying purchases.