
To build a DIY workbench, start by planning your design and choosing durable materials like hardwood or treated plywood. Gather essential tools such as saws, drills, and clamps, then carefully measure, cut, and prepare each component. Assemble the frame and secure the top, ensuring everything is square and stable. Finish with protective coatings and add accessories for personalization. If you keep going, you’ll discover detailed steps to create a sturdy and customized workspace.
Key Takeaways
- Plan your workbench design focusing on ergonomics, space optimization, and durability using AI tools and research.
- Gather essential tools and materials, ensuring safety gear and accurate measurements before starting.
- Cut and prepare components carefully, maintaining squareness and securing parts with clamps for precise assembly.
- Assemble the workbench, reinforcing joints, ensuring stability, and securing the top for safety and durability.
- Finish with protective coatings, organize accessories, and implement safety measures to create an efficient, personalized workspace.

FLEXIMOUNTS Workbench Legs, Heavy Duty Workbench Kit for DIY Custom, Maximum 96" Length, 48" Width, 35.4" Height for Garage Storage, Workshop, Shelving, Lumber Not Included
- Complete Workbench Kit: Includes legs, hardware, and instructions
- Heavy-Duty Steel Construction: Durable, rust-proof, and load-bearing
- Customizable Size and Color: Build up to 8ft long and 4ft wide
As an affiliate, we earn on qualifying purchases.
As an affiliate, we earn on qualifying purchases.
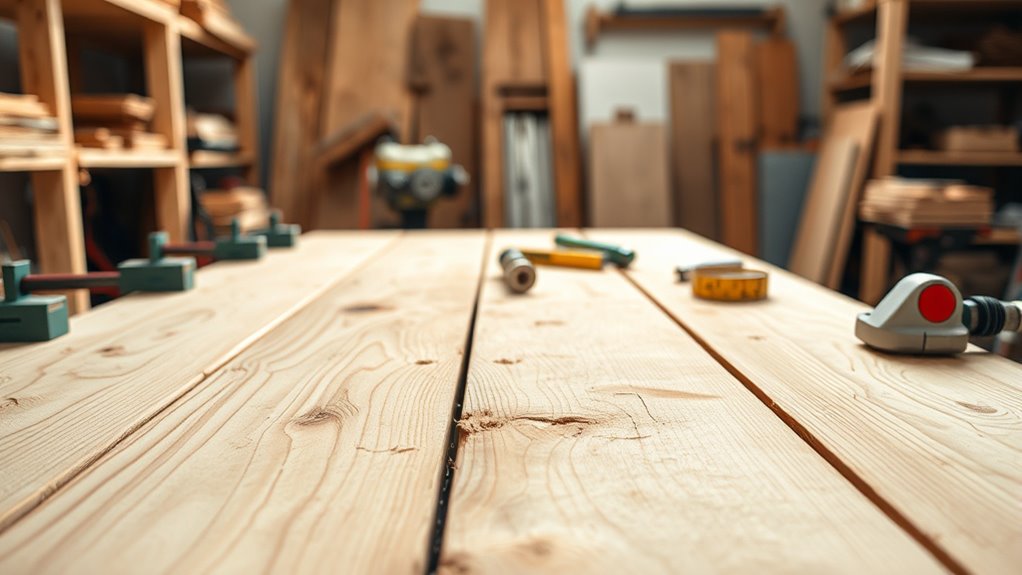
Planning Your Workbench: Design and Material Selection
Before you begin building your workbench, it’s important to plan its design and choose the right materials. Focus on ergonomic comfort to guarantee you can work efficiently without strain, which means designing a height that suits your tasks and body. Space optimization is also key; measure your workspace carefully to create a layout that maximizes functionality without clutter. Select durable materials like sturdy hardwood or treated plywood that can withstand heavy use and provide stability. Consider adding features such as adjustable height or built-in storage to enhance usability. Incorporating energy-efficient components into your workbench design can also reduce power consumption and promote sustainability. Thoughtful planning at this stage ensures your workbench is comfortable, efficient, and tailored to your space, setting a solid foundation for the entire project. Additionally, researching successful DIY projects can offer valuable insights into effective design strategies. Exploring natural materials like bamboo or reclaimed wood can further enhance sustainability and aesthetic appeal in your workbench design. Incorporating AI tools into your planning process can help simulate different designs and optimize your layout effectively. For example, understanding visual and auditory cues from speech therapy techniques can inspire innovative features that improve workflow ergonomics and user interaction.
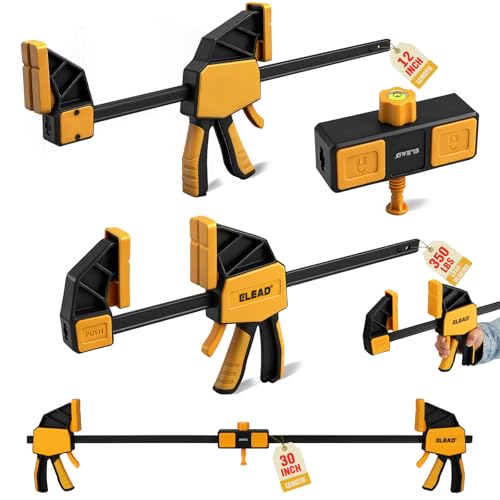
3-Pack 12-Inch Bar Clamp for Woodworking with Leveling Block Clamp, 350LBS Load Limit, Heavy Duty Quick-Release Wood Clamps/Spreader, One-Handed F Clamp for Wood Working
- High Clamping Capacity: 350 lbs maximum force with non-marring pads
- Universal Compatibility: Fits most 6x18mm I-bars for customization
- Heavy Duty Construction: Steel rails and reinforced nylon handles for durability
As an affiliate, we earn on qualifying purchases.
As an affiliate, we earn on qualifying purchases.
Gathering Tools and Supplies
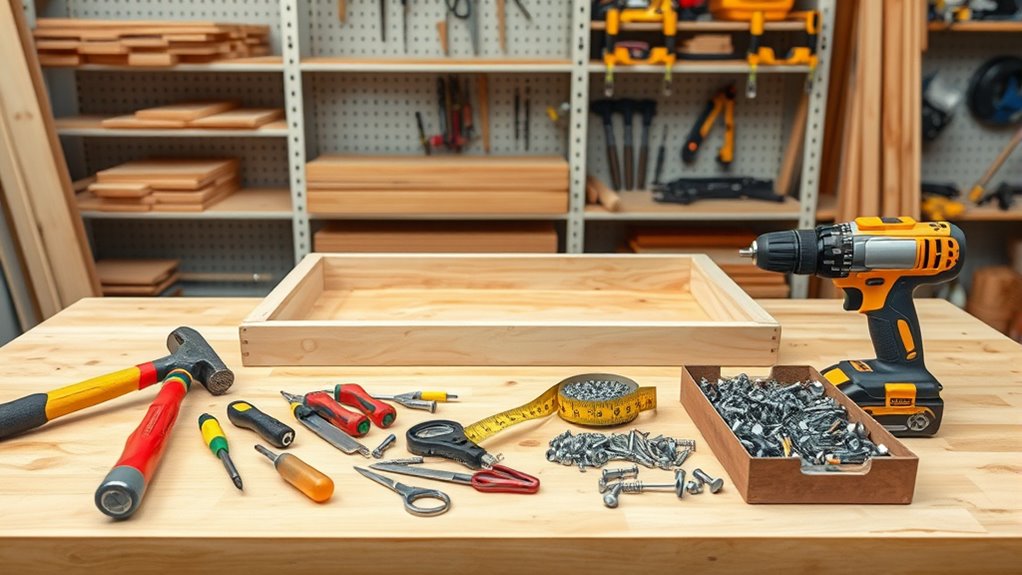
To build a sturdy workbench, you need to gather the right tools and supplies first. Start by assembling essential hand tools like a hammer, screwdrivers, a tape measure, and a square. Power tools such as a drill and saw will make the process quicker and more precise. Remember, tool safety is vital—always wear safety glasses and handle tools carefully. For supplies, visit local hardware stores or browse online supply sources to find quality lumber, screws, nails, and brackets. Double-check your list to make sure you have everything before you begin. Having the right tools and supplies on hand helps you work efficiently and safely, setting a solid foundation for your project. Proper preparation minimizes delays and keeps your focus on building a durable workbench. Additionally, understanding AI’s role in business efficiency can inspire innovative ways to streamline your project management and resource allocation. Employing the right project planning strategies can further enhance your workflow and ensure timely completion.
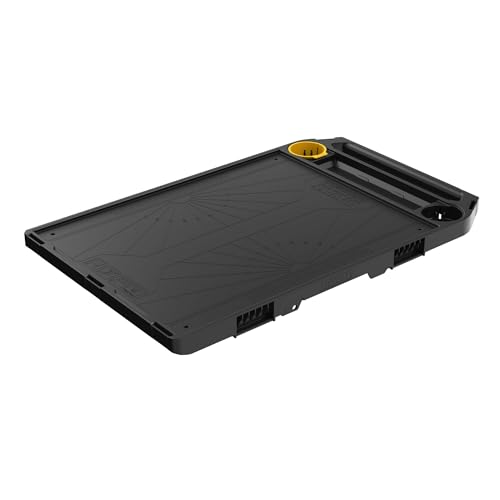
DEWALT Tough System 2.0 DXL Workbench DWST08550-1
- Series Type: DXL Tough System 2.0
- Work Surface Thickness: 18.5 inches plywood top
- Load Capacity: Supports up to 88.2 lbs
As an affiliate, we earn on qualifying purchases.
As an affiliate, we earn on qualifying purchases.
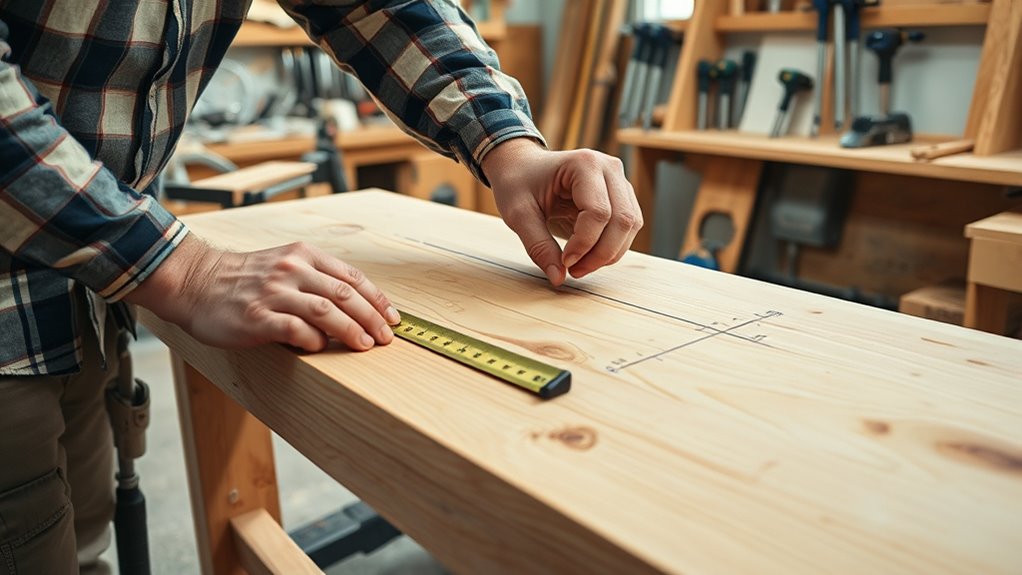
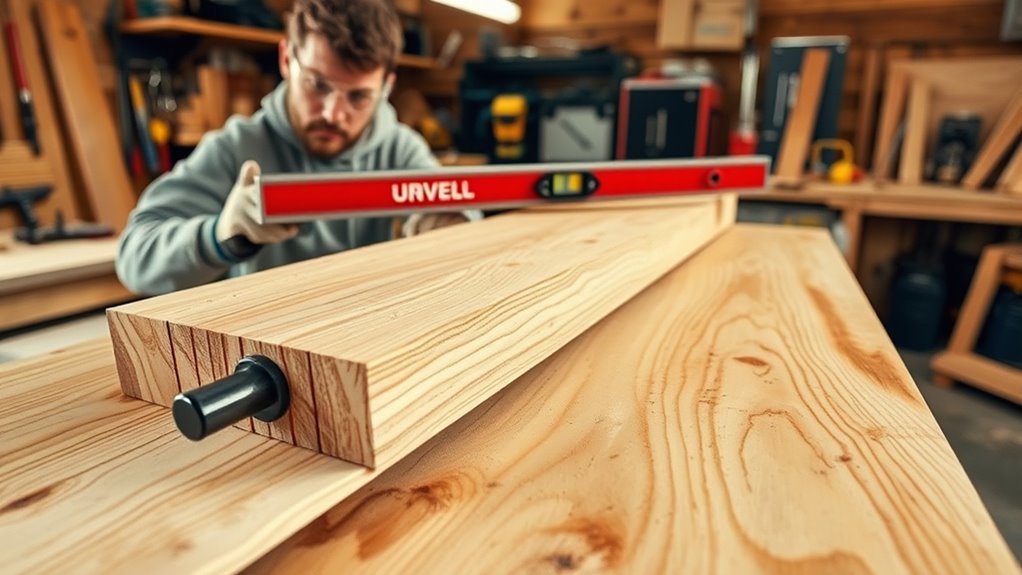
Cutting and Preparing the Components
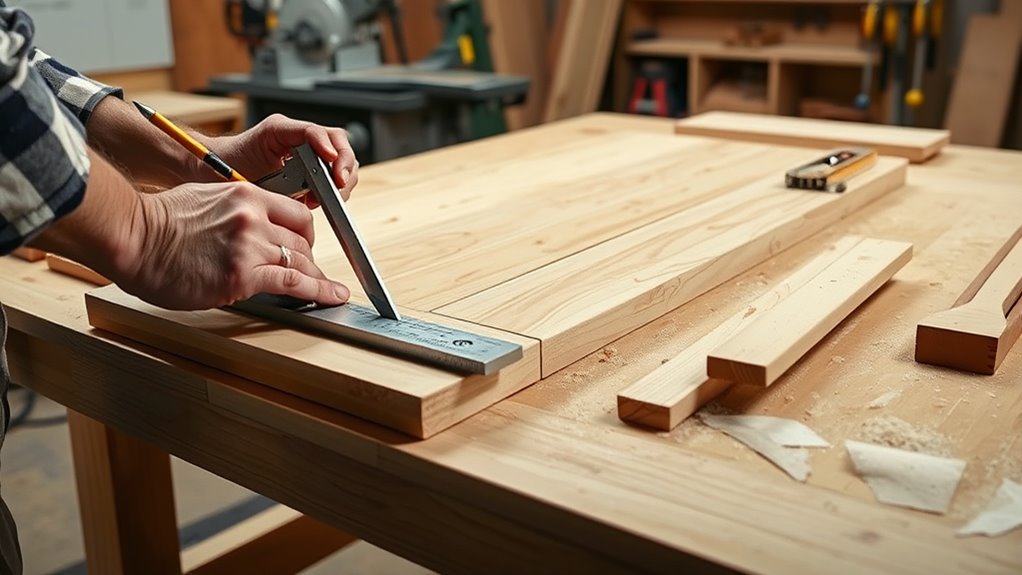
Once you have all your materials ready, it’s time to cut and prepare the components for your workbench. Safety precautions are essential—wear safety goggles and gloves, and work in a well-ventilated area. Follow these measurement techniques for accuracy:
- Use a tape measure for precise lengths, double-checking each measurement before cutting.
- Mark your cuts clearly with a pencil or chalk, ensuring straight lines with a square or ruler.
- Cut slowly and steadily, using the appropriate saw for each material to prevent splintering or uneven edges.
- Keep in mind the importance of ventilation considerations to ensure a safe and comfortable workspace during construction.
- Proper measurement techniques and safe practices help ensure your components fit perfectly and your project stays safe. Taking your time during this step sets a solid foundation for the rest of your build. Additionally, understanding essential oils for respiratory health can promote a healthier environment in your workshop.
- Being aware of electric bike conversion kits and their components can inspire innovative ideas for customizing your workspace setup or tools.

Plasti Dip Original Dip Can, Red, 14.5 fl oz, Multi-Purpose Peelable Rubber Coating, Flexible Non-Slip Grip Coating for Tool Handles, Household Objects, Workbench Use & DIY Projects
- Color and Size: Red, 14.5 fl oz can
- Flexible Rubber Coating: Creates air-dry, peelable rubber layer
- Removable Finish: Peels off easily from surfaces
As an affiliate, we earn on qualifying purchases.
As an affiliate, we earn on qualifying purchases.
Assembling the Frame and Top
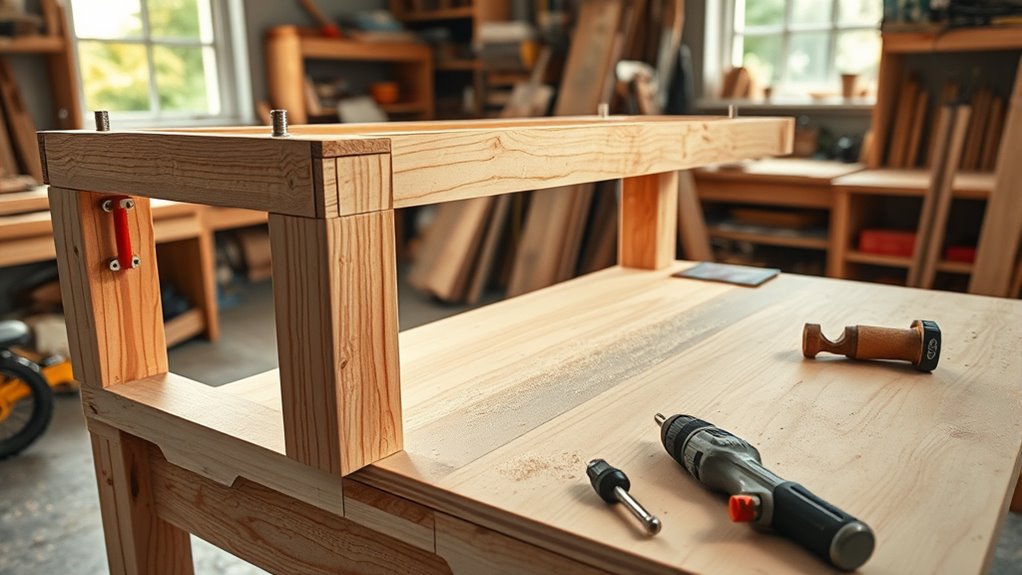
Assembling the frame and top is a straightforward process that requires careful alignment and secure fastening. Begin by positioning your frame components, ensuring each piece is square for proper wood jointing. Use clamps to hold parts steady as you drill pilot holes and drive screws or bolts, maintaining even weight distribution across the structure. When attaching the top, make sure it sits flush on the frame, adjusting as needed to prevent wobbling. Securing the top properly is vital for stability and safety during work. Pay attention to the tool compatibility of fasteners and hardware to ensure a secure build. Properly aligned joints and adequate reinforcement will contribute to a stable and long-lasting workbench that can withstand rigorous use. Additionally, checking for material strength can help you select the right fasteners for durability and safety.
Finishing Touches and Customizations
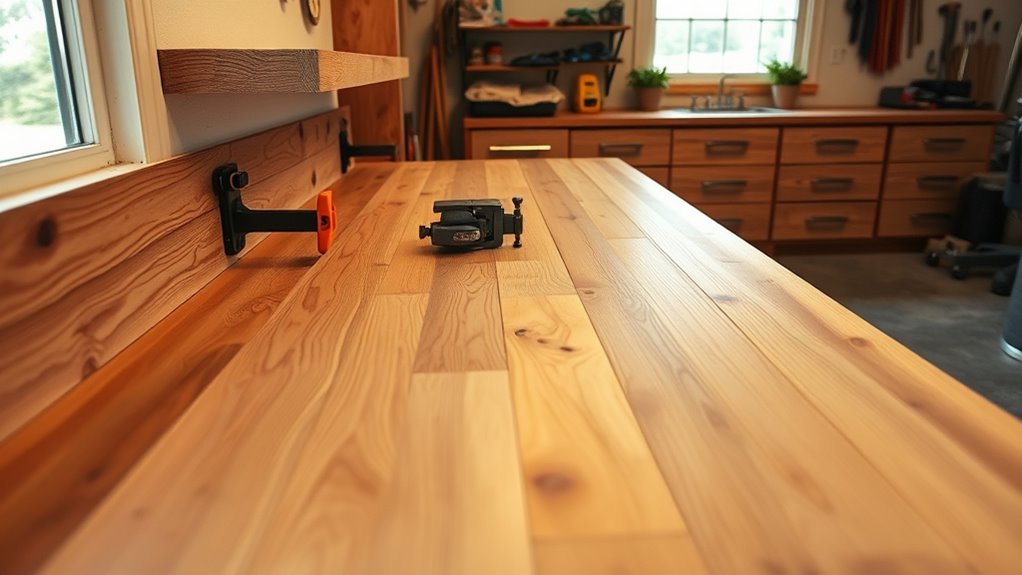
Once your workbench is assembled, you can protect its surface with a durable coating to extend its lifespan. Adding accessories like clamps or storage solutions helps customize it for your specific projects. These finishing touches make your workbench more functional and tailored to your needs. Incorporating ergonomic design principles can also improve comfort and efficiency during your projects. Considering proper workspace organization can further enhance your workflow and reduce fatigue over time. Additionally, selecting appropriate lighting can improve visibility and safety while working. Implementing ergonomic tools and accessories can also help prevent strain and injury during prolonged use, especially when considering workstation ergonomics to optimize your setup.
Adding Protective Coatings
Have you considered adding protective coatings to extend your workbench’s lifespan and improve its appearance? Protective coatings like wood stain or a polyurethane finish can make a big difference. Here are three key benefits:
- Enhance durability – Protects against scratches, moisture, and stains.
- Improve appearance – Adds color or a glossy sheen for a polished look.
- Ease of maintenance – Makes cleaning simpler and prevents damage over time.
Start by applying a wood stain if you want to add color or highlight the wood grain. Once dry, coat it with a polyurethane finish for a tough, protective layer. This combination ensures your workbench looks great and lasts for years.
Personalizing With Accessories
After applying protective coatings, adding accessories allows you to customize your workbench to suit your specific needs and style. Incorporate storage solutions like pegboards, shelves, or drawers to keep tools organized and accessible. Decorative elements such as colorful labels or personalized plaques can give your workspace character. Consider these options to enhance functionality and aesthetics:
| Storage Solutions | Decorative Elements |
|---|---|
| Pegboard for tools | Custom paint or stencils |
| Under-bench drawers | Creative signage |
| Shelving units | Unique hardware accents |
| Magnetic strips | Personal photos |
| Hooks and holders | Themed accessories |
These accessories make your workbench more efficient and visually appealing, turning it into a workspace that reflects your personality and workflow. Additionally, ergonomic design principles can help reduce fatigue and improve comfort during long work sessions.
Tips for Safe and Stable Use
Ensuring your workbench is safe and stable is crucial for a productive and accident-free workspace. To achieve this, focus on three key tips.
Maintaining a safe, stable workbench is key to a productive, accident-free workspace.
- Always wear safety gear like goggles and gloves to protect yourself during work.
- Distribute weight evenly across the surface to prevent wobbling or tipping. Use clamps or additional supports if needed.
- Regularly check and tighten fasteners to maintain stability over time.
- Consider using a sturdy work surface designed to withstand heavy loads and rough handling, which is essential for workshop safety and durability.
Frequently Asked Questions
How Do I Choose the Right Size for My Workspace?
You should start by evaluating your workspace dimensions and how much room you need for tools and materials. Think about ergonomic considerations—your workbench height should allow comfortable posture to prevent strain. Measure your available space carefully, then choose a size that fits well without overcrowding. Prioritize functionality over size, ensuring you have enough room to work efficiently and comfortably. This way, your workspace supports both productivity and your health.
Which Materials Are Best for a Durable Workbench?
You should choose sturdy materials like hardwoods such as oak or maple for a durable wood top, as they resist dents and wear. Alternatively, consider metal options like steel or aluminum for added strength and longevity. Both materials can handle heavy tools and woodworking tasks, ensuring your workbench stays stable over time. Combining a wooden top with metal legs also boosts durability, giving you a reliable workspace.
What Budget-Friendly Options Are Available for Building a Workbench?
Budget-friendly building begins with clever choices. Consider recycled materials like old doors or pallets for cost-saving, sustainable solutions. A modular design allows you to customize and expand your workbench without overspending, making it versatile and economical. By blending budget-conscious buys with recycled resources, you create a durable, dependable workspace that doesn’t break the bank. This approach maximizes your money and minimizes waste, giving you a sturdy, functional workbench without the hefty price tag.
How Can I Customize My Workbench for Specific Projects?
You can customize your workbench for specific projects by adding storage solutions like shelves or drawers to keep tools organized. Incorporate an ergonomic design by adjusting height or including a comfortable, anti-fatigue mat to reduce strain. Consider modular components so you can reconfigure the workspace as needed. Tailoring these features guarantees your workbench supports your project requirements efficiently and comfortably, making your DIY experience more productive and enjoyable.
What Maintenance Is Required to Keep the Workbench in Good Condition?
Think of your workbench like a trusted companion; it needs care to serve you well. You should establish a regular cleaning routine, wiping down surfaces after each use to prevent dust and debris buildup. Apply surface protection, like sealants or mats, to keep the wood from warping or damage. Check for loose screws or splinters periodically, and address issues promptly to maintain its durability and confirm it remains a reliable workspace.
Conclusion
Building your own workbench is a rewarding project that boosts your DIY skills. Did you know that a sturdy work surface can increase your workspace efficiency by up to 30%? By following these simple steps, you’ll create a durable, personalized bench perfect for any project. Just remember to prioritize safety and stability throughout the process. With a little patience, you’ll enjoy a customized workspace that lasts for years to come.