To replace a light switch or outlet safely, start by turning off the power at the circuit breaker and testing to verify no current is flowing. Remove the faceplate and device, then carefully disconnect the wires, noting their connections. Connect the new device, making sure all wires are secure and properly attached to the correct terminals. Double-check your work, restore power, and test the device’s functionality. If you follow these steps, you’ll gain a clear understanding of the process.
Key Takeaways
- Turn off the correct circuit breaker and verify power is off with a voltage tester.
- Gather essential tools, including screwdrivers, wire strippers, and safety gear, before starting.
- Identify and connect ground, hot, and neutral wires correctly using proper color coding.
- Remove the old device carefully, ensuring no wires touch or are loose during disconnection.
- Securely connect wires to the new switch or outlet, then test before restoring power.
Understanding Your Electrical System
Have you ever wondered how the electrical system in your home works? Understanding it begins with knowing the circuit breaker location. Your main panel houses the circuit breakers that control power to different areas. When a fault occurs, a breaker trips, cutting off electricity for safety. It’s essential to guarantee your electrical system complies with electrical code requirements, which specify proper wiring and breaker ratings. Familiarizing yourself with the layout of your electrical panel helps you identify the right breaker before working on outlets or switches. Regular inspections for signs of wear or outdated wiring can prevent hazards. Knowing where your circuit breakers are and how they function keeps you safe and ensures your electrical system remains reliable and compliant with local codes. Electrical system knowledge is vital for troubleshooting and ensuring safety during any electrical work. Additionally, understanding circuit protection helps you recognize the importance of proper breaker selection and maintenance. Being aware of energetic alignment in your environment can also influence your comfort and safety when performing electrical tasks. For example, understanding how proper wiring techniques ensure safety and efficiency can make your electrical projects more successful. Staying informed about electrical safety practices further enhances your ability to work confidently and securely on electrical components.
Gathering the Necessary Tools and Materials

Before you start your electrical project, you need to gather all the essential tools and materials. Make a checklist to guarantee you have everything from screwdrivers to wire strippers and the proper wires and connectors. Having the right items ready will make the process smoother and safer. Additionally, understanding free floating wiring concepts can help you troubleshoot and complete your project more effectively. Being familiar with air purifier maintenance guidelines can also assist in ensuring the safety and efficiency of your work environment during the project. It’s also helpful to review electrical codes to ensure your work complies with safety standards. Proper knowledge of vetted safety practices can further reduce risks during installation. Consulting load‑planning tools can help you determine the correct size of the new switch or outlet, ensuring a safe and reliable installation.
Tools Checklist
Gathering the right tools and materials is crucial before starting any electrical project. First, verify you have a screwdriver set, wire strippers, and a voltage tester to safely handle connections. If you’re considering wireless options, include a compatible smart switch tester. Having decorative covers on hand allows you to finish the job neatly and improve aesthetics. Pliers, a utility knife, and electrical tape are also indispensable for securing wiring and insulating connections. Don’t forget safety gear like gloves and safety glasses. Double-check that your tools are in good condition to prevent accidents. Proper preparation keeps the process smooth and minimizes risks. Additionally, understanding electrical safety best practices is essential for your protection during the task. Being familiar with software quality assurance principles can help ensure your work adheres to safety standards and reduces potential hazards. Using the proper tools and materials can significantly improve the efficiency and safety of your project. Incorporating knowledge of regulatory compliance ensures your work meets local electrical codes and standards. With these tools ready, you’ll be well-equipped to replace a switch or outlet safely and efficiently.
Materials Needed
To successfully complete an electrical project, you need to assemble all the necessary materials beforehand. Having the right tools and parts guarantees safety and efficiency. You’ll need basic items like screwdrivers, wire strippers, and voltage testers. Additionally, confirm you have compatible circuit breakers and outlets that meet electrical codes. It’s essential to choose components rated for your home’s wiring and load requirements. Here’s a quick overview:
| Material | Quantity/Specification | Purpose |
|---|---|---|
| Circuit Breakers | As needed | Safety shutoff for circuits |
| Outlet/Switch | Replacement unit | Function replacement |
| Wire Strippers | 1 set | Remove insulation safely |
| Screwdrivers | Flat and Phillips | Secure connections |
| Voltage Tester | 1 | Confirm power is off |
Gather these materials to ensure a safe, code-compliant replacement. Proper understanding of electrical wiring is crucial for a safe and effective upgrade, especially when working with electrical safety protocols to prevent accidents. Additionally, reviewing proper installation techniques can help avoid common wiring mistakes. Familiarity with circuit breaker functions can also enhance your safety during the process. Being aware of grounding and bonding principles is also important for maintaining safety standards.
Turning Off Power and Ensuring Safety

Turning off the power before working on electrical systems is vital for safety. First, locate your circuit breaker panel and identify the correct breaker—use circuit breaker selection to guarantee you’re shutting off the right circuit. Once identified, switch it off completely. To confirm, test the outlet or switch with a voltage tester; this verifies grounding safety by ensuring no current flows. Never assume the power is off; always double-check. If you’re unsure which breaker to turn off, turn off the main breaker to cut power to the entire house. Taking these precautions minimizes the risk of electric shock. Proper circuit breaker identification is essential to avoid accidental contact with live wires. Remember, grounding safety and proper circuit breaker selection are essential steps in creating a safe working environment during electrical repairs. Incorporating smart home technology can also help monitor electrical systems and enhance safety protocols in your home. Additionally, understanding grounding safety practices helps prevent electrical hazards and protects both people and equipment. Regular electrical inspections can further identify potential issues before they become hazards. Ensuring that your electrical system is properly grounded can significantly reduce the risk of electrical shock and fire.
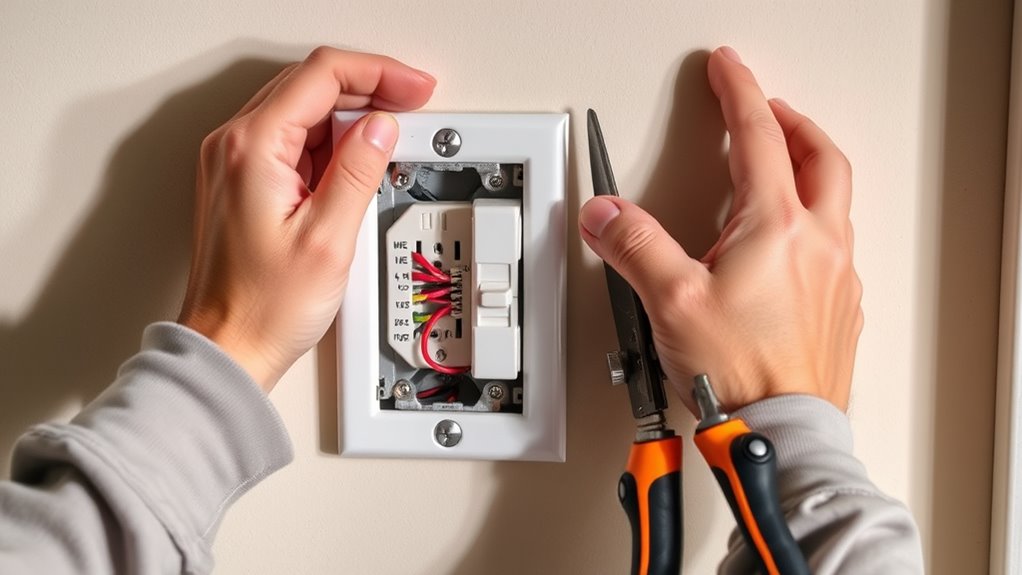
Removing the Old Switch or Outlet

Before removing the old switch or outlet, make sure the power is completely turned off and confirmed with a voltage tester. Safety precautions are essential to avoid shocks. Gather your tools, such as screwdrivers and needle-nose pliers, and prepare your workspace. Carefully unscrew the faceplate, then loosen the mounting screws holding the switch or outlet. Gently pull the device out of the electrical box, supporting it to avoid damage. Use the following table to visualize the process:
| Step | Action | Tools Needed |
|---|---|---|
| Remove faceplate | Unscrew and take off | Screwdriver |
| Loosen device | Unscrew device from the box | Screwdriver |
| Disconnect wires | Detach wires carefully | Pliers, screwdriver |
Stay alert, and handle wires with care during removal. Additionally, understanding the electrical wiring involved can help ensure a safe and effective replacement process.
Identifying Wires and Connections
Understanding wire color coding helps you quickly identify each wire’s purpose. You’ll also need to recognize different connections to guarantee safety and proper setup. Being confident with these basics makes working with electrical wires safer and more straightforward.
Wire Color Coding
Have you ever wondered how electricians quickly identify wires in a complex electrical system? It all comes down to color coding. Wires are marked with specific colors to indicate their purpose, making it easier to work safely and accurately. The ground wire, typically green or bare copper, is essential for safety, providing a path to ground in case of a fault. Hot wires are usually black or red, carrying current from the power source to devices. Neutral wires are generally white, completing the circuit. Understanding this color coding helps you distinguish between different wires, reducing the risk of mistakes or electrical shocks. Always verify the wiring color codes before handling any electrical work, and remember, proper identification is key to safe and effective repairs.
Connection Identification
Once you recognize the color codes on wires, the next step is accurately identifying individual wires and connections within the system. Understanding wire color significance helps you determine each wire’s function, like hot, neutral, or ground. Use connection diagrams to visualize how wires connect, reducing errors. Focus on these key points:
- Hot wires are typically black or red, carrying current to devices.
- Neutral wires are usually white, completing the circuit.
- Ground wires are green or bare copper, providing safety.
- Always verify connections with diagrams before making any changes.
Proper connection identification guarantees safe handling and correct wiring. Consulting connection diagrams is vital, especially when wires aren’t clearly labeled. Accurate identification minimizes risks and guarantees your repair or replacement goes smoothly.
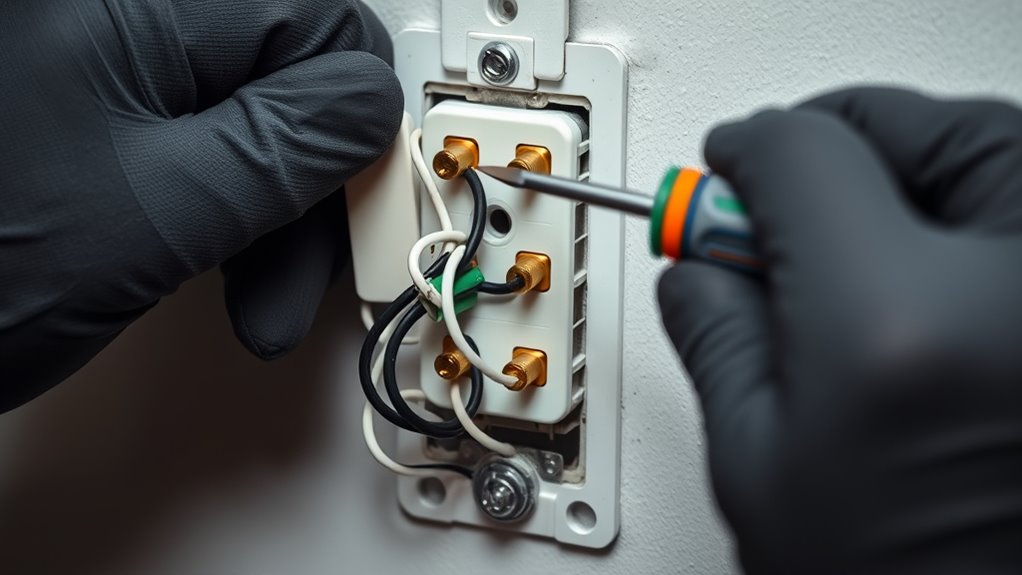
Connecting the New Switch or Outlet

Are you ready to connect your new switch or outlet? First, verify you follow proper grounding techniques to keep everything safe. Connect the ground wire—usually green or bare copper—to the green grounding screw. Next, match the wire color standards: black or red wires are hot, white wires are neutral. Attach the hot wire to the brass or gold terminal on the switch or outlet, and connect the neutral wire to the silver terminal. Make sure all wire connections are snug but not overly tight. Double-check that no wires are touching each other or the device’s metal parts. Properly connecting the wires according to these standards ensures safety and functionality. Once everything’s in place, you’re ready to proceed to securing the device and restoring power.
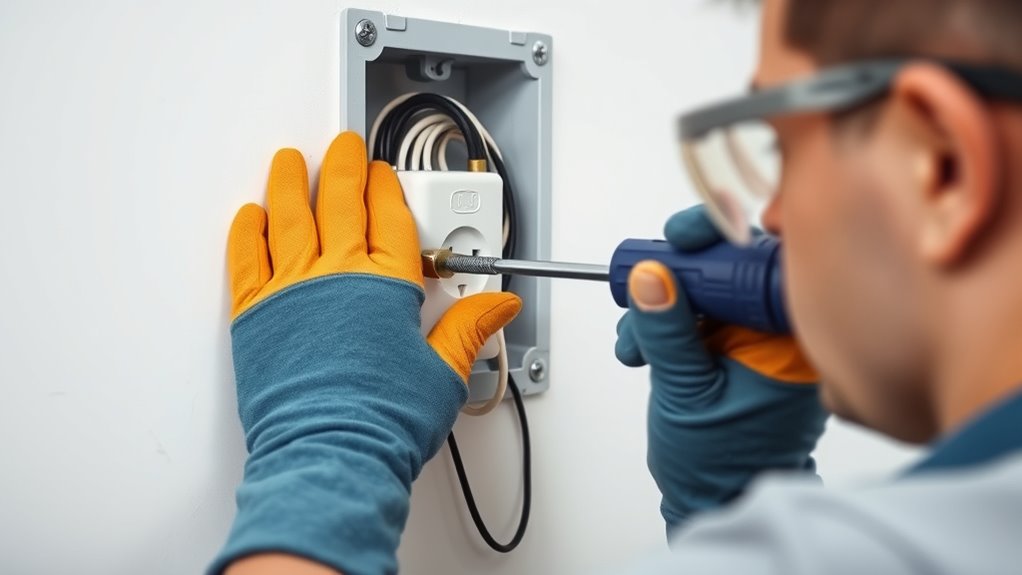
Securing the Device and Restoring Power

After confirming all wiring connections are secure and correct, you can proceed to secure the device in its electrical box. Ensure grounding safety by attaching the ground wire firmly to the device’s grounding screw. Proper device securing prevents movement and damage over time. Take these steps:
Secure all wiring connections before mounting the device to ensure safety and stability.
- Tighten the device screws to secure it flush against the electrical box
- Double-check grounding connections for safety
- Confirm no wires are pinched or strained
- Gently push the device into the box, making sure wires aren’t pinched
Once secured, replace the faceplate and tighten screws. This guarantees grounding safety, proper device securing, and a neat finish. Restoring power is the final step, but always double-check your work before turning the circuit back on.
Testing the New Switch or Outlet

Before restoring power, it’s important to verify that your new switch or outlet functions correctly. You should perform circuit testing and voltage verification to ensure safety. Use a multimeter or voltage tester to check the outlet or switch. Confirm that the voltage matches your home’s standard (typically around 120V). Proper testing prevents electrical hazards and confirms the device is installed correctly. Here’s a quick meaning check:
| Purpose | Method |
|---|---|
| Confirm power flow | Circuit testing |
| Ensure safety | Voltage verification |
| Validate installation | Multimeter or tester use |
| Detect faults | Check for proper voltage |
| Final confirmation | Test device operation |
These steps ensure your work is safe and the device functions properly before you close up.
Troubleshooting Common Issues
When troubleshooting common issues with switches and outlets, the key is to stay systematic and patient. Start by checking for loose connections, which are often the cause of flickering lights or non-functioning outlets. Look out for common wiring mistakes, like reversed hot and neutral wires, that may cause issues. Use a voltage tester to verify power flow and identify problems quickly. If flickering lights occur, it could be due to loose wiring or a faulty switch. Examine the switch or outlet for secure connections and damaged parts. Remember, safety comes first—turn off power before inspecting or adjusting wiring.
Stay systematic and patient when troubleshooting switches and outlets, checking connections, wiring, and power safety first.
- Check all wire connections for tightness
- Confirm the switch or outlet is compatible and correctly installed
- Inspect for damaged or burnt components
- Test for proper voltage and grounding
Frequently Asked Questions
Can I Replace a Light Switch Without Turning off the Circuit Breaker?
You shouldn’t replace a light switch without turning off the circuit breaker because of grounding safety and wire color codes. Working live risks electric shock, especially since wire colors indicate their purpose—hot, neutral, or ground. Always switch off the breaker before handling wiring, double-check with a tester to confirm power is off, and follow proper grounding safety procedures to prevent accidents and ensure a safe, effective replacement.
What Safety Gear Should I Wear During Electrical Work?
Think of electrical work as dancing with danger—you need your safety gear to stay in step. You should wear personal protective equipment, like safety goggles to shield your eyes, and electrical gloves to guard against shocks. These items act as your armor, keeping you safe while you handle live wires. Always prioritize your safety gear first; it’s your shield in the unpredictable rhythm of electrical work.
How Do I Identify a Faulty Wire or Connection?
To identify a faulty wire or connection, start by testing connections with a multimeter or voltage tester. Look for loose or disconnected wires, corrosion, or burn marks around terminals. When testing, make certain power is off before inspecting, then turn it on to check for proper voltage at each connection. If you notice inconsistent readings or no power where it should be, you’ve found your fault. Always double-check your work for safety.
Is It Safe to Work on Electrical Outlets Behind Furniture?
It’s not safe to work on electrical outlets behind furniture due to access challenges and potential furniture obstruction. Moving the furniture away gives you clear, safe access to the outlet, reducing the risk of accidents. If you can’t move the furniture, consider hiring a professional electrician. Always turn off power at the circuit breaker before working on any outlet, and don’t attempt repairs if you’re unsure about the process.
How Do I Dispose of Old Electrical Components Properly?
You should always prioritize electrical recycling and proper disposal of old electrical components. First, disconnect and safely handle the items, avoiding damage. Then, take them to a certified electronic waste recycling center or collection event in your area. Never throw electrical parts like outlets or switches in regular trash, as they contain hazardous materials. Proper disposal guarantees the environment and ensures safe handling of potentially harmful substances.
Conclusion
By following these steps carefully, you can replace a switch or outlet safely and confidently. Remember, understanding your system and staying cautious are key. Are you ready to tackle your electrical project and enjoy the satisfaction of a job well done? With patience and attention to detail, you’ll guarantee everything works perfectly. Always prioritize safety—because a little care goes a long way in preventing accidents and keeping your home secure.