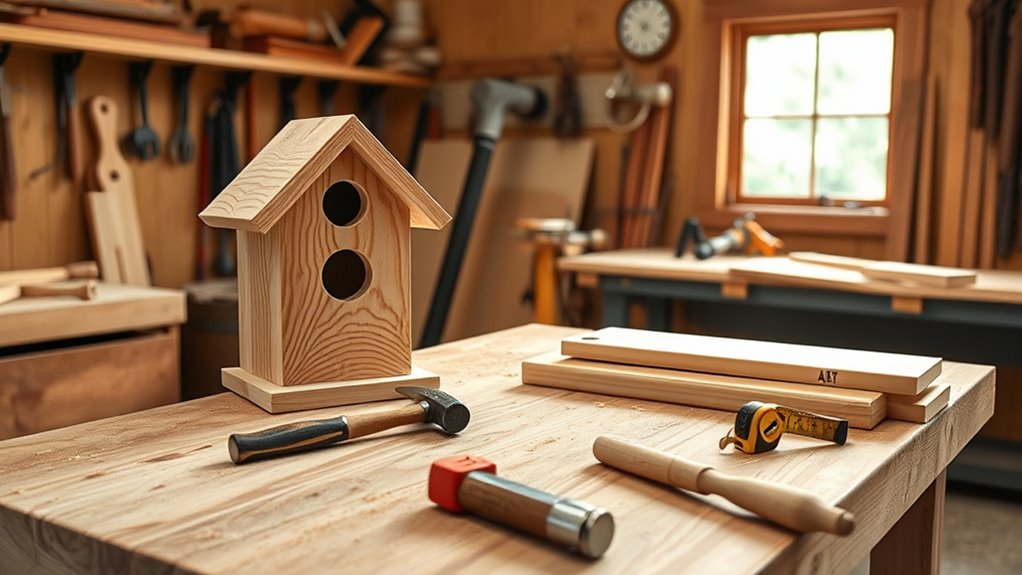
Getting started in woodworking is easier than you think. Begin with essential hand tools like a hammer, saw, tape measure, square, and chisels, along with power tools such as a drill, circular saw, and sander. Always follow safety practices—wear glasses, gloves, and a mask. Start simple projects like a box or birdhouse to build skills and confidence. As you practice accurate sawing and joinery, you’ll learn more about materials and finishing techniques that will enhance your work.
Key Takeaways
- Start with basic hand tools like a hammer, tape measure, and saw to develop fundamental skills safely.
- Choose simple projects such as a wooden box or birdhouse to build confidence and practice measuring, cutting, and assembly.
- Learn proper measuring, marking, and sawing techniques for accuracy and cleaner joints in your projects.
- Use beginner-friendly power tools like a cordless drill and orbital sander to increase efficiency and achieve smooth finishes.
- Utilize online tutorials, books, and local classes to expand your knowledge and stay motivated in your woodworking journey.
Essential Hand Tools Every Beginner Should Have
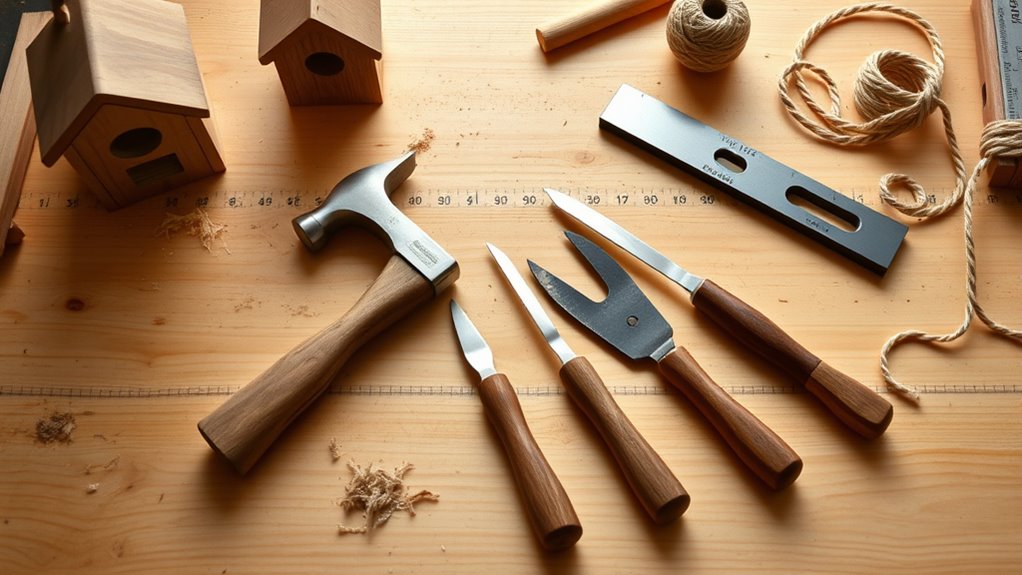
Starting your woodworking journey with the right hand tools can make all the difference in building confidence and achieving quality results. First, you need a hammer—it’s essential for driving nails and assembling projects. A hand saw will help you make straight or angled cuts in wood with control. Keep a tape measure nearby for accurate measurements and marking your cuts precisely. A rafter or speed square is invaluable for checking angles and guiding your saw cuts. Chisels are versatile for shaping wood, carving details, and creating joinery. These tools form the foundation of your toolkit and will serve you well in nearly every project. Invest in quality, ergonomic tools that feel good in your hand, and you’ll find woodworking more enjoyable and successful. Additionally, understanding projector technology will help you choose the right equipment for your home cinema setup. Exploring sound healing science can also enhance your workshop environment by creating a calming atmosphere that promotes focus and creativity. Learning about wood properties can further improve your project outcomes by helping you select the best materials for each task. Moreover, familiarizing yourself with AI applications in learning can offer innovative ways to access tutorials and guidance as you develop your skills. Developing a solid understanding of safety practices is crucial to ensure a safe and enjoyable woodworking experience.
Fundamental Power Tools for Starting Out
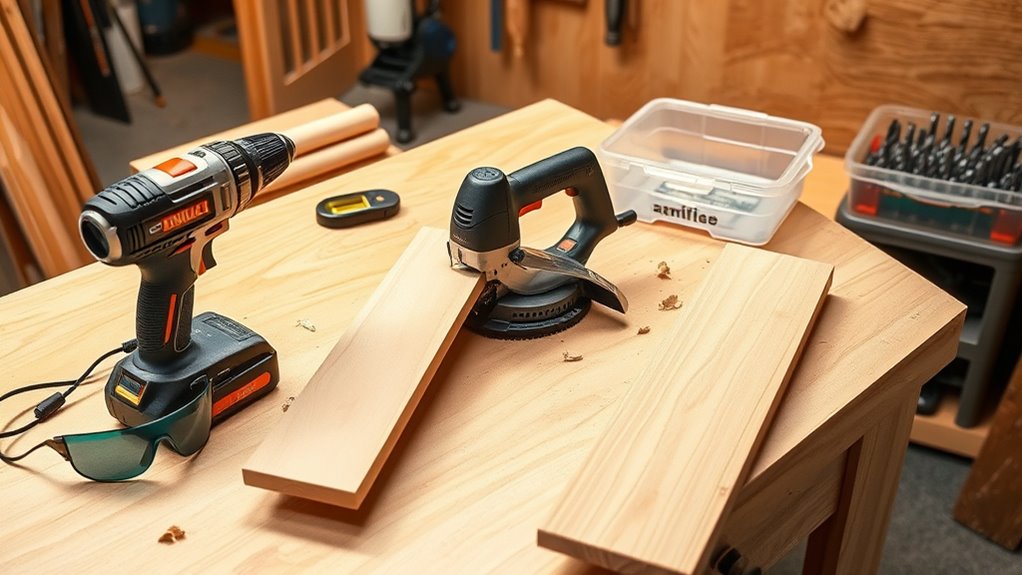
To build your woodworking skills efficiently, you’ll want to familiarize yourself with essential power tools that make your projects quicker and more precise. A cordless drill/driver is your go-to for drilling holes and driving screws easily, saving you time and effort. The circular saw is perfect for making quick crosscuts and ripping lumber to size, especially when working with larger pieces. A miter saw helps you cut accurate angles and crosscuts, which are vital for joints and framing. The random orbit sander ensures smooth surfaces with minimal effort, giving your projects a professional finish. Starting with these tools allows you to complete a wide range of beginner projects efficiently, boosting your confidence and helping you develop essential skills for more advanced woodworking. Additionally, understanding ventilation considerations can improve your workspace safety and comfort during projects. Proper ventilation helps reduce dust and fumes, creating a safer environment for your craft. Incorporating dust collection systems can further improve your workspace cleanliness and health. Remember that safety precautions are crucial when working with power tools to prevent accidents and injuries. Being aware of piercing aftercare can help you maintain your body jewelry in good condition and prevent infections, much like keeping your workspace clean and safe in woodworking.
Safety Gear and Best Practices in the Workshop
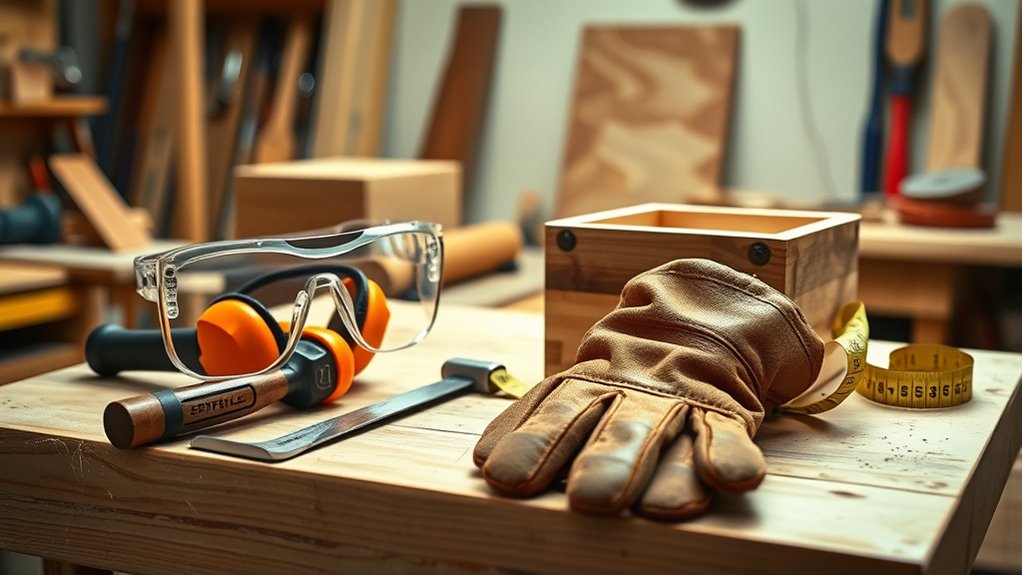
Using power tools makes woodworking faster and more precise, but safety gear and proper practices are essential to prevent accidents. You need to protect yourself at all times in the workshop. Always wear safety glasses to shield your eyes from flying debris and dust. Use work gloves when handling rough or splintered wood to avoid cuts. Ear protection, like earplugs or headphones, helps prevent hearing damage during loud operations. A P100 respirator keeps harmful dust particles out of your lungs. Finally, familiarize yourself with each tool’s safety guidelines and take time to learn proper techniques. Proper safety practices are critical for a safe woodworking experience. Keep your workspace clean and free of clutter. Use clamps to stabilize pieces when cutting or sanding. Avoid loose clothing and jewelry that could get caught. Never bypass safety features on tools. Additionally, understanding auditory safety can help prevent hearing loss over time. Being aware of ergonomic techniques can also reduce strain and injury during prolonged work sessions. Maintaining awareness of tool maintenance ensures your equipment operates safely and efficiently.
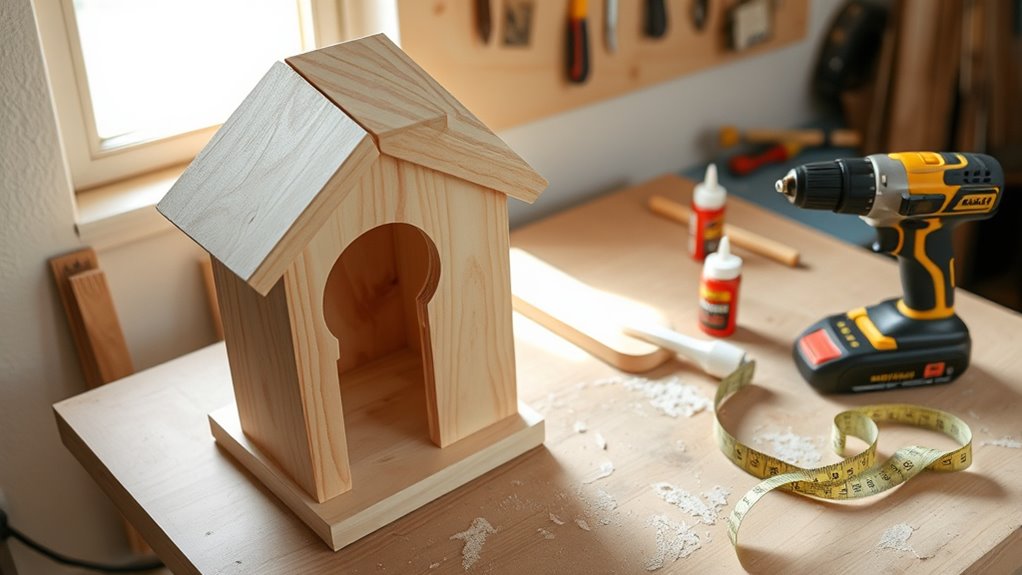
Simple Project Ideas to Build Confidence
Beginners can build confidence in woodworking by tackling simple projects that allow for practice and skill development without feeling overwhelmed. Starting with straightforward tasks helps you familiarize yourself with tools and techniques while producing satisfying results. For example, making a basic wooden box or a small bookshelf lets you practice measuring, cutting, and assembling without complex joinery. Building a picture frame or a birdhouse provides opportunities to refine your sawing, sanding, and finishing skills. These projects keep the process manageable and enjoyable, giving you a sense of accomplishment. As you complete each one, you’ll gain confidence to try more advanced projects. Keep it simple, focus on learning, and celebrate every finished piece—these are the building blocks of your woodworking journey. Regular practice with simple projects can also enhance your understanding of basic woodworking techniques, and exploring essential tools can further improve your craftsmanship skills, setting a strong foundation for future craftsmanship. Additionally, experimenting with simple finishing methods can help you achieve professional-looking results and boost your confidence in your abilities. Developing a good safety habit while working on these projects can also ensure a safer and more enjoyable woodworking experience. Incorporating proper tool maintenance into your routine can prolong the life of your equipment and improve your overall safety.
Basic Techniques for Accurate Sawing and Joinery
To get accurate cuts and strong joints, you need to master precise marking and measuring first. Next, focus on using proper sawing techniques to guarantee your cuts follow your lines closely. Additionally, practicing tool handling skills can greatly improve your precision and safety during woodworking. Proper measurement techniques are essential for ensuring your pieces fit together correctly. Finally, explore effective joinery methods that create secure, long-lasting connections between your pieces. Understanding the chemistry of adhesives can also help you choose the best glues and fasteners for durable woodworking projects. Additionally, being aware of appliance maintenance plans can be useful if you plan to incorporate modern tools and equipment into your workshop. Considering product reviews can guide you toward selecting quality tools that will last over time.
Marking and Measuring Precision
Accurate marking and measuring are the foundation of precise woodworking, ensuring your cuts and joints fit perfectly. When you measure carefully, you avoid mistakes that can ruin a project or waste material. Use sharp pencils or marking knives for clear lines and avoid smudging. Always double-check measurements before cutting. Keep your tools organized and consistent, like using the same ruler or square for all measurements. Practice transferring measurements accurately from plans to your wood. Remember, taking your time with marking and measuring helps you build confidence and precision.
- Use a reliable tape measure and check it often
- Always mark from the same side for consistency
- Double-check measurements before cutting
- Use a square for right angles and guides
- Keep your marking tools sharp and clean
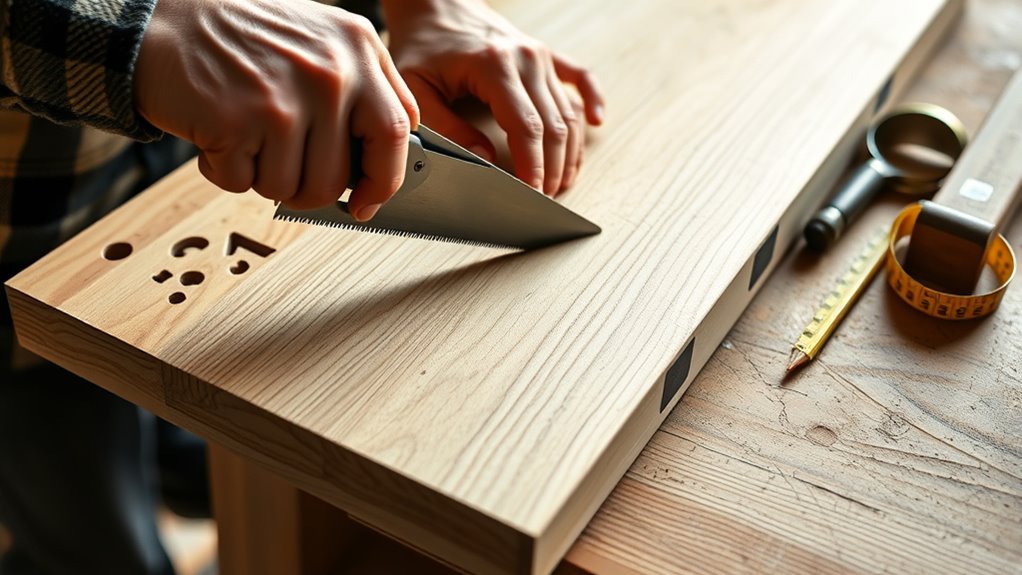
Proper Sawing Techniques
Mastering proper sawing techniques is essential for achieving clean, precise cuts that fit together well. Keep your workpiece steady by clamping it securely before cutting. Use a saw with a comfortable grip and maintain a consistent, controlled motion. Start the cut by applying gentle pressure, then let the saw’s teeth do the work. Keep your saw aligned with your marked line, using your guiding hand for stability. Use smooth, even strokes, avoiding excessive force or rushing. Check your progress regularly to stay on track. For angled cuts, use a square or guide to maintain accuracy. Remember, a steady hand and patience lead to better results. Practicing proper sawing techniques ensures your projects fit together perfectly and look professional. Additionally, maintaining your tools with proper filtration and pump protection can prevent issues that affect your cutting accuracy and finish quality. Incorporating Suprem fabric in your clothing projects can also enhance durability and comfort, resulting in higher-quality finished pieces. Developing a good sawing rhythm can help improve both accuracy and efficiency as you gain experience.
Effective Joinery Methods
Effective joinery methods start with precise sawing, as clean cuts are the foundation for strong, accurate connections. When you make straight, smooth cuts, fitting pieces together becomes easier, and the final project holds better. Focus on steady, controlled sawing, and always measure twice before cutting. Once your cuts are accurate, you can explore basic joinery techniques like butt joints, miter joints, and pocket holes. These methods create solid, visually appealing connections. To improve your skills, keep these tips in mind:
- Use a square to check angles before cutting
- Mark cut lines clearly for accuracy
- Clamp pieces securely during cutting and assembly
- Practice making consistent cuts on scrap wood
- Test-fit joints before final assembly
Mastering these basics will set a strong foundation for all your woodworking projects.
Step-by-Step Guide to Sanding and Finishing
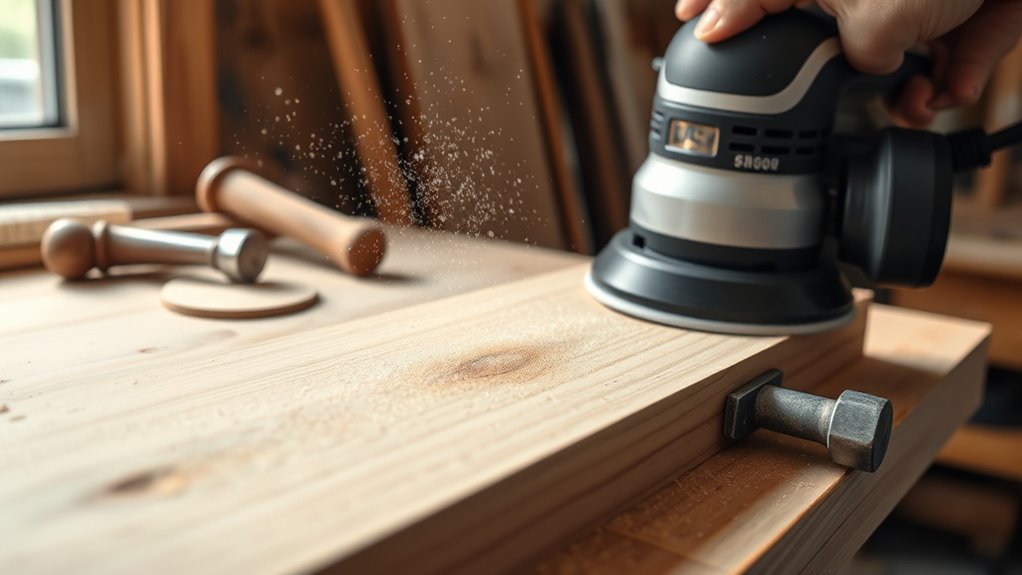
Sanding and finishing are essential steps in creating a smooth, professional-looking woodworking project. First, start with coarse grit sandpaper (around 80 grit) to remove rough spots. Progressively switch to finer grits, like 120, 180, and finally 220, for a smooth surface. Always sand with the grain to prevent scratches. After sanding, wipe the dust away with a tack cloth or damp rag. For added protection, consider selecting an appropriate finish that enhances durability and appearance.
Tips for Selecting and Using the Right Materials
When selecting materials, focus on choosing the right wood types for your project’s strength and appearance. Make certain to prepare your surfaces properly before cutting or joining, which helps ensure clean, accurate results. Always measure carefully and double-check your cuts to keep your project precise and professional-looking. Additionally, understanding unit conversions can help in accurately estimating material quantities for large projects. Proper automotive repair techniques can also prevent costly mistakes during assembly or finishing stages. Being aware of muscle recovery devices can be beneficial if your woodworking involves physical strain, helping you maintain your stamina and avoid injury.
Choosing Appropriate Wood Types
Choosing the right wood is essential for successful woodworking projects, especially for beginners. The wood you select impacts the project’s durability, appearance, and ease of working. For simple projects, softwoods like pine and cedar are ideal—they’re affordable, easy to cut, and readily available. Hardwoods such as oak or maple offer a more polished finish but can be tougher to work with initially. Consider the project’s purpose: furniture needs sturdy hardwoods, while decorative items can use softer woods. Also, check for straight, knot-free boards to prevent warping. Here are some tips:
- Start with softwoods for beginner projects
- Avoid warped or cracked pieces
- Select boards with minimal knots
- Consider grain direction for strength
- Match wood type to project needs and budget
Preparing Material Surfaces
Selecting the right materials and preparing their surfaces properly is essential for a successful woodworking project. Start by inspecting wood for defects like knots, splits, or warping, which can weaken your project. Sand surfaces to smooth out rough spots and remove splinters, ensuring a clean base for finishing. Using the correct tools, like a fine-grit sandpaper, helps achieve a smooth, even surface. Proper preparation also involves cleaning your material to remove dust and debris that could interfere with finishes or glue bonds.
| Material Type | Surface Preparation Tips | Best Uses |
|---|---|---|
| Softwood | Sand lightly, remove dust | Framing, furniture, decorative projects |
| Hardwood | Use finer grit sandpaper | Fine furniture, cabinetry, detailed work |
| Plywood | Clean edges, sand lightly | Shelves, panels, structural components |
| Reclaimed Wood | Remove old finish, sand thoroughly | Rustic projects, custom furniture |
Measuring and Cutting Accurately
Accurate measurements and clean cuts lay the foundation for a successful woodworking project. When you measure carefully, you avoid costly mistakes and guarantee your pieces fit perfectly. Use a sharp tape measure and double-check your markings before cutting. For straight and angled cuts, a rafter or speed square helps guide your saw precisely. Always measure twice, cut once—that old saying still holds true. Select quality materials suited for your project, avoiding warped or damaged wood. Keep your tools sharp for cleaner cuts and safer operation. Here are some tips to help you get it right:
- Use the right measuring tools for each task
- Mark your cuts clearly and accurately
- Always double-check your measurements
- Make slow, controlled cuts with the correct saw
- Keep your workspace clean to prevent mistakes
Resources for Continuing Your Woodworking Journey

As you progress in woodworking, accessing the right resources can substantially enhance your skills and knowledge. Books, such as beginner guides and technique manuals, offer detailed instructions and project ideas. Online platforms like YouTube and woodworking blogs provide visual tutorials and community support, helping you troubleshoot and learn new techniques. Local woodworking classes or workshops are excellent for hands-on learning and expert feedback. Forums and social media groups connect you with experienced woodworkers who can answer questions and share advice. Additionally, subscribing to industry magazines keeps you updated on trends, tools, and innovative projects. Combining these resources ensures continuous growth, keeps you motivated, and helps you develop a deeper understanding of woodworking fundamentals and advanced techniques.
Frequently Asked Questions
How Do I Choose the Right Wood for Beginner Projects?
When choosing wood for beginner projects, you want something easy to work with and affordable. Softwoods like pine, cedar, or fir are great because they cut and sand easily. Avoid hardwoods until you gain more experience, as they can be tougher and more expensive. Look for straight, knot-free planks, and buy from reputable suppliers to guarantee quality. This way, you’ll find it easier to learn and enjoy your woodworking journey.
What Are Common Mistakes to Avoid When Starting Woodworking?
When starting woodworking, avoid rushing your projects or skipping safety steps. Don’t neglect measuring twice before cutting, as errors can ruin your work. Stay patient, take your time with each step, and practice proper tool techniques. Don’t buy every tool at once; focus on essentials first. In conclusion, ignore safety gear—always wear glasses, gloves, and hearing protection to prevent injuries. These habits help you build skills safely and confidently.
How Do I Maintain and Store My Tools Properly?
A stitch in time saves nine, and the same goes for tool maintenance. You should clean your tools after each use, wipe away dust and debris, and oil moving parts regularly to prevent rust. Store them in a dry, organized space, preferably in a toolbox or on a pegboard. Keep blades sharp and check for damage. Proper care extends your tools’ life and keeps them safe and ready for your next project.
What Safety Procedures Should I Follow When Using Power Tools?
When using power tools, always wear safety gear like glasses, ear protection, and dust masks. Keep your workspace clean and well-lit to prevent accidents. Read and understand the user manual before operating each tool. Use clamps to secure your workpiece, and never bypass safety features. Stay focused, avoid distractions, and never operate tools if you’re tired or under the influence. Regularly inspect tools for damage and maintain proper technique.
How Can I Improve My Accuracy With Hand Saws and Drills?
Like a seasoned artisan honing their craft, you can improve your accuracy with hand saws and drills by practicing precise markings and steady control. Keep your hands firm but relaxed, and focus on aligning your cut line or drill bit with your mark. Use clamps to stabilize your workpiece, and take your time. Consistent practice and patience will turn your initial efforts into skillful precision, much like a master woodworker.
Conclusion
Remember, every expert was once a beginner. Embrace the learning process, stay patient, and enjoy each project you complete. With the right tools, safety practices, and a bit of perseverance, you’ll soon see your skills grow. Keep in mind, Rome wasn’t built in a day—so take your time, enjoy the craft, and trust that your efforts will pay off. Happy woodworking!