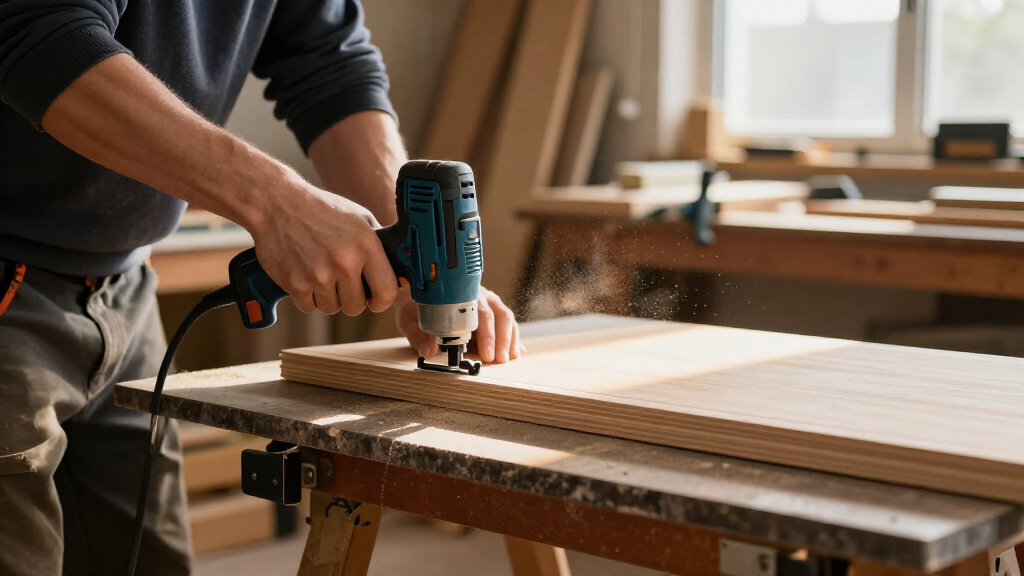

This guide shows you how to set up and safely operate a cordless oscillating multi-tool to cut wood, trim door jambs, remove grout, sand surfaces, and scrape adhesives. By the end, you will be able to change accessories, adjust speed for the material, make controlled plunge cuts, and finish a small project without damaging the workpiece or the tool. It is written for beginners and first-time owners of cordless oscillating multi-tools who already have the tool, a battery, and a starter accessory kit. Expect to spend 20-30 minutes practicing the techniques here before starting your first real job.

Get business pricing on tools and workshop supplies
- Business-only prices and quantity discounts
- Tax-exempt purchasing
- Multiple users, one account, clear invoices
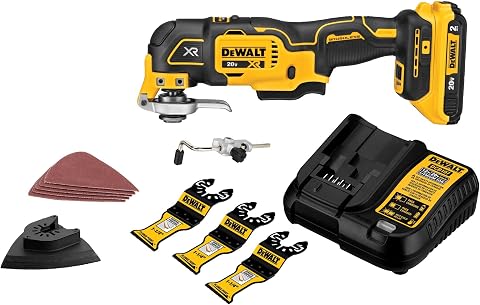
DEWALT 20V MAX XR Oscillating Multi-Tool Kit (DCS356D1)
- ✔ Voltage: 20V MAX
- ✔ Motor: Brushless
- ✔ Max Speed: 20,000 OPM
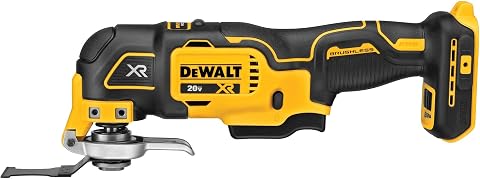
DEWALT 20V MAX XR Oscillating Multi-Tool, Tool Only (DCS356B)
- ✔ Voltage: 20V MAX (bare tool)
- ✔ Motor: Brushless
- ✔ Speed Ranges: 0–13,000 / 0–17,000 / 0–20,000 OPM

WORKPRO 20V Brushless Cordless Oscillating Multi-Tool Kit
- ✔ Voltage: 20V
- ✔ Motor: Brushless
- ✔ Max Speed: 19,000 OPM
Difficulty: Beginner | Time: 20-30 minutes to learn; jobs vary
What You’ll Need
Tools & Materials:
- Cordless oscillating multi-tool with charged battery
- Assorted accessories: wood-cutting blade, bi-metal blade, sanding pad with sandpaper, scraper blade
- Hex key or accessory-change wrench (if your tool does not have a tool-free clamp)
- Safety glasses and hearing protection
- Dust mask for sanding and cutting
- Clamps to secure the workpiece
- Pencil and straightedge for marking cut lines
Knowledge:
- Basic ability to charge and insert the tool’s battery
- How to hold a powered hand tool with two hands
- Familiarity with the material you plan to cut or sand
Read your tool’s manual before starting. Accessory mounting systems differ between brands — some use a hex bolt, others use a tool-free lever — and the accessory must sit flat against the mounting pad before it is tightened. Confirm your battery is fully charged, as oscillating tools drain batteries faster than drills under load.
DEWALT 20V MAX XR Oscillating Multi-Tool Kit (DCS356D1)
For most buyers, this is where the search should end. The DCS356D1 kit includes everything a first-time multi-tool owner needs: the tool, a battery, a charger, cutting blades, and sanding paper. That completeness is exactly what separates it from its sibling, the DCS356B — the tools are functionally identical, but here you avoid the surprise of buying a bare tool and discovering you can’t use it yet.Performance-wise, the brushless motor is the headline: DEWALT claims up to 57% more runtime than a brushed equivalent, which translates to finishing a job on one battery instead of stopping mid-cut. The 3-speed selector (up to 20,000 OPM) is paired with a dual-grip variable speed trigger, so within each range you still feather the speed by hand. Compared with the WORKPRO, this setup is faster to operate — flip a switch and go — but coarser if you need a very specific low speed for plastics or veneer.The quick-change accessory system means no wrench hunting when you swap from a blade to a sanding pad, and the universal adapter keeps you open to third-party accessories rather than locking you into DEWALT-branded blades. The built-in LED is genuinely useful for under-sink and behind-toilet work where these tools often live. The honest tradeoff: this is the heaviest commitment of the three on price-per-piece if you already own DEWALT batteries — in that case, skip down to the DCS356B.
Pros:
- Complete kit: battery, charger, blades, and sanding paper included
- Brushless motor delivers up to 57% more runtime than brushed models
- 3-speed selector plus dual-grip variable trigger for layered speed control
- Tool-free blade changes with universal accessory compatibility
Cons:
- Highest-cost entry point if you already own 20V MAX batteries
- Three preset speed ranges are coarser than a fully variable dial
Best for: Buyers starting from zero who want a complete, ready-to-work kit from a proven pro-grade platform
Not ideal for: Anyone already invested in the DEWALT 20V MAX ecosystem — the bare tool saves real money
Bottom line: The safest all-around choice: a genuine pro-grade tool with nothing left to buy before your first cut.
“The safest all-around choice: a genuine pro-grade tool with nothing left to buy before your first cut.”
DEWALT 20V MAX XR Oscillating Multi-Tool, Tool Only (DCS356B)
Here’s the thing to understand upfront: the DCS356B is not a lesser tool than the DCS356D1. Same brushless motor, same 57% runtime advantage, same 3-speed selector spanning 0–13,000, 0–17,000, and 0–20,000 OPM, same quick-change system and LED. What you’re choosing here is configuration, not capability.That makes this the best value pick for the enormous population of homeowners and tradespeople who already own DEWALT 20V MAX drills, impact drivers, or saws. If two batteries and a charger are already in your garage, paying for a third set is wasted money. This option makes the most sense for that buyer — you get the identical tool and two wood-cutting blades to start, and your existing batteries drop straight on.The tradeoff is real, though. Compared with the DCS356D1 kit, you’re supplying the power, and compared with the WORKPRO kit, you get fewer accessories in the box. If you’re platform-neutral and starting from scratch, this pick loses its advantage entirely — the full kit or the WORKPRO becomes the smarter arithmetic. But for ecosystem owners, nothing else here matches it on cost-per-capability.
Pros:
- Identical performance to the DCS356D1 kit — brushless motor, 20,000 OPM, 3-speed selector
- Smartest cost path if you already own 20V MAX batteries
- Two wood-cutting blades included so the tool is usable immediately (with your battery)
- Universal accessory adapter avoids proprietary blade lock-in
Cons:
- No battery or charger included — a hidden cost for newcomers
- Fewer included accessories than either kit option
Best for: Existing DEWALT 20V MAX owners adding a multi-tool without duplicating batteries and chargers
Not ideal for: First-time cordless tool buyers with no batteries — the kit versions are better economics
Bottom line: The platform play: every ounce of the kit version’s capability, for buyers who already hold the batteries.
“The platform play: every ounce of the kit version’s capability, for buyers who already hold the batteries.”
WORKPRO 20V Brushless Cordless Oscillating Multi-Tool Kit
The WORKPRO takes a different philosophy from both DEWALT options. Instead of three preset speed ranges, it offers six variable speed settings up to 19,000 OPM, which gives you noticeably finer control at the low end. If you’ve ever melted plastic trim or scorched veneer because a tool’s lowest setting was still too aggressive, that granularity is the reason to choose this model over the DEWALTs.Like the others, it runs a brushless motor and features tool-less blade changes on a universal fit interface, so you’re not locked into one accessory brand. The integrated LED covers the same dark-corner use cases. Where it trails DEWALT is top-end speed — 19,000 versus 20,000 OPM — though in practice that difference is barely perceptible through a blade. More relevant is platform weight: the WORKPRO 20V line is smaller than DEWALT’s sprawling ecosystem, so future tool purchases have fewer branches to grow along.One caution deserves emphasis: battery and charger availability varies by kit configuration, so verify exactly what’s in the box before buying — otherwise this kit’s value proposition against the DCS356D1 collapses. For DIYers, apartment renovators, and anyone whose work leans toward delicate cuts and detail sanding rather than demolition-pace cutting, this pick makes the most sense.
Pros:
- Six variable speed settings for genuinely fine control on delicate materials
- Brushless motor reaching 19,000 OPM across cutting, sanding, grinding, and trimming
- Tool-less universal-fit blade changes compatible with most accessory brands
- Integrated LED light for dark work surfaces
Cons:
- Battery and charger may be sold separately depending on kit configuration
- Smaller 20V accessory ecosystem than DEWALT’s platform for future expansion
- Slightly lower top speed than the DEWALT models
Best for: DIYers and detail-focused users who want precise low-speed control for delicate materials without a pro-grade price
Not ideal for: Heavy-duty users who want the deepest battery ecosystem and fastest aggressive-cutting setup
Bottom line: The control specialist: six speed settings and universal fit make it the thoughtful choice for precision work over raw pace.
“The control specialist: six speed settings and universal fit make it the thoughtful choice for precision work over raw pace.”
As an Amazon Associate we earn from qualifying purchases.
Before You Start
Oscillating multi-tools cut with a very fast, small side-to-side motion (typically 18,000-21,000 oscillations per minute) rather than a spinning blade. This means the tool is safe against adjacent surfaces, but it also means cuts happen slower than you expect and the blade heats up quickly. Work in a ventilated area, wear eye protection at all times, and clamp your workpiece — never hold small pieces by hand near the blade. Keep the battery out of the tool while changing accessories.
Step-by-Step Instructions
Step 1: Charge the battery and inspect the tool
Insert the battery into its charger and wait for the indicator light to show a full charge. While it charges, inspect the tool body, the accessory mount, and the on/off switch or variable-speed trigger for damage or debris. Wipe the mounting pad clean with a dry cloth.
Tip: If you own two batteries, charge both. Continuous cutting drains a battery in 15-30 minutes depending on load.
Check: The charger shows a full-charge light and the tool powers on briefly when you test the switch with no accessory installed.
Step 2: Select the right accessory for the job
Choose your accessory based on the task: a wood/end-cut blade for plunge cuts and trimming, a bi-metal blade for nails and mixed materials, a segmented blade for cuts needing a tight corner radius, a rigid scraper for adhesive and caulk, or a sanding pad for smoothing. Match the accessory to the material — never force a wood-only blade through metal.
Tip: For trimming door jambs to install flooring, a bi-metal blade handles hidden nails without chipping.
Check: The accessory is rated for your material (check the packaging or etching on the blade) and its teeth or grit are undamaged.
Step 3: Install the accessory securely
Remove the battery. Position the accessory on the mounting pad so it sits completely flat, with the mounting holes aligned to the bolt or clamp. For hex-bolt tools, insert the hex key through the access hole and tighten firmly. For tool-free tools, pull back the lever, seat the accessory, and snap the lever closed. Reinstall the battery.
Tip: An accessory that sits at an angle or sits loose will vibrate, cut crooked, and can fly off. Check tightness by hand — it should not shift when you tug it.
Check: The accessory is flush against the pad, does not wobble when you move it by hand, and the tool runs without a rattling sound.
Step 4: Mark and secure your workpiece
Mark your cut line or work area with a pencil and straightedge. Clamp the workpiece to a stable bench so the cut zone is unsupported and accessible. Position clamps away from the cut path so the blade cannot contact them.
Tip: Apply masking tape over the cut line on finished wood to reduce splintering, and cut with the good face down when using a flat blade.
Check: The workpiece does not move when you push against it, and there is clear space for the full length of the blade stroke.
Step 5: Set the speed for the material
Set the speed dial (or feather the variable-speed trigger) to match the material: low to medium speed (settings 1-3) for plastics, soft metals, and delicate work to prevent melting; medium to high (settings 4-6) for hardwoods and most cuts in softwood and plywood. Start at a middle setting until you know how the tool behaves.
Tip: If the blade glows, smokes, or the material melts, your speed is too high or you are pushing too hard.
Check: The tool reaches full oscillation without laboring, and the tool removes material steadily rather than burnishing the surface.
Step 6: Make a practice plunge cut
Grip the tool with one hand on the body and one on the barrel or auxiliary handle. Place the blade flat against the scrap wood’s surface BEFORE starting the tool. Start the tool, let it reach full speed, then slowly tip the blade into the wood along your marked line. Let the tool’s own speed do the cutting — apply only light pressure.
Tip: This is the step where most beginners go wrong. Pushing hard slows the blade, burns wood, heats the accessory, and produces a worse cut. Light pressure and patience cut faster.
Check: The blade sinks through the scrap in a smooth, controlled line with minimal smoke and no stalling.
Step 7: Run your first real cut
Position the blade at the start of your marked line, start the tool, and move it along the line at a steady pace. For long cuts, work in short sections and recheck your line. For flush cuts against a wall or floor (such as trimming door casing), rest the wide face of the blade flat against the surface you must not damage and let the edge do the cutting.
Tip: Slight forward tilt helps the blade track straight, but more than a few degrees causes the blade tip to gouge.
Check: The finished cut follows your marked line, is reasonably smooth, and shows no scorch marks or damaged adjacent surfaces.
Step 8: Switch tasks: sanding and scraping
Remove the battery and swap to the sanding pad, pressing a matching-grit hook-and-loop sheet onto it. Sand at medium speed, moving the tool in slow, overlapping oval passes with light pressure — dwelling in one spot gouges the surface. Start with 80 grit for stock removal, finish with 120-180. For scraping, install the scraper blade, run at low-to-medium speed, and hold the blade at a shallow angle to lift adhesive or caulk.
Tip: The triangular sanding pad excels in corners where round orbit sanders cannot reach. Use it for detail work, not large flat surfaces.
Check: Sanded surfaces feel uniform with no swirl marks; scraped surfaces come clean without gouging the substrate.
Step 9: Shut down and store the tool
Release the switch and wait for the accessory to come to a complete stop before setting the tool down. Remove the battery, brush dust and debris from the air vents, and store the tool, battery, and accessories in the case. Leave batteries off the charger once full and store them at room temperature.
Check: The tool is clean, the battery is removed, and all accessories are accounted for in the case.
Common Mistakes to Avoid
- Pushing the tool too hard into the cut — Apply only light-to-moderate pressure and let the oscillation speed cut. If the tool slows down or the wood smokes, ease off. Hard pushing dulls accessories, burns material, and drains the battery fast.
- Starting the tool with the blade already touching the workpiece — Rest the blade in position first, then start the tool and let it reach full speed before cutting. Starting under load jolts the tool off your line and can kick it sideways.
- Using the wrong accessory for the material — Check the accessory rating before each job. Wood blades lose teeth on hidden nails; use bi-metal blades when fasteners may be present, such as when cutting door casings or old flooring.
- Loose or misaligned accessory mounting — Always seat the accessory flat on the pad before tightening, and give the mounting bolt an extra firm snug with the hex key. Recheck tightness every time you change accessories.
Troubleshooting
Problem: The blade wanders off the cut line
Solution: You are likely pushing too hard or tilting the tool. Reduce pressure, keep the blade’s flat side against your guide surface, and cut in shorter strokes. Marking a wider, clearer line also helps tracking.
Problem: The wood burns or the blade smokes
Solution: Slow your feed rate is the opposite of what you need — increase speed slightly, reduce downward pressure, and use a sharper or finer-toothed blade. Burn marks also mean the blade is dull; replace it.
Problem: The tool stalls or bogs down mid-cut
Solution: Back the blade out, let it reach full speed, and re-enter slowly. If it stalls repeatedly, the battery may be low or the accessory too aggressive for the material. Swap the battery or use a finer-tooth blade.
Problem: The accessory keeps working loose
Solution: Stop and clean the mounting pad — sawdust between the pad and accessory prevents a flush seat. Reinstall, confirm the accessory sits flat, and tighten the bolt firmly. Replace a worn mounting bolt if the problem persists.
What Success Looks Like
You have completed this guide successfully when you can: install and remove any accessory with the battery removed; make a plunge cut in scrap wood that follows a pencil line within about 1/16 inch; complete a flush cut on a piece of door casing without scorching or wall damage; and sand a corner smooth without gouges. Your tool should run quietly, the accessory should stay tight, and cuts should show minimal burning. If your practice cuts meet these standards, you are ready for real project work.
Next Steps
Put the tool to work on a starter project: undercut a door jamb for flooring installation, cut out a damaged section of drywall for a patch, or remove old window caulk with the scraper blade. Build out your accessory kit as jobs demand — a grout removal blade, a carbide rasp, and a range of grits multiply the tool’s usefulness. Keep spare blades on hand, since blades dull after a few hours of cutting and dull blades cause most cut-quality problems. Clean the air vents after dusty jobs, and check the mounting pad for wear every few months.
Frequently Asked Questions
Why is my cut so much slower than with a circular saw or jigsaw?
Oscillating tools move the blade only a few degrees side to side, so they remove material gradually. They trade speed for precision and access — they cut flush against surfaces and fit in tight spaces where other saws cannot. Let the tool work at its own pace and plan on cuts taking longer.
Can I cut metal with a cordless oscillating multi-tool?
Yes, with the right accessory. Use a bi-metal blade for nails, screws, and thin metal pipe, and run at a low-to-medium speed. Apply cutting oil for thicker stock. Wood-only blades will lose teeth immediately on metal.
How do I know when a blade needs replacing?
Replace the blade when teeth are visibly missing or rounded, when cuts slow down noticeably despite proper technique, or when burn marks appear consistently. A dull blade works the tool harder, drains the battery, and produces worse results than a fresh one.
Do I need oscillation speed control, or is a single-speed tool fine?
Variable speed matters. High speed suits hardwood cutting; low speed prevents melting in plastics and gives better control for detail work. If your tool is single-speed, take extra care and use light pressure on heat-sensitive materials.
Will a multi-tool cut through a nail embedded in wood?
A bi-metal or carbide-tooth blade will cut standard framing nails. Expect sparks, wear eye protection, and cut slowly. If you hit hardened fasteners repeatedly, a carbide blade lasts far longer than bi-metal.