
To caulk like a pro and fix gaps in your bathroom or kitchen, start by thoroughly cleaning and drying the surfaces, removing old caulk and debris for proper adhesion. Choose high-quality, mold-resistant silicone or polyurethane sealant suited for moist areas. Apply your caulk smoothly with a steady hand, smoothing the bead immediately with a damp finger or tool for a neat finish. Regular inspection and touch-ups prevent mold and moisture damage—stay tuned to learn expert tips for flawless results.
Key Takeaways
- Prepare surfaces thoroughly by cleaning, drying, and removing old caulk for optimal adhesion.
- Select high-quality, mold-resistant silicone or polyurethane caulk designed for bathrooms and kitchens.
- Apply caulk steadily with a properly cut tip, smoothing immediately with water or a smoothing tool for a neat bead.
- Focus on sealing corners and joints tightly to create an effective, watertight barrier.
- Regularly inspect and replace damaged or cracked caulk to prevent mold growth and maintain a professional finish.
Ever wondered how to achieve a clean, professional finish when sealing gaps and cracks? Mastering the art of proper sealant application is essential for both functional and aesthetic reasons. When you’re sealing around bathroom sinks, tubs, or kitchen countertops, you want the sealant to stick well, look neat, and do its job effectively. The key to this is preparation, application technique, and understanding the importance of mold prevention.
First, make sure the surface is thoroughly cleaned and dried. Any dust, soap scum, or old caulk can prevent the new sealant from adhering properly. Use a mild cleaner and a lint-free cloth to wipe down the area. Once the surface is dry, use painter’s tape along the edges to create clean lines. This step ensures a professional-looking finish and makes the cleanup easier. When you’re ready to apply the sealant, choose a high-quality, mold-resistant silicone or polyurethane caulk designed for bathroom and kitchen use. These products resist mold growth, which is a common problem in moist environments.
Thoroughly clean and dry surfaces before applying mold-resistant caulk for best results.
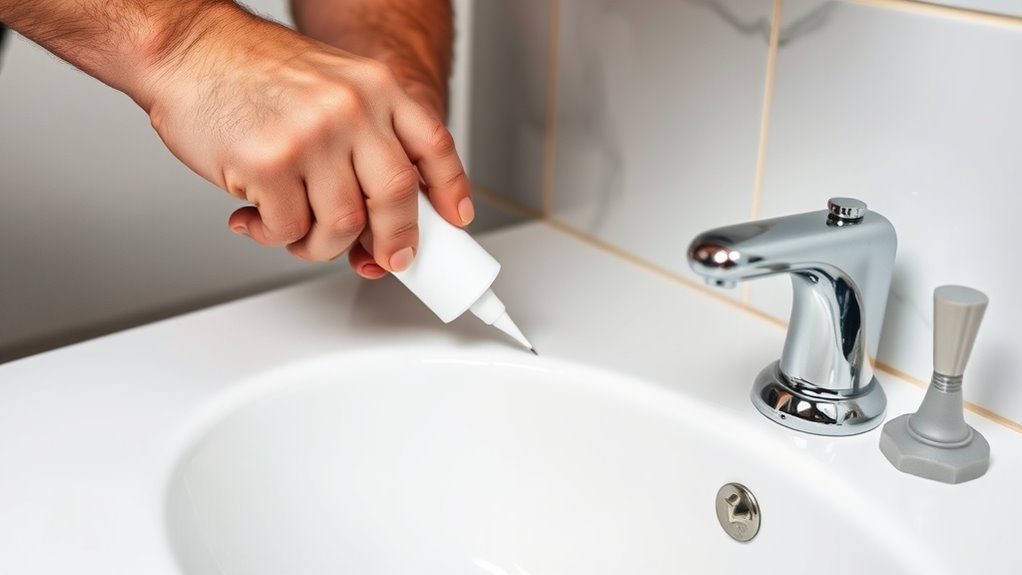
Applying the sealant correctly involves loading your caulking gun with the tube, cutting the tip at a 45-degree angle, and puncturing the inner seal if needed. Start at one end of the gap, and gently squeeze the trigger while moving the gun steadily along the crack or joint. Keep a consistent pressure to avoid gaps or uneven thickness. For a smooth finish, you can dip your finger or a caulk smoothing tool in a bit of water or soapy water and gently run it along the bead immediately after application. This not only improves the appearance but also helps push the sealant into the joint for better adhesion.
Mold prevention is a critical benefit of proper sealant application. When you apply sealant smoothly and thoroughly, it creates a watertight barrier that keeps moisture out. Moisture buildup is the main culprit behind mold growth, especially in bathrooms and kitchens where water is frequently present. Make sure to pay extra attention to corners, edges, and joints, where moisture tends to accumulate. Regularly inspect your sealed areas and replace the caulk if you notice any cracking or deterioration. This proactive approach prevents mold from taking hold and keeps your space hygienic.

GE Advanced Silicone Caulk for Kitchen & Bathroom, White, 2.8 fl oz Tube, 1 Pack – 100% Waterproof Silicone Sealant, 5X Stronger Adhesion, Shrink & Crack Proof
100% Silicone Caulk Protection: This silicone caulk white provides ultimate waterproof protection, ensuring a reliable seal against water…
As an affiliate, we earn on qualifying purchases.
As an affiliate, we earn on qualifying purchases.
Frequently Asked Questions
What Types of Caulk Are Best for Different Bathroom Surfaces?
For bathroom surfaces, you should choose silicone caulk because of its excellent water resistance and flexibility. For areas prone to mold, opt for mold-resistant silicone. If you’re sealing around tiles or porcelain, acrylic latex caulk works well due to easy cleanup and good surface compatibility. Always match the caulk material to the surface to guarantee durability and a clean finish, and consider specific bathroom needs like moisture resistance or mold prevention.
How Long Should Caulk Cure Before Using the Area?
Did you know that proper drying time can extend up to 24 hours? You should wait at least 24 hours before using the area after caulking. During this drying time, avoid cleaning or disturbing the sealant. For best results, keep the area dry and clean before applying the caulk, and remember to follow specific drying time instructions on the product label. This guarantees a durable, waterproof seal that lasts.
Can I Remove Old Caulk Without Damaging the Surface?
Yes, you can remove old caulk without damaging the surface. Use a caulk remover tool or a plastic scraper to gently pry and scrape away the old caulk, being careful around delicate surfaces. Apply a caulk remover solution if needed, and work slowly to prevent surface damage. Always test a small area first, and clean the surface thoroughly afterward to make sure a smooth, damage-free surface before applying new caulk.
What Tools Are Essential for Professional-Looking Caulking?
You need essential caulking tools for professional results. Grab a quality caulk gun, precision caulking tools, and a utility knife for cleaning edges. Use painter’s tape for clean lines, and a silicone spatula or finger for smoothing the sealant. Master professional caulking techniques by applying steady pressure and maintaining a consistent bead. These tools and methods guarantee your caulking looks neat, durable, and professional every time.
How Do I Prevent Mold Growth on New Caulk?
To prevent mold growth on new caulk, you should use mold-resistant caulk in high-moisture areas. Keep the surface dry and well-ventilated, and regularly clean with gentle cleaning techniques that target mold and soap scum. Avoid harsh chemicals that can damage the caulk, and reapply mold-resistant caulk if you notice any signs of mold or deterioration. Proper maintenance helps keep your caulk fresh and mold-free.
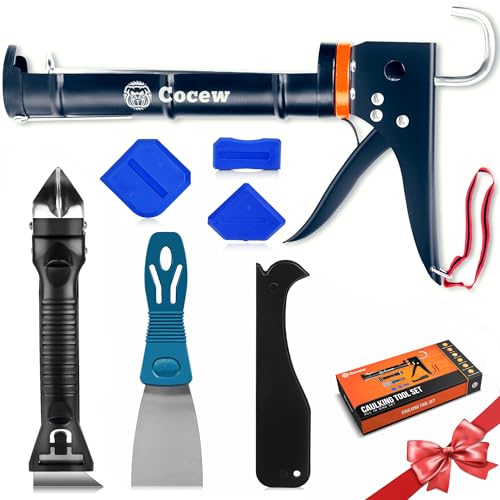
Caulk Gun Kit, Smooth Silicone Caulking Gun and Caulk Remover Tool, Sealant Finishing Tool Grout Scraper for Kitchen Bathroom Window Sink Joint, All in One with Gift Box
【Easy to operate】Cocew Caulking Gun is lightweight, the Smooth Pressure Rod is available with a high thrust ratio….
As an affiliate, we earn on qualifying purchases.
As an affiliate, we earn on qualifying purchases.
Conclusion
Now that you know how to caulk like a pro, you’ll confidently tackle those pesky gaps. Imagine sealing a bathroom sink where water tends to leak—your perfect caulk job keeps everything dry and looking fresh. With a bit of practice, you’ll prevent mold and damage, saving time and money. Just remember, patience and steady hands make all the difference. Soon, you’ll be the go-to person for a sleek, professional finish in every kitchen and bathroom project.

ALLWAY CT31 3-in-1 Caulk Tool for Removal and Application
Multifunction 3-in-1 Caulk Tool: Comfortable soft-grip and made from strong engineering plastic
As an affiliate, we earn on qualifying purchases.
As an affiliate, we earn on qualifying purchases.

Tremco Vulkem 45 SSL Polyurethane Sealant 30 oz. (1, Single) (1, Single)
Multi-surface poly sealant for horizontal surfaces such as expansion joints, new or wet concrete, brick, natural stone, wood…
As an affiliate, we earn on qualifying purchases.
As an affiliate, we earn on qualifying purchases.