
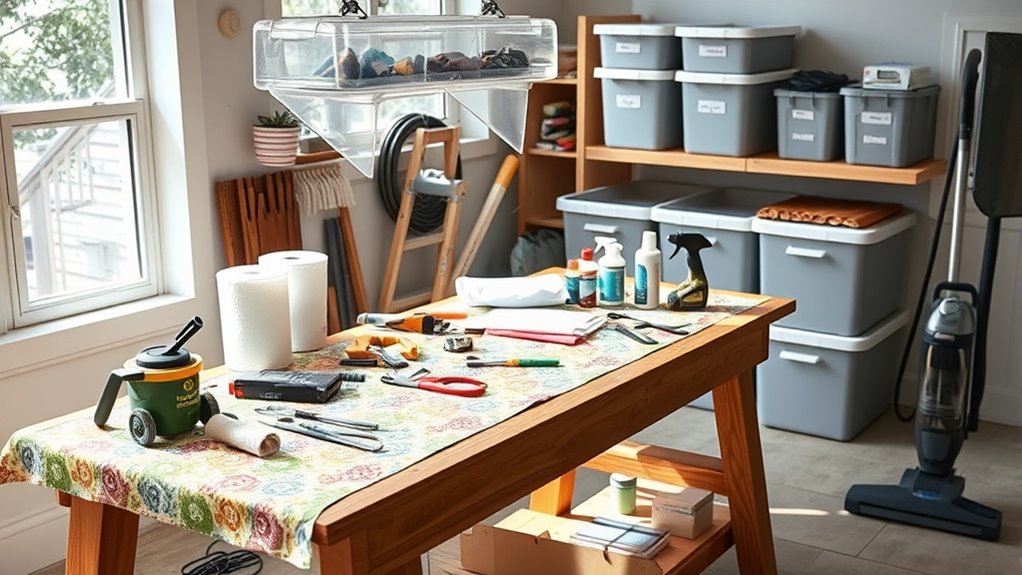
To prep your space for a DIY project, start by clearing the area of hazards, organizing tools and materials, and ensuring everything is within reach. Protect floors and surfaces with drop cloths or plastic sheeting, and cover furniture to prevent damage. Seal off vents and large openings to contain dust and fumes. Set up a waste disposal spot and plan your cleanup process. Keep hazards in check, and you’ll minimize messes—exploring these steps further can make your project smoother.
Key Takeaways
- Clear the workspace of hazards, clutter, and unnecessary items, ensuring a safe, organized environment for your project.
- Protect surfaces and furniture with drop cloths, plastic sheeting, or blankets to prevent damage and ease cleanup.
- Seal off vents, windows, and doors to contain dust, fumes, and debris, maintaining a controlled and clean workspace.
- Gather and organize all tools and materials beforehand to avoid store trips and reduce workspace clutter.
- Set up designated waste disposal areas for debris, recyclables, and hazardous waste to keep the area tidy and safe.

SHALL 2-Pack Folding Roller Stand - Heavy Duty 250 LBS Load Capacity - 27.8-43'' Adjustable Height Roller Stands for Table Saw Miter Saw Outfeed Woodworking
Heavy-Duty Load Capacity: 250 lbs per chrome-plated steel roller stand, easily handling bulky lumber, plywood, and sheet materials...
As an affiliate, we earn on qualifying purchases.
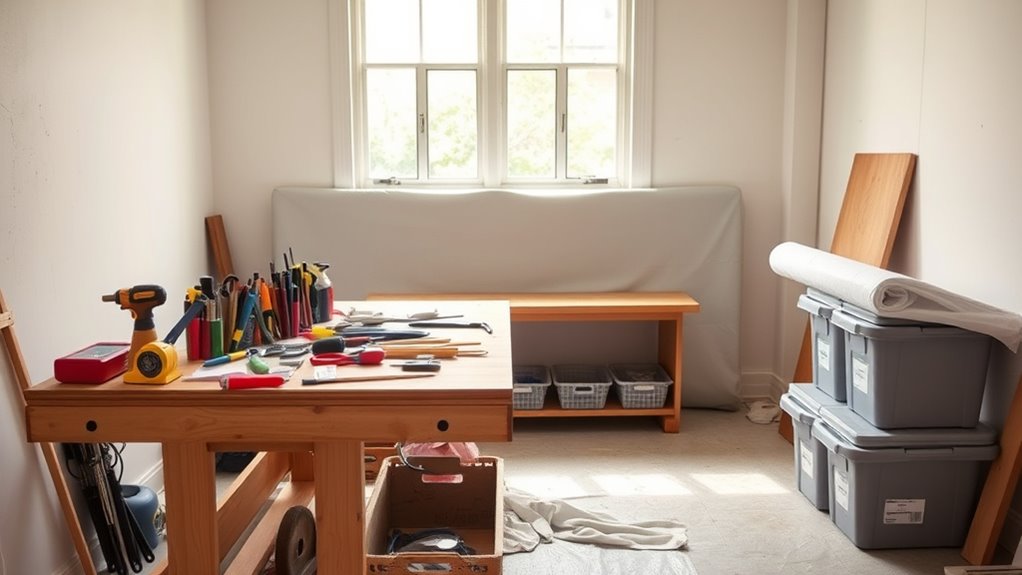
Assess and Clear Your Workspace

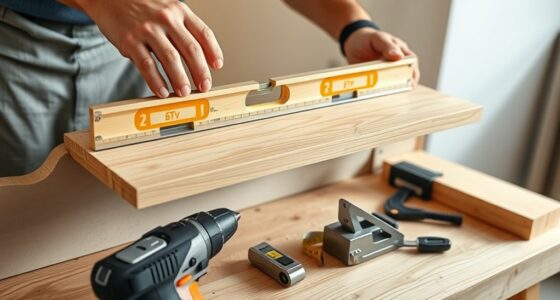
Before starting your DIY project, it’s essential to evaluate and clear your workspace. Ensuring workspace safety involves removing hazards like loose wires, sharp objects, or unstable surfaces that could cause accidents. Focus on clutter management by tidying up the area, so you have plenty of room to work efficiently. Clear away any unnecessary tools, materials, or debris that might obstruct your movements or cause damage to your project. A well-organized space minimizes distractions and helps you stay focused. Make sure your workspace is well-lit and ventilated, which enhances safety and comfort. Checking your air quality and ventilation setup can further improve the environment, especially if using fumes or dust-producing materials. Incorporating proper workspace layout principles can optimize your workflow and reduce the risk of errors. Additionally, assessing your electrical safety setup beforehand can prevent potential hazards related to power sources. Being aware of power outlet placement and capacity can help avoid overloads or electrical issues during your work. It’s also helpful to consider storage solutions to keep your tools accessible and your workspace neat, which can boost productivity and safety. Taking these steps upfront prevents accidents, keeps your project on track, and creates a safer environment for everyone involved. Proper assessment and clearing are the foundation of a successful DIY session.

WORKPRO Folding Roller Stand Height Adjustable, Heavy Duty 250 LB Load Capacity, Outfeed Woodworking
Adjustable Height From 27-In To 43-In
As an affiliate, we earn on qualifying purchases.
Gather All Necessary Tools and Materials
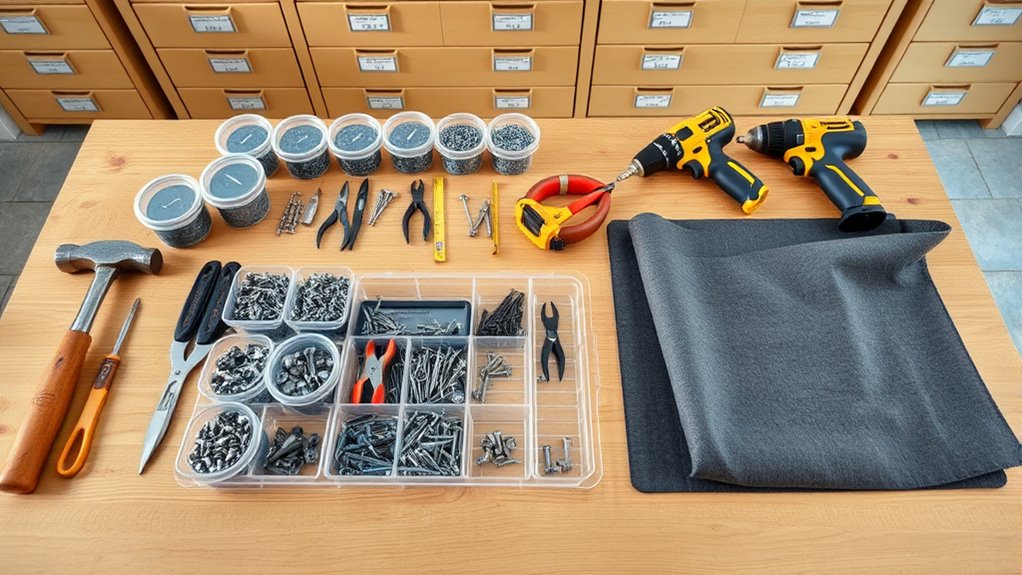
Start by making an inventory check to guarantee you have everything you need. Organize your tools and materials by type to streamline your workflow. Double-check that all items are of good quality and safe to use before beginning your project. Familiarize yourself with world clock functionality to better manage your time during the project planning stage. Additionally, considering the European cloud innovation standards can help ensure your setup aligns with sustainable and secure practices. Incorporating power tool safety protocols into your planning stage can further prevent accidents and ensure a smooth project execution. Understanding auditory processing techniques can also help you better interpret instructions and stay focused during your project. Being aware of slang and colloquialisms can improve your communication if working with others or following informal instructions.
Inventory Check First
Ensuring you have all the necessary tools and materials before diving into your project can save you time and frustration. Start with an inventory check to confirm everything is on hand. Good inventory management helps prevent multiple trips to the store. Gather items like:
- Hammer, screwdrivers, and pliers
- Nails, screws, and anchors
- Paint, brushes, and drop cloths
- Measuring tape and level
Organize your tools and materials in material storage containers so nothing gets lost. Check for missing or damaged items, and replace or repair as needed. Keeping a detailed inventory list makes future projects easier. Additionally, free floating materials can make your workspace cluttered and inefficient. This step guarantees you’re fully prepared, minimizes disruptions, and keeps your workspace clean and efficient. Proper inventory management is key to a smooth, mess-free DIY experience, especially when considering family photoshoot fails and how to avoid mishaps, as well as understanding the importance of cultural content in community projects. Incorporating garage door openers can enhance safety during storage and access, further streamlining your project setup. Remember, maintaining an organized workspace with clear storage solutions can significantly reduce clutter and improve overall efficiency during your project.
Organize by Type
Organizing your tools and materials by type helps streamline your project and makes it easier to find what you need quickly. Use effective storage solutions like labeled containers or bins to keep similar items together. Implement labeling techniques to identify contents at a glance, saving time searching. Group items such as screws, paintbrushes, or power tools in designated spots. Here’s an example:
| Tool/Material | Storage Solution |
|---|---|
| Screws | Small labeled jars |
| Paintbrushes | Hanging caddies |
| Power Tools | Stackable bins |
| Sandpaper | Drawer organizers |
| Tape Measure | Wall-mounted hooks |
This approach guarantees your workspace stays organized, minimizes mess, and helps you stay focused on your project. Additionally, considering proper storage techniques can extend the lifespan of your tools and materials. Incorporating water-resistant storage options can protect your supplies from moisture and damage, especially in environments prone to humidity or water exposure.
Ensure Quality & Safety
Having all the right tools and materials on hand is key to a successful DIY project. Before starting, double-check that your tools are well-maintained to prevent accidents and ensure efficiency. Gather safety equipment such as goggles, gloves, masks, and ear protection to keep yourself safe. Make a checklist to verify you have everything needed, including:
- Sharp, clean cutting tools
- Properly functioning power tools
- Quality safety gear
- Adequate supplies of paint, nails, or screws
Proper tool maintenance minimizes risks and prolongs tool life. Wearing safety equipment shields you from injuries and health hazards. Having everything ready and in good condition helps you work confidently and prevents delays caused by missing or unsafe tools. Additionally, understanding tool safety principles can significantly reduce the chance of accidents during your project. Also, considering the performance of your tools, such as electric power and efficiency, can further improve your work quality.

VEVOR Roller Stand, Heavy Duty 2500 LBS Load Capacity Tool Stand - 28"-52" Height Adjustable - Foldable Space-Saving Design - for Woodworking and Metalworking Long Boards, Metal Pipes or Bars
Unwavering Support for Your Projects: With VEVOR's roller stand, experience rock-solid stability that can handle heavy loads up...
As an affiliate, we earn on qualifying purchases.
Protect Floors and Surfaces
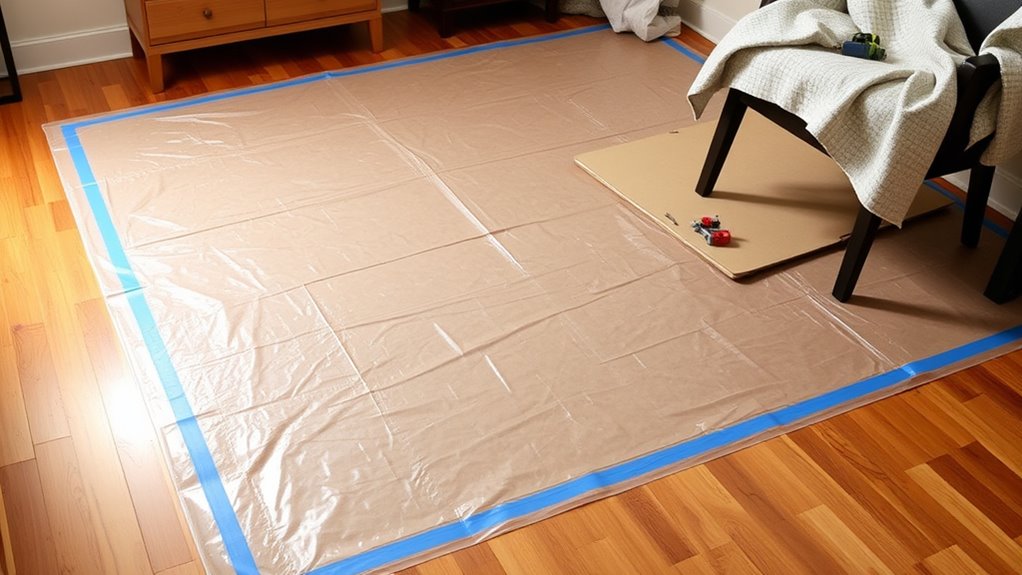
To keep your floors and surfaces safe, start by covering them with drop cloths to catch any drips or debris. Use protective tape to secure the coverings and prevent paint or stain from seeping through. If your project creates dust or fumes, seal off ventilation to protect other areas of your home. Additionally, consider using proper protective gear to safeguard yourself from potential hazards during your DIY project. Implementing simple organization strategies can also help contain clutter and make cleanup easier afterward. For added safety, ensure your workspace has adequate ventilation considerations to prevent buildup of fumes or dust.
Cover With Drop Cloths
Covering your floors and surfaces with drop cloths is essential to keep your space clean and protected during your DIY project. Drop cloths provide effective material protection and spill prevention, preventing damage from paint, dust, or debris. When selecting your drop cloths, consider these options:
- Heavy-duty canvas for durability and reuse
- Plastic sheets for quick, disposable coverage
- Drop cloths with reinforced edges for added strength
- Large sheets that cover multiple surfaces at once
Lay the cloths flat, smoothing out wrinkles to avoid tripping hazards. Tuck edges under furniture or fixtures to ensure full coverage. Using the right drop cloths minimizes mess and keeps your workspace tidy, making cleanup easier and protecting your surfaces from accidental spills or splatters. Properly protective coverings also help prevent dust and debris from settling on surrounding areas, simplifying cleanup after your project. Incorporating professional-grade materials can further enhance the effectiveness of your protective measures, especially for larger or more intricate projects. Additionally, selecting appropriate materials based on your specific project needs can improve overall safety and efficiency.
Use Protective Tape
Protecting your floors and surfaces during a DIY project is essential to prevent damage and make cleanup easier. Use masking tape or painter’s tape to shield edges, trim, and delicate surfaces. Apply the tape along baseboards, moldings, and around fixtures to create a barrier that catches drips and splatters. Painter’s tape is especially useful because it sticks well without leaving residue when removed. Be sure to press the tape firmly to prevent paint or debris from seeping underneath. For added protection, extend the tape onto drop cloths or plastic sheets, creating a seamless shield. Taking these simple steps with masking or painter’s tape helps keep your space clean and minimizes the risk of accidental damage.
Seal Off Ventilation
Sealing off ventilation openings helps prevent dust, paint fumes, and debris from spreading throughout your space. It’s crucial for airflow regulation and odor control, keeping your environment cleaner and safer. To do this effectively, you might:
- Cover vents and exhaust fans with plastic sheeting or painter’s tape
- Seal gaps around windows and doors with weatherstripping or draft stoppers
- Use plastic sheeting to block large openings or vents
- Ensure all potential airflow paths are closed off to contain dust and fumes
This step minimizes airborne particles, prevents fumes from escaping, and maintains a controlled environment. Proper sealing helps you work efficiently, reduces cleanup time, and protects other areas from damage. It’s a simple but essential measure for a successful DIY project.

WORKPRO Folding Roller Stand Height Adjustable, Heavy Duty 250 LB Load Capacity, Outfeed Woodworking (Upgraded head)
Adjustable Height From 27-In To 43-In
As an affiliate, we earn on qualifying purchases.
Cover Furniture and Fixtures
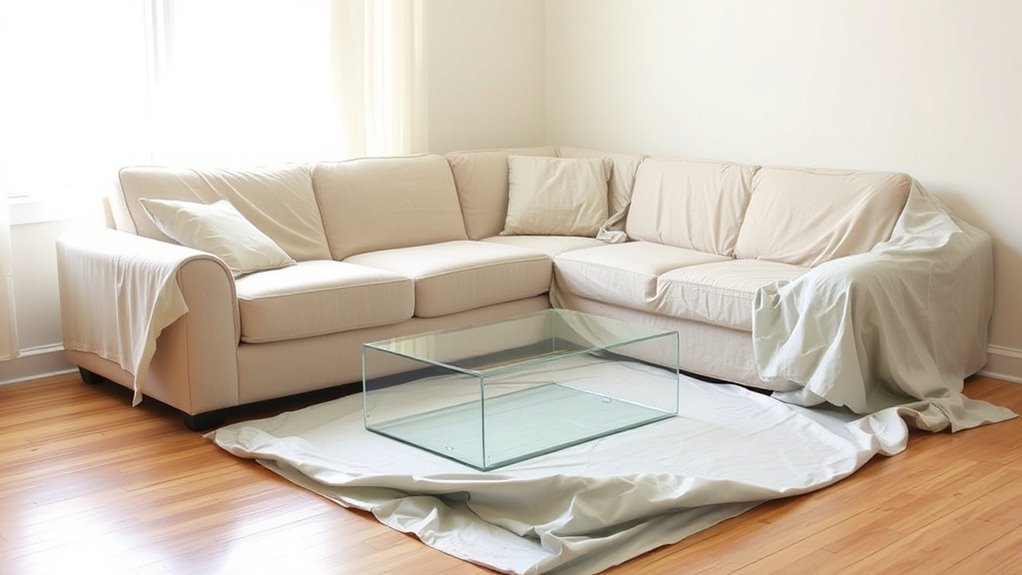
Before you start your DIY project, it is vital to shield your furniture and fixtures from paint splatters, dust, and potential damage. Proper fixture safeguarding and furniture protection prevent costly repairs later. Covering surfaces ensures your project stays neat and damage-free. Use drop cloths, plastic sheeting, or old sheets to protect larger furniture pieces. For fixtures, consider masking tape and plastic covers to guard against splatters. Here’s a quick reference:
| Furniture Protection | Fixture Safeguarding |
|---|---|
| Drop cloths | Plastic covers |
| Old sheets | Masking tape |
| Furniture blankets | Painter’s plastic |
| Cardboard | Protective film |
| Plastic sheeting | Foam padding |
This simple step keeps your space clean and minimizes damage.
Designate a Waste Disposal Area

Setting up a designated waste disposal area keeps your workspace organized and safe throughout your project. By establishing a clear disposal station, you prevent clutter and reduce hazards. Place a sturdy waste container nearby for debris, scraps, and used materials. Use a dedicated spot for recyclable items to keep them separate. Consider a small bin for hazardous waste, like paint or chemicals. Keep the disposal station stable and accessible, so you don’t have to search for it. This setup encourages responsible disposal and maintains cleanliness. A well-organized waste container area minimizes mess, speeds up cleanup, and protects your workspace. Remember, a tidy project area makes your work more efficient and safer for everyone involved.
Organize Your Supplies for Easy Access

To work efficiently, you need to organize your supplies so they’re within easy reach. Use storage solutions like labeled bins, shelves, or drawer organizers to keep everything tidy. Group similar items together—brushes, paints, tools—so you can find what you need quickly. Implement labeling techniques on containers and drawers to avoid searching through multiple boxes. Clear labels with bold text or color codes help you identify supplies at a glance, saving time and reducing frustration. Keep frequently used items accessible and store rarely used tools out of the way. Regularly reassess your setup to ensure everything remains organized as your project progresses. Proper organization minimizes clutter, prevents accidents, and keeps your workspace efficient and safe.
Set Up Adequate Lighting and Ventilation
Good lighting and proper ventilation are essential for a safe and comfortable workspace. Adequate task lighting guarantees you see details clearly, reducing mistakes and eye strain. Good air circulation prevents fumes and dust buildup, keeping the air fresh and safe to breathe. To set up effectively, consider these points:
- Position bright, focused task lighting directly over your work area
- Open windows or use exhaust fans to promote air circulation
- Use adjustable lamps to direct light exactly where needed
- Keep a fan or ventilation system running to disperse fumes
Identify and Address Potential Hazards
Before starting your project, it’s essential to identify and address potential hazards in your workspace. Begin with hazard identification—look for anything that could cause injury or damage, such as exposed wiring, sharp tools, or slippery surfaces. Check for unstable furniture or clutter that could cause trips or falls. Once hazards are identified, implement safety precautions: keep sharp tools away from children, use protective gear like gloves and goggles, and ensure proper ventilation if working with fumes or dust. Removing or mitigating hazards minimizes accidents and keeps your workspace safe. Taking these steps before you start helps prevent injuries, property damage, and project delays, letting you focus on completing your DIY project smoothly and safely.
Establish a Clean-Up Plan
Having a clear plan for cleaning up as you go helps keep your workspace organized and safe. Start with a clean-up checklist to guarantee you don’t forget essential tasks, like clearing debris or wiping surfaces. Decide on disposal methods for waste materials—recycling, composting, or trash—and keep bins nearby for quick access. Visualize your cleanup routine with these steps:
A proactive cleanup plan keeps your workspace safe, organized, and efficient throughout your project.
- Regularly collecting and bagging trash
- Sorting recyclables from waste
- Wiping down tools and surfaces
- Storing unused materials promptly
Frequently Asked Questions
How Do I Choose the Best Workspace for My Project?
You should choose a workspace with ample space for your tools and materials, ensuring it’s well-organized with proper storage solutions to keep everything accessible. Look for good lighting setup to prevent mistakes and reduce eye strain. Select an area away from high-traffic zones to minimize disruptions and potential damage. A clean, well-ventilated space that suits your project’s specific needs will help you work efficiently and safely.
What Safety Gear Should I Have on Hand?
You should have safety equipment and protective gear ready before starting your project. Wear goggles to shield your eyes, gloves to protect your hands, and a dust mask if you’re working with debris or fumes. Consider ear protection if you’re using loud tools. Always check your safety gear for damage and make sure it fits properly. Staying protected helps prevent injuries and keeps your project running smoothly.
How Can I Prevent Paint or Stain Spills?
To prevent paint or stain spills, you should use paint protection essentials like drop cloths or plastic sheeting to cover nearby surfaces. Stain containment can be achieved by masking off edges with painter’s tape and working carefully to control drips. Always work in a well-ventilated area and keep brushes and tools steady to avoid accidents. These steps help keep your space clean and protect your belongings from unwanted messes.
What Are Eco-Friendly Disposal Options for Waste?
Think of waste disposal like tending a garden—you nurture what’s good and let go of what’s not. For eco-friendly options, explore recycling options for materials like paper, plastic, and metals, ensuring they’re properly sorted. Composting methods turn organic waste into nutrient-rich soil, reducing landfill burden. By choosing these green disposal methods, you help protect the environment and keep your space sustainable, just like tending a thriving garden.
How Do I Prevent Damage to Delicate Surfaces?
To prevent damage to delicate surfaces, start with proper surface prep by cleaning and drying the area thoroughly. Use protective coverings like painter’s tape, plastic sheets, or drop cloths to shield surfaces from scratches, spills, or stains. Always handle tools carefully and work gently. By taking these steps, you guarantee your surfaces stay intact and your project proceeds smoothly without unintended damage.
Conclusion
Think of your workspace as a garden ready for planting. Clear away weeds (clutter), nurture your tools (gather supplies), and create a safe environment to let your project grow. By preparing thoughtfully, you’re cultivating a space where creativity can blossom without chaos or damage. When you tend to your workspace with care, you’re not just building a project—you’re nurturing a foundation for success. Happy creating in your well-prepared garden of ideas!