
To build a quick and simple bookshelf, gather basic tools like a saw, drill, screws, measuring tape, square, pencil, and sandpaper. Start by carefully measuring and cutting your wood pieces, then sand all edges for safety and a clean look. Assemble the frame by attaching side panels to the top and bottom, using pilot holes and wood glue for stability. Finish with paint or stain, and make certain it’s level and sturdy. Keep these steps in mind to create your functional shelf with ease.
Key Takeaways
- Gather essential tools: saw, drill, screws, measuring tape, square, and sandpaper for precise, safe construction.
- Measure, mark, and cut wood panels accurately to ensure even shelves and a balanced frame.
- Assemble the frame by attaching side panels to top and bottom, drilling pilot holes, and reinforcing joints with glue.
- Install shelves securely at desired heights, checking for levelness and stability throughout the process.
- Finish with paint or stain for protection and appearance, maintaining safety and simplicity for a quick build.
Ever wondered how to create your own sturdy and functional bookshelf without spending a fortune? Building a simple bookshelf is a rewarding project that can be completed in just a few hours, especially if you plan carefully and follow the right steps. Before you start, it’s essential to prioritize woodworking safety. Always wear eye protection, gloves, and a dust mask when cutting or sanding wood. Keep your workspace clean, and use clamps to secure pieces while working on them. If you’re new to woodworking, consider researching bookshelf design ideas that suit your space and style. Simple, minimalist designs often work best for quick projects, and they require fewer cuts and joints, making the process smoother and safer.
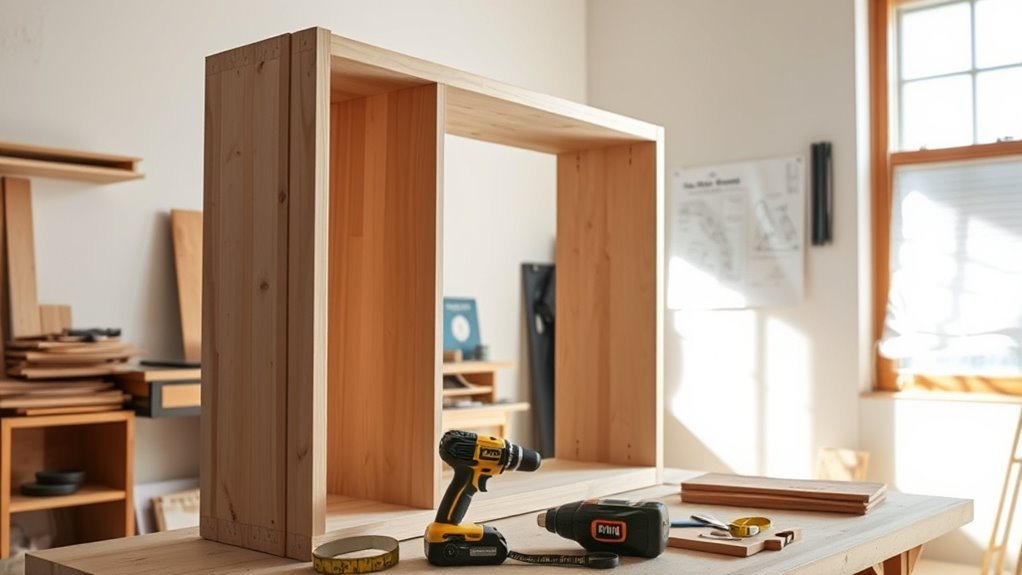
To begin, gather your materials and tools. You’ll need wood planks (pine, plywood, or any sturdy board), a saw, a drill, screws or nails, a measuring tape, a square, a pencil, and sandpaper. Measure carefully before cutting to ensure your shelves are even. Once you’ve selected your design, cut the side panels, top, bottom, and shelves to size. When working with the saw, take your time, keep your fingers clear of the blade, and always cut on a stable surface. After cutting, sand all edges and surfaces thoroughly to prevent splinters and give your bookshelf a clean finish.
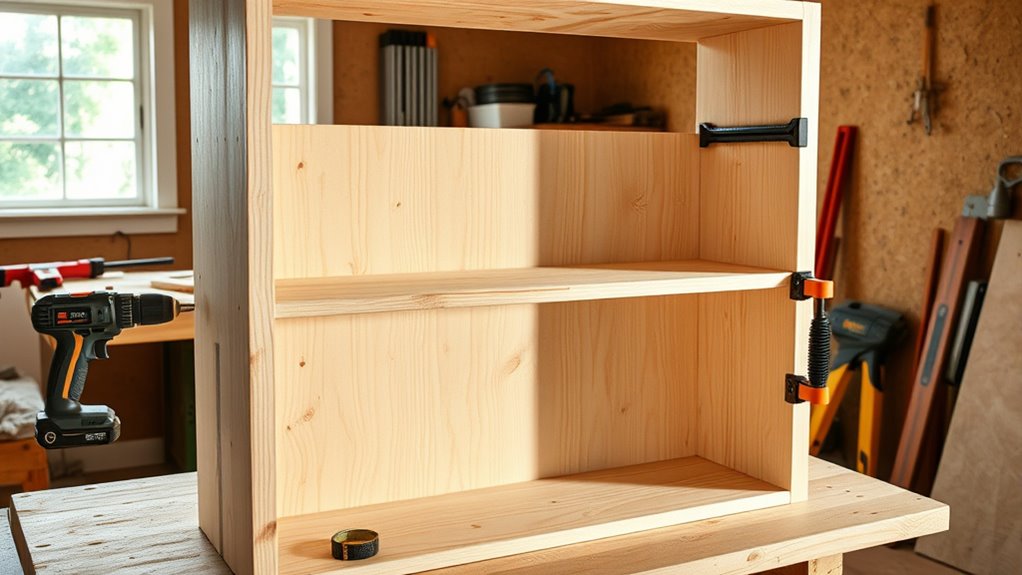
Next, assemble the frame by attaching the side panels to the top and bottom pieces. Drill pilot holes first to prevent splitting the wood, then secure the pieces with screws or nails. For the shelves, measure and mark their positions inside the frame, then attach them securely using screws from below or above, depending on your design. Reinforce the joints with wood glue if you want extra stability. Once assembled, double-check that everything is level and square. Adjust as needed by sanding or repositioning shelves.
Finally, finish your bookshelf with a coat of paint or stain if desired, which not only enhances appearance but also protects the wood. Keep in mind, simplicity is key for a quick build—stick to basic designs and minimal cuts. Remember to always prioritize woodworking safety throughout the project to avoid accidents. This simple bookshelf will not only hold your books but also serve as a satisfying example of what you can accomplish with a few basic tools and some careful planning. With patience and attention to detail, you’ll have a sturdy, stylish piece that you built yourself, saving money while adding functional storage to your space.

VEVOR 13-Gallon Air Compressor, 2HP, 4.6 SCFM@90PSI, Oil-Free Tank, 66dB Quiet Operation, Ideal for Tire Inflation, Woodworking, Auto Repairs, and Spray Painting (Maximum Pressure 125 PSI)
Built to Last: The 13-gallon large-capacity tank paired with a 2HP motor delivers fast air buildup in under...
As an affiliate, we earn on qualifying purchases.
Frequently Asked Questions
What Are the Best Types of Wood for a Beginner?
You should choose softwoods like pine or cedar for your beginner project because they have a consistent wood grain and lower moisture content, making them easier to work with. These woods are lightweight, affordable, and less prone to warping. Plus, their smooth grain ensures a better finish. By selecting wood with proper moisture content, you’ll get a sturdy, beautiful bookshelf without much hassle, perfect for your first woodworking experience.
How Can I Customize the Bookshelf’s Size Easily?
Want to customize your bookshelf’s size? Just adjust the dimensions during your design phase or opt for a modular design. It’s surprisingly easy—simply cut your wood to your desired measurements or add removable shelves to change the height and width. Modular components let you expand or shrink your bookshelf over time, making it a flexible project that adapts to your evolving needs. Who knew DIY could be so versatile?
What Safety Precautions Should I Take During Assembly?
You should wear safety gear like goggles and gloves to protect your eyes and hands during assembly. Keep your workspace organized, clearing away clutter to prevent accidents and guarantee easy access to tools. Always handle sharp or heavy parts carefully, and follow manufacturer instructions closely. These precautions help you stay safe, avoid injuries, and make the assembly process smoother and more efficient.
Can I Build a Bookshelf Without Power Tools?
You can definitely build a bookshelf without power tools—just roll up your sleeves and use manual tools like a handsaw, screwdriver, and clamps. It’s a budget-friendly option that proves you don’t need fancy equipment to get the job done. While it may take a little more elbow grease, this approach gives you control and satisfaction, showing that sometimes, the simplest way is the best way.
How Do I Finish and Paint the Completed Bookshelf?
To finish and paint your bookshelf, start with sanding the surface for smoothness. Choose your paint options, like latex or chalk paint, to match your style. Apply a primer first for better adhesion, then add your chosen paint in thin, even coats. Finish with a clear sealant or polyurethane for durability. Use finishing techniques like sanding lightly between coats to achieve a professional look and long-lasting results.

Klutch 29-Gallon Air Compressor, 2.5 HP, 120 Volts, 175 PSI
POWERFUL COMPRESSOR: Unleash the potential of your tools with this portable air compressor, the Klutch 29-Gallon Air Compressor's...
As an affiliate, we earn on qualifying purchases.
Conclusion
Now that your simple bookshelf is finished, it stands as a sturdy proof of your effort—functional and personalized. Just as a cluttered space can feel overwhelming, this clean, organized shelf brings clarity and calm. You’ve transformed raw materials into a practical piece, proving that DIY projects blend patience with creativity. So, while it’s just a small addition to your home, it’s also a big step toward making your space truly yours.

YESWELDER 135A MIG Welder, 110V Flux Core MIG/Lift TIG/Stick 3-in-1 Large LED Digital Display Welding Machine IGBT Inverter Welder
MULTI PROCESS: Experience the convenience of a high-quality, budget-friendly 3-in-1 welding machine that masterfully handles Gasless Flux Core...
As an affiliate, we earn on qualifying purchases.

SuperHandy Portable 25 Ton Gas Log Splitter with 7HP Engine, Bucher Gear Pump, and Horizontal/Vertical Half Beam Steel Wedge for Firewood Splitting and Forestry Harvesting
Powerful Performance - Equipped with a 7HP AlphaWorks engine and 2-Stage Bucher Hydraulic Gear Pump, our log splitter...
As an affiliate, we earn on qualifying purchases.