To install shelves perfectly level, start by gathering your tools like a bubble or laser level, tape measure, and pencil for marking. Measure carefully from fixed points like the ceiling or floor, and make precise marks. Use the level to verify your marks are horizontal before drilling. Choose appropriate wall anchors for your wall type to guarantee stability. Following these steps guarantees a balanced shelf; explore more tips to master perfect alignment.
Key Takeaways
- Use a bubble or laser level to ensure horizontal accuracy before marking shelf positions.
- Measure and double-check reference points with a tape measure for precise placement.
- Mark multiple points and verify alignment with a straightedge prior to drilling.
- Choose appropriate wall anchors based on wall type to prevent shifting or wobbling.
- Continuously verify levelness after each adjustment to maintain perfect alignment during installation.
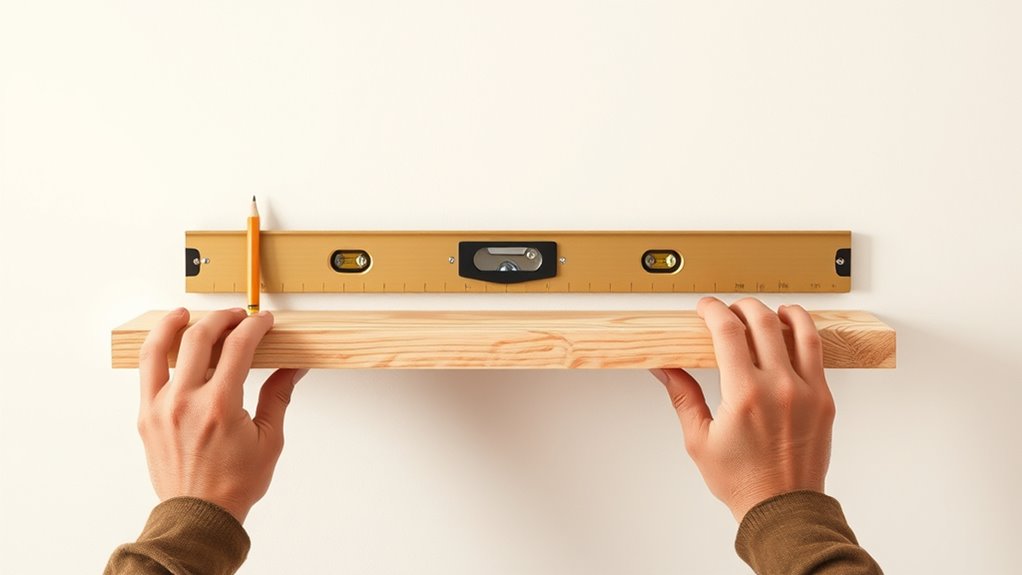
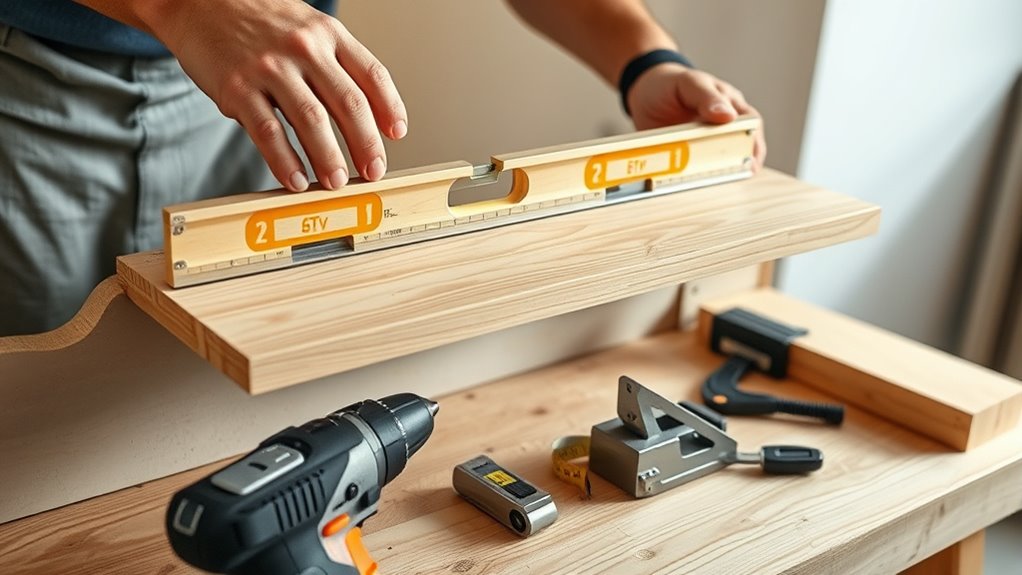
Installing shelves may seem straightforward, but making sure they’re perfectly level is essential to both their appearance and functionality. If you don’t get it right, your shelves might look crooked, and items can slide or fall off. To prevent this, you need to master some measuring techniques and wall anchoring methods that guarantee precision. Start by gathering a good quality level—either a traditional bubble level or a laser level. A bubble level is simple to use: place it on the shelf or a straight edge, and adjust until the bubble sits exactly between the marked lines. Laser levels project a straight line across the wall, making it easier to see if your shelf aligns perfectly with other fixtures or marks on the wall. Using these tools correctly is essential because they are your primary reference points for achieving a perfect level.
Next, consider your measuring techniques. Before marking your wall, measure the height where you want your shelves to sit and mark those points with a pencil. Use a tape measure to double-check your marks from multiple reference points to guarantee consistency. It’s wise to measure from a fixed point, like the ceiling or floor, to avoid discrepancies caused by uneven walls. Once the marks are in place, hold a straightedge or a level across your marks to verify they are aligned horizontally. If they aren’t, adjust your marks accordingly before drilling. This extra step saves you from costly mistakes and re-drilling later. Additionally, understanding the importance of proper calibration can significantly improve your accuracy in hanging shelves.
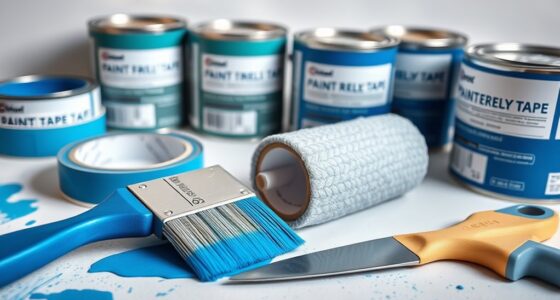
Wall anchoring methods also play an important role in keeping your shelves level and secure. Depending on the wall type—drywall, plaster, or brick—you’ll need different anchors. For drywall, toggle bolts or molly bolts provide strong support for heavier shelves, while plastic anchors work for lighter loads. When drilling into drywall, first drill a small pilot hole, then insert the appropriate anchor before screwing in your bracket or shelf support. For masonry or brick, use a masonry bit to drill holes and install appropriate anchors designed for these surfaces. Proper anchoring ensures the shelf doesn’t wobble or shift, which could throw off your level alignment over time.

VEVOR 13-Gallon Air Compressor, 2HP, 4.6 SCFM@90PSI, Oil-Free Tank, 66dB Quiet Operation, Ideal for Tire Inflation, Woodworking, Auto Repairs, and Spray Painting (Maximum Pressure 125 PSI)
Built to Last: The 13-gallon large-capacity tank paired with a 2HP motor delivers fast air buildup in under...
As an affiliate, we earn on qualifying purchases.
Frequently Asked Questions
How Do I Level Shelves on Uneven Wall Surfaces?
To level shelves on uneven walls, you should start by locating the high and low points using a level or straightedge. Use wall anchors to secure brackets firmly, especially if surface unevenness makes mounting tricky. Adjust the brackets or shims under them to compensate for unevenness, then tighten everything securely. This way, your shelves stay level and stable, even on irregular surfaces.
What Are the Best Tools for Small or Tight Spaces?
Think of your toolkit as a Swiss Army knife—you need compact tools that do it all. For small or tight spaces, go for multi-purpose devices like a mini level, a compact drill, or a right-angle screwdriver. These tools fit easily into tight spots, making your job smoother. They’re essential because they maximize efficiency and precision without sacrificing space, giving you the power to work comfortably, even in the trickiest corners.
Can I Level Shelves Without Using a Level Tool?
Yes, you can level shelves without a level tool by using DIY hacks and alternative methods. For example, you can use a smartphone app or a straightedge, like a ruler or piece of paper, to check for levelness. Another trick is to mark the wall at the same height on both sides and ensure the shelf aligns with these marks. These simple hacks can help you achieve a level shelf without specialized tools.
How Do I Correct a Shelf That’s Slightly Crooked After Installation?
To correct a slightly crooked shelf, start by adjusting the shelf brackets or screws to level it. If needed, carefully loosen the brackets and shift the shelf until it’s straight. Once aligned, tighten the brackets securely. If there are gaps or damage from adjusting, use wall patching to fix any holes or imperfections. Regular shelf adjustment helps keep everything neat, while wall patching maintains a clean, professional look.
What Safety Precautions Should I Take During Installation?
Think of safety as your sturdy helmet in a busy construction zone. You should wear personal protective equipment like safety goggles and gloves to avoid injuries. Keep your workspace tidy to prevent trips, and be cautious around electrical outlets—turn off power when working near wiring. Always follow manufacturer instructions and use tools properly. Being vigilant guarantees your shelf installation stays secure without risking your safety, like a steady ship sailing smoothly.

Klutch 29-Gallon Air Compressor, 2.5 HP, 120 Volts, 175 PSI
POWERFUL COMPRESSOR: Unleash the potential of your tools with this portable air compressor, the Klutch 29-Gallon Air Compressor's...
As an affiliate, we earn on qualifying purchases.
Conclusion
Now that you’ve mastered the tools and tricks, installing your shelves becomes as smooth as a well-laid road. With patience and precision, you’re steering your project straight to success. Remember, a level shelf isn’t just about looks—it’s the foundation for all your future organization. Keep your eye on the target, stay steady, and enjoy the satisfying feeling of a perfectly aligned space. Your shelves are ready to stand tall and proud, just like a well-placed bridge.

CRAFTSMAN 33 Gallon Air Compressor, 175 Max PSI, Portable Air Compressor, Vertical Air Compressor for Heavy-Duty Use, Ideal for Home Garage and Workshop, Efficient and Reliable Performance
Oil-Free Pump Technology: Experience maintenance-free operation with our oil-free pump. This 33 gallon air compressor ensures long-lasting performance,...
As an affiliate, we earn on qualifying purchases.

California Air Tools 8010 1.0 HP Ultra Quiet and Oil-Free Air Compressor, 8 Gallon Steel Tank, Lightweight with Wheels, 60 dBA Noise Level
ULTRA QUIET PERFORMANCE: The California Air Tools Ultra Quiet & Oil-Free Air Compressor operates at only 60 decibels,...
As an affiliate, we earn on qualifying purchases.